Wednesday, January 31, 2024

Samsung and Marimekko To Release Limited Edition Artwork for The Frame

Samsung Electronics and Marimekko,1 an esteemed Finnish design house, have partnered to launch limited edition artwork for The Frame, Samsung’s lifestyle TV.


http://dlvr.it/T26d7z

[Infographic] Everything You Need to Know About Samsung’s Integrated VXT Platform

Samsung Electronics debuted its Visual eXperience Transformation (VXT) platform at Integrated Systems Europe (ISE) 2024 — the largest AV systems integration


http://dlvr.it/T26HhB

Samsung Electronics Announces Fourth Quarter and FY 2023 Results

Samsung Electronics today reported financial results for the fourth quarter and the fiscal year 2023.   The Company posted KRW 67.78 trillion in


http://dlvr.it/T262XT

How to Automatically Forward Text Messages to Another Phone

What to Know


* You can't automatically forward SMS/MMS text messages from one phone to another without connecting them somehow.

* To auto-forward texts from one iPhone to another, the devices must be connected via Apple ID. 

* If you want to avoid connecting devices to the same Apple ID, your best option is to manually forward texts.


Can you divert text messages to another phone automatically? Sort of. If you want to automatically forward text messages to another device, you have to link that device to the same Apple ID as your iPhone, and then enable automatic text message forwarding. If you don't want to link another device to your Apple ID, your best option is to forward text messages manually.


Jump To:


* Set up Automatic Text Message Forwarding

* Manually Forward Text Messages


How to Automatically Forward Texts to Another Device


To enable automatic text message forwarding, the device must be linked to the same Apple ID as your iPhone. The obvious downside is that this gives the second device full access to your data, not just your text messages. If the second device is owned by you or someone you trust, you can link the devices via Apple ID and enable automatic text message forwarding.


How to Connect a New Device to Apple ID


If you want to set up automatic text forwarding on a device not connected to your Apple ID, you first need to connect the device to your Apple ID. This is the only way to enable automatic text forwarding.


Warning: Connecting another device to your Apple ID means the second device will have full access to your iPhone data. You should only enable auto-forwarding if the device receiving forwarded texts belongs to you or someone you fully trust. For privacy, I recommend manually forwarding texts instead. 


How to Enable Automatic Text Message Forwarding on iPhone


Now that the other device is connected to the same Apple ID, follow the steps below to automatically forward all the texts you receive to your Mac, iPad, or another iPhone.


* On your iPhone, open the Settings app.


* Tap Messages.


* Tap Text Message Forwarding.


* Toggle on the device you'd like to receive your automatically-forwarded text messages.


The other device should now be set to automatically receive the texts sent to this iPhone! If you want to disable automatic text message forwarding, disable the toggle next to the device in the Text Message Forwarding section. To learn more iPhone tips, sign up for our free Tip of the Day Newsletter.


How to Manually Forward Text Messages


If you want to avoid going to the trouble of connecting another device to your Apple ID, or the device you want to forward messages to is another person, you can always manually forward text messages. While it does take a bit of time, this is the best option for forwarding text messages.


As you can see, the options for automatic text message forwarding from an iPhone or Android are limited, primarily to protect people's safety and privacy. Have you found any other practical solutions? If so, we'd love to hear about them!
How-ToiPhoneApple IDiCloudiMessageMessagesCommunicationMaster your iPhone in one minute a day: Sign up here to get our FREE Tip of the Day delivered right to your inbox.


http://dlvr.it/T25YsL

Apple Watch Water Lock: What Is It & How to Use It

What to Know


* Water Lock is a feature that prevents water damage to your Apple Watch.

* This setting locks the display and ejects water from the Apple Watch after submersion.

* You can activate Water Lock from the Control Center by tapping the water drop icon.


Before you go for a swim, you should activate Water Lock on your Apple Watch. What is Water Lock? This helpful feature helps you to avoid water damage to your smart watch by locking the display and ejecting any water after you've submerged the watch.


Jump To:


* What Is Water Lock on Apple Watch?

* How to Eject Water from Apple Watch

* FAQ


What Is Water Lock on Apple Watch?


The Apple Watch water drop or water icon means that your watch has the Water Lock activated. What is Water Lock on Apple Watch? When it is activated, it protects your watch from water damage. It also locks the screen, making it impossible to click, swipe, or tap any buttons. This helps prevent accidental presses when the screen is wet (although, if your Apple Watch keeps pausing during a workout, it's likely not an accidental press).


You can press and hold the digital crown to turn off the Apple Watch's Water Lock and eject water. This will create a vibration and sounds that will expel the water from the speaker. It should only take a few seconds, and you will be able to use your watch again. There are some other great uses for the Water Lock that have nothing to do with swimming. It can also be a good idea to use if you are running in the rain. For more Apple Watch tips and tricks, be sure to sign up for our free Tip of the Day newsletter.


How to Eject Water from Apple Watch


You can manually clear water by turning on the Water Lock. Here's how to eject water from Apple Watch:


* Open the Control Center by pressing the side button. Then, tap the Water Lock icon. It's shaped like a water droplet.


* Press and hold the Digital Crown to unlock the screen and clear water from the speaker.


* Your Apple Watch will vibrate and emit a tone that ejects water from the watch.


Pro Tip: There are other great things you can do with the Digital Crown. Read this to learn more ways to use the Digital Crown on your Apple Watch.


That's all there is to it! Now you know how to use Water Lock on Apple Watch.


FAQ


* Do you have to use Water Lock on Apple Watch? According to Apple, the Apple Watch Series 2 or newer will remain equally water-resistant regardless of whether or not Water Lock is turned on. So can an Apple Watch get wet unexpectedly without causing any damage? Yes, definitely! To expel any water from the speaker, just turn the Water Lock on and off.

* Can you swim with the Apple Watch? As long as you have an Apple Watch Series 2 or newer, you can swim with it. The Apple Watch is not waterproof, however, so be careful about submerging it too deep.


How-ToApple WatchLifestyleMaster your iPhone in one minute a day: Sign up here to get our FREE Tip of the Day delivered right to your inbox.


http://dlvr.it/T25F6W

Tuesday, January 30, 2024

Samsung Showcases Advanced Connectivity Through SmartThings for Its B2B Displays at ISE 2024

  Samsung Electronics today at Integrated Systems Europe (ISE) 2024 in Barcelona is showcasing how SmartThings will bolster its B2B displays to shape the


http://dlvr.it/T242KB

[Video] Meet Galaxy AI at the Galaxy Experience Space NYC

Where can users discover the future of Galaxy AI? At the Galaxy Experience Space in NYC. Running from January 17 to February 16, this immersive experience at


http://dlvr.it/T23hpp

Samsung Galaxy S24 Series Is Now Available Worldwide

  Samsung Electronics announced the global availability of the new Galaxy S24 series, which has received an impressive number of pre-orders thanks to its


http://dlvr.it/T23SSn

Monday, January 29, 2024

Travel Just Got a Whole Lot Smarter, Thanks to Samsung Galaxy S24

Traveling is often filled with unexpected challenges and complexities, but it just got easier. Samsung Galaxy S24 series, powered by Galaxy AI, is a personal


http://dlvr.it/T21why

Friday, January 26, 2024

“What Matters Is an Open Mind” Gangwon 2024 – Winter Youth Olympic Games With Galaxy

The 2024 Gangwon Winter Youth Olympic Games, a sports festival for youth around the world, kicked off on January 19 in Gangwon Province. Samsung Electronics


http://dlvr.it/T1tkFv

Thursday, January 25, 2024

Which Apple Services Are Worth Paying For?

Apple Music, Apple Fitness+, iCloud+, News+, Apple One… The list of Apple’s subscription options is enough to make your head spin. Each subscription comes with its own questions: Is it better than its competitors? Is it worth the monthly price? If I subscribe, will I use it? How can I best bundle my subscriptions? Lucky for you, I’ve tried every Apple subscription out there and can tell you with confidence which are worth the monthly price tag.


Apple Music - ($10.99/month)


Apple Music is my favorite of all Apple subscriptions. I love having virtually unlimited music at my fingertips, no ads clogging up my playlists, and knowing that the artists I’m listening to are fairly compensated. I’ve tried a few other music subscription services, but this one beats them all. It offers all the music and none of the stress, an experience I haven’t had since I kept my music on my iPod.


My Verdict: Go for It!


It Might Be For You If…


* You’re a regular music listener

* None of your current options are checking all your boxes

* You enjoy high usability and little stress.


iCloud+ - (From $0.99/month)


I pay for iCloud+ but I don’t love that I do. I know, I know, that there are cheaper and more sensible storage options, but honestly I can’t be bothered. I used to tell myself I was going to back up my photos, never do it, then lose years of memories when my phone would inevitably die after one too many drops. Now, I don’t have to think of it and my photos stay safe. I recently sprung for the 2TB ($9.99/month) and am now sharing it with my sister, but my gut tells me I’m doing the wrong thing.


My Verdict: It Depends…


It Might Be For You If…


* You have too much data and enjoy knowing it’s automatically backed up

* You don’t want to have to take the time to move photos and other information into a different app or platform

* You have family members with whom you can share the storage space.


Apple Arcade - ($4.99/month)


I’m a huge mobile gamer, so it pains me to say this, but Apple Arcade really isn’t worth it. I’ve had two free trials, and I expected to feel a pinch when the trial ended and I had to stop playing the games, but… I didn’t. Besides one game where I got to move puzzle pieces to their correct places and watch patterns turn from black and white to color, I honestly do not remember a single game I played on Apple Arcade.


My Verdict: Nope!


It Might Be For You If…


* You are paying for a monthly game subscription and want to get more for your money

* You want to avoid ads

* You want access to specific Arcade games.


Apple TV+ - ($6.99/month)


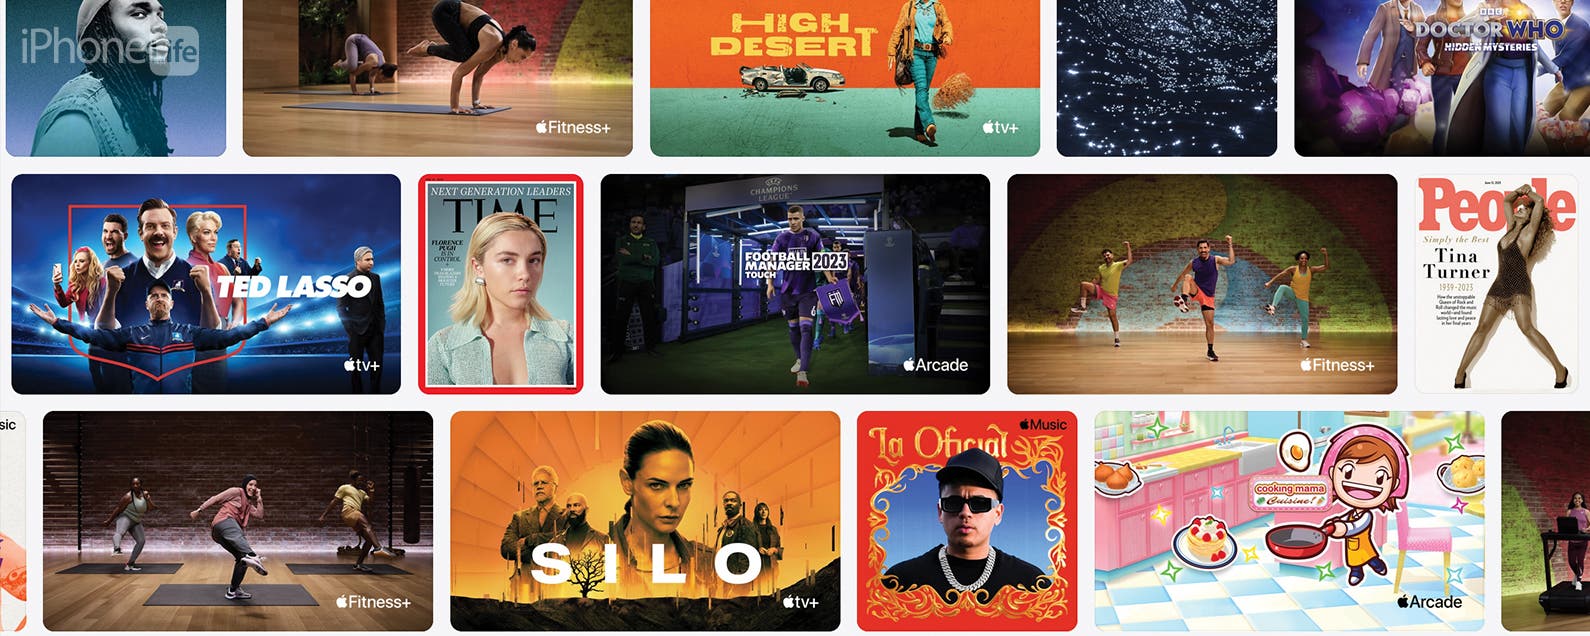
Two words: Ted Lasso. Kidding! Sort of. Out of all the streaming services out there, Apple TV+ holds its own in content quality. Many of today’s top shows and movies can be streamed there, and its originals are almost always top-quality, whether you’re looking for something to give you hope (again, Ted Lasso) or something darker and more challenging, like The Morning Show. Additionally, Apple TV makes it easy to live-stream Apple events, which is a huge plus for me. However, with so many streaming services out there, it can be hard to choose.


My Verdict: Go for It!


It Might Be For You If…


* You enjoy the programming Apple TV+ offers

* You enjoy watching Apple events through the Apple TV app

* You own an Apple TV and can take advantage of the high-quality streaming experience.


Apple Fitness+ - ($9.99/month)


This is a controversial one, I’m sure. I did enjoy the seamless integration with my Apple Watch that Fitness+ offered, and you can’t argue against the quality of content. The trainers are top-notch, the workouts cover many fitness levels and video lengths, and they draw from Apple Music’s library, so you don’t have to relive my 2010’s nightmare of holding a plank to The Common Domain Song That Never Ends. But… there are so many other fitness options out there. And most of them are free. I just don’t see the need for this one.


My Verdict: It Depends…


It Might Be For You If…


* You pay for many different gym/fitness app subscriptions and are looking for one subscription that provides everything

* You particularly enjoy the format, instructors, and workouts offered

* You love workouts with Apple Watch integration

* You prioritize consistent new content.


Apple News + - ($9.99/month)


I am from a generation unused to paying for news. Not that I don’t think reporters and news outlets should be paid fairly, just that it never crosses my mind. Sure, sometimes I’m blocked by a paywall, but most of the time I can find the information I’m looking for elsewhere. That being said, I’ve had a free trial of Apple News+ and never ended up using it once. I have on occasion tried to tap on a news story that came up as a notification on my iPhone only to find I needed to subscribe to access it, but I’ve never felt bitter swiping away.


My Verdict: Nope!


It Might Be For You If…


* You subscribe to several news sources separately that are all included in Apple News+

* You want access to their digital magazine archives (though who needs that when you have iPhone Life? Cue cheesy grin)

* You enjoy having the news integrated thoroughly with your Apple Devices.


Whether or not an Apple subscription is right for you depends a lot not only on your own needs and preferences, but also which other subscriptions you might want to spring for. Apple One can offer a cheaper way to bundle subscriptions, but it has some gaps in its offering, like only offering Fitness+ in its Premier tier, which has much more than most people will use.
OpinionAppsApp StoreApple ArcadeApple Fitness PlusApple MusicApple News PlusApple OneApple TV PlusiCloud PlusApple AppsStreaming ServicesSubscriptions & PurchasesShoppingMaster your iPhone in one minute a day: Sign up here to get our FREE Tip of the Day delivered right to your inbox.


http://dlvr.it/T1swZT

What Is Stolen Device Protection & Is It Better Than Find My?

What to Know


* The iOS 17.3 Stolen Device Protection feature protects your phone from Apple iPhone passcode thieves.

* Stolen Device Protection doesn’t replace Find My, but it makes it even more effective at getting your phone back.

* Turning on Stolen Device Protection can be done in your Face ID & Passcode settings.


Stolen Device Protection was released with iOS 17.3, and it helps protect your phone from iPhone passcode thieves who might get access to your passcode or Apple ID password. This Apple security update requires biometric data to access or change any sensitive iPhone settings. It also forces you to wait an hour to make changes to your Apple ID if you are at a location other than work or home.


Jump To:


* What Is Stolen Device Protection?

* How to Enable Stolen Device Protection

* FAQ


What Is Stolen Device Protection?


iPhone protection features are designed to keep your device safe from security and privacy threats. The Stolen Device Protection feature that came out with the iOS 17.3 update makes it harder (but not impossible) to change your Apple ID, disable Find My iPhone, enable a recovery key, add a new face to Face ID, or add a new fingerprint to Touch ID. Basically, it adds an extra level of security, including biometric authentication and an hour-long security delay based on your location.


So, with Stolen Device Protection enabled, several things will happen if you attempt to change your Apple ID password or make other sensitive changes to your iPhone's security and privacy settings. First, you will need to use Face ID or Touch ID to confirm that it is really you trying to make these changes. Secondly, if you are trying to do this from a location where you don't spend much time (anywhere other than home, work, or school, basically), there will be a one-hour security delay. This means that you'll need to wait an hour before making these changes.


Stolen Device Protection will also require biometric authorization to make changes to other security features, such as accessing your passwords in the Keychain app. However, this specific action will not require you to wait an hour, even if you are at an unusual location. This security feature will not prevent you from using your iPhone in other ways, such as making calls, texting, emailing, or using other common features.


The reason for Face ID and Touch ID verification is that these cannot easily be faked by a thief. Passcodes and passwords, on the other hand, can be hacked or leaked or even physically stolen by someone looking over your shoulder while you type it in or find your passwords written down (which is why we don't recommend it). When this happens, the thief can easily disable Find My, add their biometrics to be able to unlock your phone, or even change or remove your Apple ID from the device.


With Stolen Device Protection activated it is a lot harder to steal your phone and data. It also gives the iPhone's owner an hour to realize their device is gone and to take the necessary precautions to locate and/or lock their phone before it is too late. For more Apple Watch tips, check out our free Tip of the Day newsletter.


How to Enable Stolen Device Protection


To enable Stolen Device Protection, which I highly recommend to keep your iPhone and data secure:


* Open Settings.


* Tap Face ID & Passcode. You'll have to enter your passcode to make any changes.


* Scroll down until you see Stolen Device Protection and tap Turn On Protection. Next to Stolen Device Protection, the Off will change to On once it is enabled.


That’s it. Congratulations, your iPhone is now extra safe!


Now you know how to keep your phone safe from Apple iPhone passcode thieves. Enabling this feature will give you an extra layer of security even if someone does get their hands on your iPhone, passcode, and Apple ID password. Next, learn how to turn on Find My iPhone.


FAQ


* What do thieves do with stolen iPhones? It depends on the thief, but they can resell your phone if they are able to reset it to factory settings and erase your Apple ID from it.

* How do I lock a lost iPhone? As long as Find My is enabled before you lose your iPhone, you can use Find My to erase your phone so that whoever took it cannot steal your data. Stolen Device Protection will lock certain settings and require biometric data like Face ID or Touch ID to access them, which acts a bit like a lock.

* What to do if my iPhone is stolen? If you have Find My enabled in advance, you can use it to track and lock your phone. However, whoever took your iPhone may be dangerous, so you may want to contact the police right away.


How-ToiPhoneApple IDFind MySettingsFace ID & Touch IDPrivacy & SecurityMaster your iPhone in one minute a day: Sign up here to get our FREE Tip of the Day delivered right to your inbox.


http://dlvr.it/T1r10b

How to Lock the Journal App in iOS 17

The Journal App, a fun new app that came with iOS 17.2, is a great way to keep a digital journal directly from your iPhone. The Journal app has a straightforward user interface that allows you to write, upload media, add links, and keep track of important memories. For this reason, it's important to be able to keep that information private. Here's how to lock the Journal app to protect your entries from prying eyes.


Why You'll Love This Tip:


* Quickly set up a lock on the Journal app to maintain privacy.

* Use FaceID or a passcode to protect your private entries on the app.


Lock iPhone Journal App in iOS 17


System Requirements


In order to access the Journal app, you need to download iOS 17.2 or later to your iPhone. Learn how to update to the latest iOS.


While you can't lock individual entries in Apple's Journal app, you can lock the app as a whole. I consider it like the little lock on the outside of a diary. Once someone can access the app, they can read all the entries. If you like learning tips about the latest Apple updates, be sure to sign up for our free Tip of the Day! Here's how to lock the iPhone Journal app.


* On your iPhone, open Settings.


* Tap Journal.


* Tap Lock Journal.


* Enter your iPhone's passcode.


* Toggle on Lock.


* To customize how long it takes to require a passcode again, tap Require Passcode.


* Select a time that feels appropriate to you. For instance, Immediately will require a passcode everytime you close the app.


* Now you will need to use the Passcode on your iPhone or FaceID to access the Journal app.


And that's how you lock the Journal app on iPhone. The Journal app is only available on iPhones running iOS 17.2 or later. Be sure to update your iPhone to the latest software to start using the new Journal app now!
How-ToiPhoneAppsApple AppsJournalFace ID & Touch IDPasscodePrivacy & SecurityMaster your iPhone in one minute a day: Sign up here to get our FREE Tip of the Day delivered right to your inbox.


http://dlvr.it/T1qllR

Wednesday, January 24, 2024

Samsung Members Connect 2024: Samsung’s Most Dedicated Users Experience the All-New Galaxy S24 Series, Powered by Galaxy AI

Samsung Electronics hosted Samsung Members Connect 2024, bringing together over 50 passionate Samsung Members Stars to witness the dawn of the new mobile AI


http://dlvr.it/T1pd25

Samsung Integrates SmartThings Energy With British Gas Services for More Energy-Efficient Homes

  Samsung Electronics today announced it has teamed up with British Gas, enabling customers to better manage their energy use in homes around Britain.


http://dlvr.it/T1njgL

Mass Delete Text Messages on iPhone

Deleting messages on iPhone is easier than you think. You can delete one, two, or as many messages as you want with just a few taps. So, if you’re ready to clear out your old messages, read on to find out how to delete text messages on your iPhone.


Why You’ll Love This Tip:


* Quickly clear up your messages by getting rid of messages you don’t need anymore.

* Delete individual messages without deleting the whole conversation.


How to Delete Text Messages on iPhone


System Requirements


This tip works on iPhones running iOS 9 or later. Find out how to update to the latest version of iOS.


Can you delete messages on iMessage? Yes! If you find your messages getting too cluttered, the best thing you can do is delete messages you don’t need anymore. For more iPhone management tips, sign up for our free Tip of the Day newsletter. Now, let’s go over how to delete texts on iPhone:


* Open any text conversation in the Messages app. Then, just long press on any message.


* Tap More…


* You’ll see circles slide in from the left edge of the screen for each message. Simply tap a circle, and it’ll turn blue with a checkmark in the middle. Check off as many messages as you want.


* Tap the trash can icon in the lower left.


* Tap Delete Message.


Keep in mind that this only deletes the message on your end. The messages will still exist on the other person’s phone. If it has not been more than 15 minutes since you sent the message, you can always unsend it instead.
How-ToiPhoneAppsiMessageApple AppsMessagesCommunicationMaster your iPhone in one minute a day: Sign up here to get our FREE Tip of the Day delivered right to your inbox.


http://dlvr.it/T1nW56

Samsung Launches SSD 990 EVO: Elevating Performance for Everyday Gaming, Business and Creative Workflows

  Samsung Electronics Co. Ltd., a world leader in advanced memory technology, today announced the release of SSD 990 EVO — the newest addition to the


http://dlvr.it/T1nFwz

Tuesday, January 23, 2024

Friday, January 19, 2024

Samsung Electronics Collaborates With Three EU Artists on Eye-Catching Accessories for the Galaxy S24 Series

  Samsung Electronics Co., Ltd. yesterday announced the launch of an accessories line for the Galaxy S24 series that have been created in collaboration


http://dlvr.it/T1b2bp

[Galaxy Unpacked 2024] A Closer Look at Galaxy Unpacked in San Jose: The World Reacts to a New Era of Mobile AI

At this year’s Galaxy Unpacked on January 17, Samsung Electronics unveiled the Galaxy S24 series, ushering in a new era of mobile AI. With Galaxy AI, the


http://dlvr.it/T1b2LG

Best of CES 2024: The Most Innovative New Tech for Apple Enthusiasts

In the 208th episode, Editorial Director Sarah Kingsbury joins Donna to share a behind-the-scenes look at our award winners at the 2024 Consumer Electronics Show in Las Vegas. From health and fitness gear, to artificial intelligence and robotics, to mixed reality and self-driving cars, get a tour of the latest tech trends with Sarah!


Click here to listen and subscribe. If you like what you hear, be sure to leave a review. And remember to tune in every other week to hear our editors share with you the latest Apple news, best apps, iPhone tricks, and coolest accessories.


Limited-time offer! Claim 30% off your subscription to iPhone Life Insider when you visit iPhoneLife.com/PodcastDiscount.


This episode was brought to you by:


iMazing


Looking for a way to easily manage the data across all of your devices without using a cloud service? iMazing provides secure and powerful tools that fill important gaps in Apple's default offering. Learn more.


Zugu Case


Are you looking for an iPad case that checks all the boxes? Look no further! Zugu creates convenient cases in a wide variety of colors that are protective and slim. Thanks to the eight-angle magnetic stand, your iPad will always be ready for work, play, and even travel. In the rare case of any iPad damage, Zugu will cover AppleCare+ repair costs and offers free 60-day returns plus a 2-year warranty. With 10% of profits donated to a charitable cause, your Zugu case purchase will take your iPad to the next level while making a meaningful difference.


Gobudi CASEBUDi Crossbody Lanyard ($25)


We’ve all experienced that gut-wrenching moment of panic when you can’t find your phone. And we all know that feeling doesn’t subside until you’ve fumbled through your purse or pockets to retrieve it. With the CASEBUDi Crossbody Phone Lanyard, you can rest assured knowing exactly where your phone is, plus you can access it at a moment’s notice. The adjustable lanyard comes with the CASEBUDi Disc that you can stick to any phone or phone case, letting you remove and reattach it in seconds using the easy slide-in and turn-lock mechanism. However, the lanyard is designed so that you can comfortably make calls, text, and take photos, all while your phone is still attached. The Crossbody Lanyard comes in black and camel, but you could always get both to match every outfit. This hands-free solution to adventuring with your iPhone can change the way you take on the world or give you peace of mind as you go about your day. Try it today!


Question of the week:


Which of iPhone Life’s Best of CES Award winners for 2024 do you think is the coolest? Let us know at podcast@iphonelife.com.


Articles referred to in this episode:


* The Best of CES 2024

* Apple’s Vision Pro Will Be Available in February 2024

* Apple Universal Clipboard: Copy & Paste Between Devices


Links to award winners:


* XEBEC SNAP (Starting at $549)

* Roborock S8 Max Series (Starting at $1599)

* Sightful Spacetop ($2150)

* Clicks Creator Keyboard (Starting at $139) 

* Withings BeamO ($249.95)

* UNISTELLAR ODYSSEY Smart Telescopes (Starting at $2499)

* SENNHEISER MOMENTUM True Wireless 4 ($299.95)

* Jabra Elite 8 Active ($199.99)

* Ampere DuskRx ($299)

* Birdfy Hum Feeder ($299.99)

* Motionpillow ($699)

* Satechi 3-in-1 Portable Charger ($129.99)

* ESR 6-in-1 Wireless Charger ($179)


Useful links:


* Join the iPhone Life Facebook Group

* Insider walk-through: get a sneak peek of members-only benefits

* Get the Insider discount for Podcast Listeners

* Sign up for the free Tip of the Day Newsletter

* Email the Podcast

* Subscribe to iPhone Life magazine


News(Gear)Apple StoreEducationHealth & FitnessMaster your iPhone in one minute a day: Sign up here to get our FREE Tip of the Day delivered right to your inbox.


http://dlvr.it/T1b23h

How to See How Long You've Been on FaceTime

What to Know


* You can only check a FaceTime call's duration after you have hung up.

* Open your Phone app, tap the "i" icon next to the call, and see the time listed beneath the log.


Knowing how long a FaceTime call lasted can be handy whether you're trying to keep track of who you spoke to when or are just curious if that call with your favorite person that felt like only twenty minutes was actually two hours, knowing how to see how long a FaceTime call was is a fundamental iPhone skill. Here's how to check how long a FaceTime was.


How to See How Long You've Been on FaceTime


How can you see how long a FaceTime call was? Once a FaceTime call is complete, you can easily check to see how long the call was in your Phone app.


* After you hang up from a FaceTime call, open your Phone app.


* Under Recents, scroll to the FaceTime call you want to check.


* Tap the "i" icon next to the call listing.


* Recent calls will be listed just below the display name with the call time marked in small letters below each entry.


That's all there is to it! For more iPhone must-knows, check out our free Tip of the Day newsletter.


FAQ


* How do I check my FaceTime history? In the FaceTime app you can see your FaceTime call history on the left side of the screen. In your Phone app you can go to Recents and see which calls were placed with FaceTime.

* Do FaceTime calls have a time limit? FaceTime calls do not officially have a time limit but you might run out of service or battery or other things that interrupt your call at a certain point.


How-ToiPhoneFaceTimeCommunicationMaster your iPhone in one minute a day: Sign up here to get our FREE Tip of the Day delivered right to your inbox.


http://dlvr.it/T1b1hF

Thursday, January 18, 2024

Samsung Invites Actress Emma Myers to Seoul, Creating an Unforgettable Experience With Galaxy S24 Ultra

Samsung Electronics today unveiled the tour vlog titled “Emma Myers in Seoul” — a film shot entirely on the new Galaxy S24 Ultra that follows actress Emma


http://dlvr.it/T1YG0x

Does iMessage Send a Notification When You Save a Photo?

What to Know


* No, the Messages app does not notify the sender when you save their photo.

* The only app with a built-in 'notify when saved' feature is FaceTime.


The Messages app is great for sending text messages, voice messages, and, of course, photos and videos! When someone sends you photos, you can easily download them. Fortunately, the sender does not get a notification when or if you choose to download the photos they shared.


Jump To:


* Does iMessage Notify When You Save a Photo

* FAQ


Does iMessage Notify the Sender When You Save a Photo?


The short answer is no! At no point does the Messages app notify the sender of an image if you save it. This is true for both iPhone and Android contacts. The only notification the sender gets is that they see that you have read their message (aka seen their photo), and these read receipts can be turned off if you prefer. They will not be notified if you save any media they send you, what time you saved it, or if you saved it at all. For more iPhone tips, check out our free Tip of the Day newsletter!


Now, you can have some peace of mind while saving (or not saving) photos sent by your friends and family. The only native iPhone app that has a feature like this is FaceTime. Next, learn how to find a lost text or photo in the Messages app.


FAQ


* Does iMessage notify the sender when you screenshot? No, your contact will not be notified if you screenshot the conversation. But please keep in mind that some places may have laws against sharing text messages or other information without two-party consent.

* Does Facebook notify the sender when you save a photo? No, Facebook does not notify the sender if or when you save a photo they shared with you.


How-ToiPadiPhoneMacAppsiMessageApple AppsMessagesCommunicationMaster your iPhone in one minute a day: Sign up here to get our FREE Tip of the Day delivered right to your inbox.


http://dlvr.it/T1XWvW

Wednesday, January 17, 2024

[Video] Samsung Teases a New Era of Mobile With Upcoming Galaxy AI

The next evolution of Galaxy is on its way. On January 17, Samsung Electronics’ new product lineup – powered by Galaxy AI – will be revealed at Galaxy Unpacked


http://dlvr.it/T1TyM6

Monday, January 15, 2024

[Video] [CES 2024] Samsung Showcases Future-Forward Vision for AI

At this year’s Consumer Electronics Show (CES), Samsung Electronics invited attendees to experience a future powered by AI. Through its theme of “AI for All:


http://dlvr.it/T1PJK2

Samsung Announces All-in-One VXT Platform for Effortless Digital Display Creation and Management

  Samsung Electronics today announced the official launch of its Visual eXperience Transformation (VXT) Platform, a cloud-native Content Management


http://dlvr.it/T1NkxP

Friday, January 12, 2024

[CES 2024] Elevating Lifestyles: Samsung Showcases AI-Based Home Appliances at the Home Experience Zone

At the Consumer Electronics Show (CES) 2024 in Las Vegas from January 9-12, Samsung Electronics featured its BESPOKE home appliances — providing amplified user


http://dlvr.it/T1HFB9

[CES 2024] An AI-Powered Experience: Samsung Showcases Next-Generation of Devices at the Mobile Experience Zone

Samsung Electronics showcased its AI-strengthened Galaxy ecosystem at the Consumer Electronics Show (CES) 2024 in Las Vegas from January 9-12.   The


http://dlvr.it/T1HDv3

Thursday, January 11, 2024

[CES 2024] Elevating Lifestyles: Samsung Showcases How AI-Based Home Appliances Improves the Home Experience

At the Consumer Electronics Show (CES) 2024 in Las Vegas from January 9-12, Samsung Electronics featured its BESPOKE home appliances — providing amplified user


http://dlvr.it/T1DmKM

[CES 2024] An AI-Powered Mobile Experience: Samsung Showcases Next-Generation of Mobile Devices

Samsung Electronics showcased its AI-strengthened Galaxy ecosystem at the Consumer Electronics Show (CES) 2024 in Las Vegas from January 9-12.   The


http://dlvr.it/T1Dm6b

[CES 2024] Go Beyond Viewing: Samsung Pushes the Boundaries of Home Entertainment at the Screen Experience Zone

Samsung Electronics unveiled its vision for the future of displays and screens at the Consumer Electronics Show (CES) 2024 in Las Vegas from January 9-12.


http://dlvr.it/T1DlqK

Introducing the Galaxy XCover7 & Galaxy Tab Active5: The Perfect Blend of Durability, Work Continuity and Productivity for Today’s Enterprises

  Samsung Electronics today announced the new Galaxy XCover7 and Galaxy Tab Active5, an enterprise-ready smartphone and tablet geared to handle rigorous


http://dlvr.it/T1DlWm

How to Get a Fake Number for Free: Temporary & Permanent

What to Know


* Fake phone numbers can be temporary or permanent, depending on your needs.

* Virtual telephone numbers can be used for business purposes or to protect your privacy.

* You can get a virtual or fake number using third-party services or apps; some are free.


Many people have or want a fake phone number to use for a small business, for privacy reasons, or for temporary verification to avoid spam calls and texts. Virtual numbers can be acquired for free using third-party services or apps. Fake phone numbers can be temporary or permanent, depending on your needs.


Jump To:


* What is a Fake Phone Number Used For?

* How to Get a Virtual Phone Number for Free

* FAQ


What is a Fake Phone Number Used For?


Virtual or fake phone numbers tend to have a bad rap, but there are many legal and legitimate uses, including:


* For business purposes or to give out to new contacts or casual acquaintances to protect your privacy. Putting a fake phone number on a business card will still allow people to reach you without knowing your personal number.

* To provide websites, apps, or services that require a phone number verification. Some companies may sell your data or get hacked, which may result in your phone number being leaked to scam/spam callers or texters.

* Free communication apps such as WhatsApp require a phone number that’s visible to those you communicate with. Using a virtual number is a great way to get in touch with more people while maintaining your privacy.


Using a fake phone number to spam, scam, or otherwise pester other people is not only socially unacceptable, but it may also be illegal, depending on the laws in your state or country. For more iPhone security and privacy advice, check out our free Tip of the Day newsletter.


How to Get a Virtual Phone Number for Free


There are a variety of apps, websites, and services that can help you get a free virtual number. One of the most reliable ways to get a free permanent or temporary phone number is via Google Voice. To set up a free US number using the Google Voice app:


* Download the Google Voice app (free) from the App Store and open it.


* If you already have a Google account, you’ll be able to Continue as (Name) with your primary account. Feel free to select a different account by tapping the caret icon.


* First, you have to Accept the Terms and Conditions. I highly recommend that you read through both the Terms of Service and Privacy Policy so that you know exactly what you are agreeing to.


* Now, you'll be able to Search for an existing local number.


* Here, you can search by city or number; not every state will have available numbers, and sometimes, you will have to select from a limited number of locations.


* Once you select a location, you’ll see some number options. Tap Select to pick one.


* You will now have to verify with your existing phone number and tap Next.


* Tap Next again.


* Enter your existing number and tap Send Code.


* Your code should come via text and may even auto-populate.


* Tap Finish, and you now have a virtual, aka fake, phone number.


* Make sure you allow Voice to send you notifications so that you don't miss any incoming calls. If you would rather not be notified about calls or texts because you only want to use it as a temporary phone number to verify your number on certain websites or apps, you'll have to open the app to use this as a temporary number.


Since you don’t always have a lot of choice when getting a free number using Google Voice’s phone number generator, you will likely have to get a random phone number without too much choice regarding the area code.


Now you know how to get a free Google phone number and use it as a temporary phone number for verification purposes or a permanent virtual number to put on business cards for a small business. Just because the number is virtual doesn’t mean that it isn’t traceable to you, so please use it responsibly.


FAQ


* What is my phone number? If you don’t remember what your phone number is, you can easily look it up on your phone in your Settings.

* How to identify fake phone numbers? There are several ways to identify fake phone numbers; sometimes, a paid phone number checker service may work depending on the type of fake number you are dealing with.


How-ToiPhoneAppsThird-Party AppsPhoneGooglePrivacy & SecurityMaster your iPhone in one minute a day: Sign up here to get our FREE Tip of the Day delivered right to your inbox.


http://dlvr.it/T1Dl6L

Wednesday, January 10, 2024

Apple’s Vision Pro Will Be Available in February 2024

Apple’s much-anticipated mixed reality headset will be available for purchase in just a few weeks! The Vision Pro is advertised as an AR headset, but it is more of a wearable Mac that will integrate with iCloud and have access to over 1 million apps. Despite the hefty $3,499 price tag, Apple is hoping that the Vision Pro will become as mainstream as an iPhone or Apple Watch.


Price & Release Date


The Vision Pro will cost $3,499 for 256GB of storage, with extra fees for ZEISS optical inserts for those who need eyeglasses. In the USA, optical inserts for reading glasses will cost $99, and prescription inserts will cost $149.


Apple’s Vision Pro will be available for pre-order in the USA starting Friday, January 19th. It will be available for purchase on February 2nd. To learn more about Apple's newest products and features, don't forget to check out our free Tip of the Day newsletter.


What to Consider When Shopping for the Vision Pro


The Vision Pro is Apple’s first new product type since the Apple Watch launched in 2015. This mixed reality headset is focused on productivity, letting you safely navigate your home while simultaneously working, with apps, browser tabs, or even movies playing in virtual environments across your field of vision. Apple has even announced that the Vision Pro app store has over 1 million apps designed with the headset in mind, to give you plenty to do on your new spatial computer.


Because it is a brand-new product, skeptics worry that the first model will be glitchy and not as great as expected, just like the first-ever iPhone and Apple Watch. However, Apple is known to fine-tune any kinks before releasing new products and features, and since the release of the Vision Pro has not been delayed, we hope that the product will be worth the hype. Read more about Vision Pro's specs and abilities, and let us know whether you're interested in the product in the comments below.
NewsVision ProShoppingMaster your iPhone in one minute a day: Sign up here to get our FREE Tip of the Day delivered right to your inbox.


http://dlvr.it/T19FSN

Tuesday, January 9, 2024

[CES 2024] Key Highlights from Samsung’s Press Conference

Samsung Electronics held a press conference at CES 2024, the world’s largest consumer electronics and IT exhibition held in Las Vegas, on January 8


http://dlvr.it/T18RyY

Monday, January 8, 2024

[Video] [CES 2024] Samsung’s New Transparent MICRO LED Display Blurs the Boundaries Between Content and Reality

Transparent LEDs are poised to redefine viewing experiences, making the line between content and reality virtually indistinguishable. Leveraging this


http://dlvr.it/T150tb

Samsung Electronics Launches 2024 Neo QLED, MICRO LED, OLED and Lifestyle Displays To Spark the AI Screen Era and New Ways of Life

  Samsung Electronics today announced its latest QLED, MICRO LED, OLED and Lifestyle display lineups ahead of CES® 2024. The announcement also served to


http://dlvr.it/T150lD

Galaxy Watch’s Advanced Sensor Tech Paves Way for Greater Preventive Healthcare Solutions

    Samsung Electronics has expanded its Privileged Health Software Development Kit (SDK) program, with the goal of providing a broader range of


http://dlvr.it/T14rNb

Sunday, January 7, 2024

Samsung Teases Evolution of Mobile Experience in Major Cities Ahead of Unpacked 2024

As Samsung Electronics gears up for its first Galaxy Unpacked of 2024, a global billboard campaign has launched in anticipation of Samsung’s new era of mobile


http://dlvr.it/T13yfp

Friday, January 5, 2024

[Video] Take a Peek Into a Day at a Net Zero Home in a Smart City

By generating and using energy efficiently, a Net Zero Home aims to eliminate carbon emissions from the home to create a more sustainable way of living.


http://dlvr.it/T101rX

Sweet Dreams! Snooze Better with Your Apple Watch & iPhone

Did you know you can track your sleep cycles with just your Apple Watch and iPhone? It’s easy and can be done right from the Health app. Whether you’re tracking your sleeping habits for personal use or to share the data with a healthcare provider, all you need to get started is your iPhone and/or an Apple Watch.


Setting Up Sleep on Apple Watch


If you’re using your Apple Watch, the first thing you’ll need to do is head over to the Sleep app on your Apple Watch. If this is your first time opening the Sleep app, you’ll see a few explanations of how this app works. Follow the on-screen prompts, including setting your Sleep Goal, and a Sleep Schedule. This will be used to configure your Sleep Focus. When setting up your Sleep Schedule, you can select a Bedtime and a Wake Up time. You can also choose to enable an alarm for your Wake Up time.


The Wake Up alarm works slightly differently than the other alarms that you set with the Clock app. The first noticeable difference is the sound you can choose for your Wake Up alarm. While the Clock app uses loud and abrupt sounds, the sounds available for the Wake Up alarm are designed to gently bring you out of a deep sleep. They each start out with a single quiet sound and gradually get louder while adding other sounds into the mix, making your morning Wake Up less startling.


The second way the Wake Up alarm differs is that, when using an Apple Watch, the alarm will only go off on your watch. If you set other alarms from your iPhone, they will often go off on both devices simultaneously. On the other hand, the Wake Up alarm only goes off on your wrist. It’ll start with gentle taps that increase in intensity and frequency, in tandem with your chosen Wake Up sound to wake you up gently. For more Apple Watch health tips and advice, be sure to sign up for our free Tip of the Day newsletter.


Tracking Your Sleep with an Apple Watch


Once you have Sleep set up on your Apple Watch, head over to the Watch app on your iPhone, and tap Sleep. Make sure Track Sleep with Apple Watch is toggled on. When using Sleep on an Apple Watch Series 3 or newer, your device will collect data overnight, like your respiratory rate and your heart rate. It also can detect when you enter each stage of sleep. When looking at the chart in the Sleep category of the Health app, you’ll see four different stages: Awake, REM, Core, and Deep.


Know Your Sleep Stages


* Awake is the time that you spend awake throughout the night. Waking up and falling right back asleep is normal, and you might not even remember it happening, but your Apple Watch does.

* REM stands for Rapid Eye Movement. This stage of sleep is when your body is at its most relaxed, and your eyes move from side to side. This is also usually when you have most of your dreams.

* Core sleep, also called light sleep, is the stage you will likely see the most amount of time for in the chart. This stage is when certain brain waves occur that are important to cognitive function.

* Deep sleep is when your body repairs tissue and releases necessary hormones. During this stage, you will likely be so relaxed that you might have difficulty waking up.


The bottom of the chart shows what time you went to sleep and when you woke up in the morning. In between, you'll see around when you entered each stage of sleep. If you would like to learn more about the sleep stages, tap Understanding Sleep Stages on the Sleep category page in the Health app.


No Apple Watch? No Problem!


If you don’t have an Apple Watch, you can still track your sleep with your iPhone, though the type of data available will be much more limited. Since your Apple Watch has unique sensors to detect things like respiratory and heart rate, your iPhone won’t be able to capture as much information.


However, your iPhone will still be able to detect when you’ve stopped using your phone and have gone to sleep, as well as when you wake up and start using your device again. As such, you’ll still be able to get an idea of how much sleep you’re getting each night!


Get the Most Accurate Data


If you’re not getting the data you want from the Health app, Apple provides a list of recommended third-party sleep-tracking apps. Simply tap the Sleep category in the Health app, and scroll down to Sleep Apps. Here, you will see a list of suggested apps, like Sleepzy, Pillow: SleepTracker, and Sleepiest: Sleep Meditations. I haven’t used these myself, but if you’re serious about tracking your sleep, a third-party app may provide more functions than you can find in the Health app.


Lastly, if you plan on using your Apple Watch for sleep tracking, you’ll need to make sure it’s charged before bed in order to get the most accurate data. Typically, your Apple Watch will notify you when Wind Down is starting and will let you know how much battery your device has. If it’s low on battery, you’ll also see a suggestion to charge it before bed. Luckily, the Apple Watch charges relatively quickly so you can set it on the charger during Wind Down time, and when you’re ready to go to sleep, it will most likely have enough power to last through the night. Good luck, and sleep tight!


Top image credit: Oliga / Shutterstock.com
How-ToApple WatchiPhoneHealthHealth & FitnessMaster your iPhone in one minute a day: Sign up here to get our FREE Tip of the Day delivered right to your inbox.


http://dlvr.it/T0z5YV

How to Get Digital Clock on StandBy

StandBy mode is a feature in iOS 17 and later that turns your iPhone into a pseudo-alarm clock. It can be a little tricky to get used to at first, so if you're new to StandBy, be sure to check out how StandBy works before diving in. However, if you love StandBy as a feature but would prefer a digital clock to an analog clock, Apple just released a new widget that allows you to do this, and it's a total game changer. Here's how to change the clock in StandBy.


Why You'll Love This Tip:


* Learn how to change the clock widget in StandBy.

* Change the clock from an analog clock to a digital one, which may be easier to read at night.


How to Change the Clock on StandBy Mode


System Requirements


This tip works on iPhones running iOS 17 or later. Find out how to update to iOS 17.


StandBy can only stay on permanently if you have an iPhone that has an Always-On display, so if you don’t see the Always-On display option in your Display & Brightness, you won’t be able to keep StandBy on the entire time. Personally, I prefer having to tap it to see it anyway! If you like learning neat tricks about how to use your iPhone, be sure to sign up for our free Tip of the Day!


* Enter StandBy mode by placing your iPhone on a charger and placing it in landscape orientation.


* When StandBy mode appears after a few moments, tap and hold the clock.


* You may need to enter your passcode or use FaceID if your iPhone locked.


* Then, tap the Plus button to add a new widget.


* Tap Clock.


* The first widget should now be the digital clock. Tap Add Widget to add it to your StandBy screen.


* Now, you can delete the other clocks already in the widget stack to ensure that they don't rotate.


* Or, you can turn off Smart Rotate.


* Additionally, you may want to turn off Widget Suggestions to avoid random widgets being added to the stack.


* Tap Done when you're done.


* Now StandBy mode will feature an easy-to-read digital clock!


And that's how you can change the analog clock to a digital clock on StandBy. For a long time, the only clock option available in StandBy was the analog clock. This makes it so much easier to read the time in the middle of the night!
How-ToiPhoneClockStandByWidgetsCustomization & PersonalizationMaster your iPhone in one minute a day: Sign up here to get our FREE Tip of the Day delivered right to your inbox.


http://dlvr.it/T0z5PT

How to Send Tickets from Apple Wallet

Apple's Wallet app is a really great way to organize your credit cards and travel tickets. However, you might not have known that you can easily share your boarding passes or train tickets via AirDrop so your friends and family can stay informed about your travel plans. Here' how to send tickets from Apple Wallet.


Why You'll Love This Tip:


* Quickly share your traveling ticket information with a friend.

* Keep your friends and family informed about your travel plans.


How to Share Tickets in Apple Wallet


This could also be super useful if you need to send a boarding pass or train ticket to a child. This way, they'll have it on their phone and will be less likely to lose it. If you like learning cool tips about your Apple devices, be sure to sign up for our free Tip of the Day!


* Open the Wallet app.


* Tap your ticket.


* Tap the Share icon.


* Tap AirDrop.


* Choose which device to AirDrop your ticket to.


And that's how you AirDrop a boarding pass to another person. This also works for train tickets, concert tickets, and other items that you can add to Apple Wallet.
How-ToiPhoneAppsApple AppsWalletAirDropTravelMaster your iPhone in one minute a day: Sign up here to get our FREE Tip of the Day delivered right to your inbox.


http://dlvr.it/T0z5CB

How to Unlock Your Mac with Your Apple Watch

If you have an Apple Watch and a Mac, there are a few cool but hidden tricks you might not know you can do with the two devices together. One of those cool things is the ability to unlock your Mac or MacBook with the Apple Watch. This can be super useful if you're busy while someone wants to use your computer, plus you avoid being forced to tell them your password or type it out in front of them. Here's how to unlock your Mac with Apple Watch.


Why You'll Love This Tip:


* Learn a hidden way to quickly unlock your Mac from your Apple Watch.

* Quickly unlock your Mac for someone else while you're busy or standing at a distance.

* Avoid giving someone your Mac password, bypassing it via your Apple Watch.


Unlocking Mac with Apple Watch


While you may worry that this will create a way for people to get into your Mac, do be aware that your Apple Watch needs to be unlocked, meaning they would need your Apple Watch password first before they could get into your Mac. In many ways, this way is a safe and secure way to allow people access to your computer without directly giving them the password or typing it in front of them. If you like hidden tips about using your Apple devices, be sure to sign up for our free Tip of the Day!


To Use This Tip


* Your Mac and Apple Watch have both Wi-Fi and Bluetooth turned on.

* Your Mac and Apple Watch are signed in with the same Apple ID using two-factor authentication.

* Your Apple Watch has a password enabled.


How to Open Your Mac with the Apple Watch


* On your Mac, open System Settings.


* Click Touch ID & Password.


* Toggle on your Apple Watch. It may take a moment to enable. 


* Now, to practice, lock your Mac.


* Then, when you go to unlock it, you will feel your Apple Watch vibrate and get a message that says that your Apple Watch opened the Mac.


And that's how you do it! I love how simple this feature is to set up, and I love not having to type my password in front of my friends or family when they want to use my computer.
How-ToApple WatchMacBluetoothPasscodePrivacy & SecurityMaster your iPhone in one minute a day: Sign up here to get our FREE Tip of the Day delivered right to your inbox.


http://dlvr.it/T0z50N

Thursday, January 4, 2024

Wednesday, January 3, 2024

[Invitation] Galaxy Unpacked 2024: Opening a New Era of Mobile AI

A revolutionary mobile experience is coming. Get ready to discover a new era full of possibilities with the latest Galaxy innovations, designed to transform


http://dlvr.it/T0tjPQ

Samsung Electronics Expands Odyssey Gaming Monitor Lineup With New OLED Models at CES 2024

  Samsung Electronics today announced new Odyssey OLED gaming monitors debuting at CES® 2024, the world’s biggest tech event owned and produced by the


http://dlvr.it/T0tjHv

Private WiFi Address: What Is It & How to Enable It

What to Know


* Private Wi-Fi Address is a feature that prevents your device from being tracked across multiple networks.

* You can enable this feature in the Wi-Fi Settings of both your iPhone, iPad, and Apple Watch.


Privacy is one of the iPhone’s best features. You can rest easy knowing your data is secure, and the iPhone’s Private Wi-Fi Address setting makes sure your connection is protected. Let’s go over what exactly this feature does and how you can enable it on your iPhone or iPad.


Jump To:


* What Is Private Wi-Fi Address?

* Enable Private Wi-Fi Address on iPhone & iPad

* Enable Private Wi-Fi Address on Apple Watch

* FAQ


What Is Private Wi-Fi Address?


Whenever you connect to a Wi-Fi network, your iPhone (and any other Wi-Fi-capable device) uses a Media Access Control (MAC) address to identify itself. If your iPhone uses the same MAC address when connecting to different Wi-Fi networks, that makes your device more easily trackable across connections.


If you enable the Private Wi-Fi Address feature, your iPhone will use a unique MAC address for each network, making it harder to identify you when you switch to a different network. For more iPhone security and privacy advice, check out our free Tip of the Day newsletter.


How to Enable Private Wi-Fi Address on iPhone & iPad


You can enable your iPad or iPhone’s Private Wi-Fi Address by going into the Settings app:


* Open the Settings app, and tap Wi-Fi.


* Tap the info icon next to a Wi-Fi network.


* Tap the toggle next to Private Wi-Fi Address to enable this feature.


How to Enable Private Wi-Fi Address on Apple Watch


You can also enable Private Wi-Fi Address on your Apple Watch:


* Open the Settings app, and tap Wi-Fi.


* If your Apple Watch is not already connected to a Wi-Fi network, scroll dow and swipe left on a network.


* Tap the three dot menu button.


* Tap the toggle next to Private Wi-Fi Address to enable or disable this feature.


Now, your Apple devices can stay secure no matter which Wi-Fi network you connect to.


FAQ


* Should I turn on Private Wi-Fi Address on iPhone? Turning on Private Wi-Fi Address keeps your connection secure without compromising internet speeds. There are no downsides to turning it on and it helps you maintain privacy, so I would say definitely turn it on.

* How to turn off Private Wi-Fi Address? If you are wondering how to turn off private Wi-Fi address, simply follow the same steps above, and tap the toggle so that it turns gray.


How-ToApple WatchiPadiPhoneSettingsWi-FiPrivacy & SecurityMaster your iPhone in one minute a day: Sign up here to get our FREE Tip of the Day delivered right to your inbox.


http://dlvr.it/T0tHWT