Wednesday, November 30, 2022

[Video] Galaxy Z Flip4 Gets a Maison Margiela Makeover: Unboxing Your New Favorite Accessory

On November 9, Samsung Electronics unveiled a new special edition of Galaxy Z Flip4 in collaboration with Maison Margiela.   The Galaxy Z Flip4 Maison
http://dlvr.it/SdbXfM

New Action Button: 7 Things You Can Do on Apple Watch Ultra

Are you wondering what you can do on an Apple Watch Ultra with the Action Button? This new customizable button offers a quick way for you to access your favorite watch features with the click of a button. No other Apple Watch model to date has an Action Button, and none of the existing buttons offer this level of personalization. I'll teach you all the different ways to use the Action Button, leaving the best for last, so make sure to read until the end! Jump To: * How to Customize Your Action Button on Apple Watch Ultra * 7 Coolest Ways to Use Apple Watch Ultra Activity Button How to Customize Your Action Button on Apple Watch Ultra Before I explain every customization option, you need to learn how to configure your Action Button. It doesn't matter if you already picked an Action during the initial setup or skipped it for later; the configuration process is the same: * 
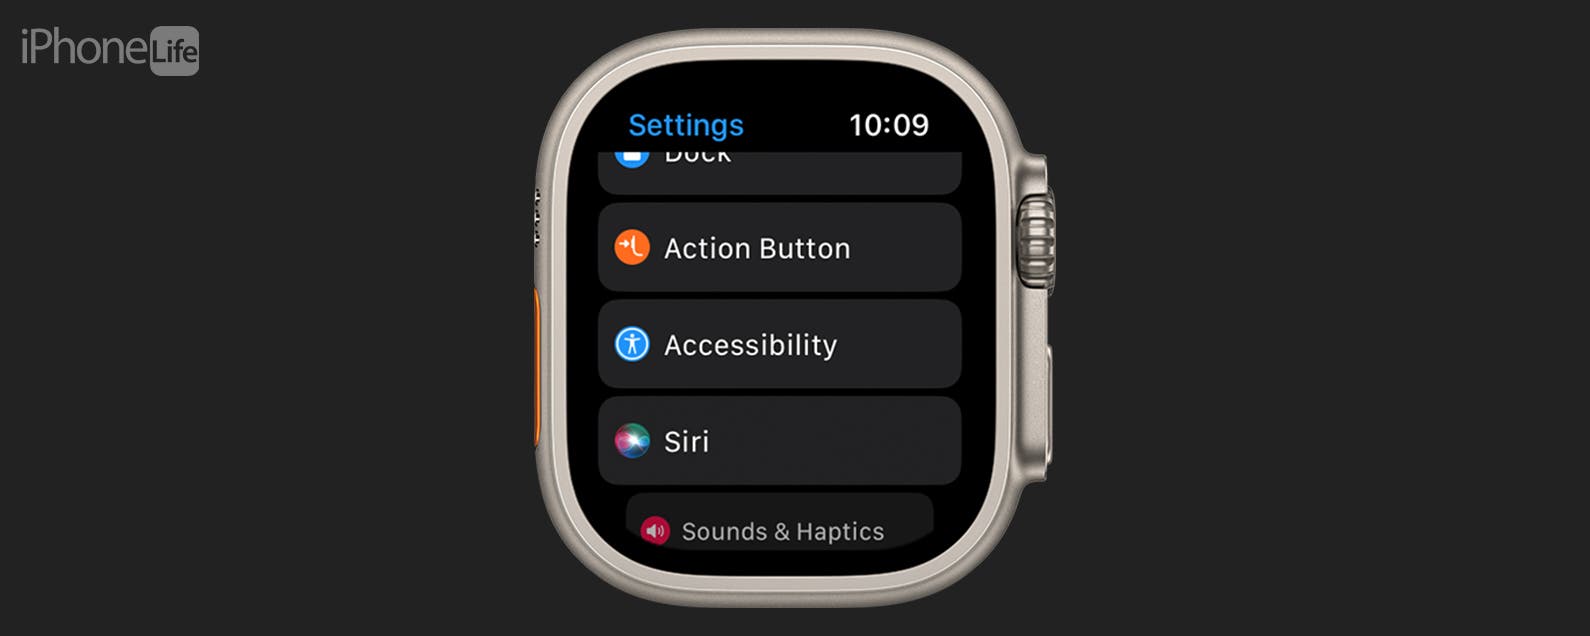
On your Apple Watch, open Settings. * Scroll down and tap Action Button. * If you’ve already selected one, you’ll see it at the top. Tap it to see the menu with other options. * If you're doing this for the first time, you'll see this menu in step 3. From here, select one of the options. I'll cover each one in this article; feel free to skip to the section that interests you most! Tap one of the options to select it. * Then tap the arrow to go see how to use it or further customize it. Some actions have more customization options than others; I'll demonstrate this with Workout. * If you have multiple compatible workout apps, you’ll be able to pick which one the Action Button opens. To do this, tap App. * Then, select your preferred app. * Tap the arrow to go back. * Next, tap First Press. Here you can pick what happens after you’ve pressed the Action Button already. The language is a little confusing, but you’ll get the hang of it. * If you tap Start a Workout, and you'll see more options appear below WORKOUT. * Scroll down and tap your favored or most used compatible workout. Keep in mind that not every workout can be selected here, and also watch for the gray text under the activity, as this list shows the same activity with various goal options. If you scroll to the very bottom, you’ll see more specific workouts, such as 1 min Hill Repeats or 1 Mile Repeats. I will select Outdoor Walk Open Goal as I use this one the most. * Tap First Press to return to the main menu. Next, scroll down to learn how to use the button. Since every Action is so different, this is a useful way to learn how to utilize it fully. * Scroll to the very bottom until you see SIREN. Here you can decide if you want to activate it by Holding the Action Button. I chose to keep this toggled on as it is by default because I like the peace of mind of having the siren so accessible in case I am injured. However, if I notice that I keep accidentally activating it, I may decide to toggle it off. Pro Tip: If you hate the Action Button and want nothing to do with it, please read this article and see if I can convince you otherwise. If you still don't want to use it, return to step 3 and scroll to the very bottom, and select None. When the time comes for me to write the new Apple Watch guide for iPhone Life, I may do this while I'm working on the images because I keep accidentally activating other features because I'm so used to placing my thumb where the new Action Button is to take a screenshot on my Apple Watch. Don’t forget to sign up for our free Tip of the Day to learn more hidden features and get notified about the release of our popular Insider guides! That's it! Now you know how to customize your Apple Watch Ultra's new Action Button. 7 Coolest Ways to Use Apple Watch Ultra Activity Button Now that I've covered how to customize your Apple Watch Ultra's new Action Button, let me show you the seven best ways to personalize it! 1. Never Get Lost Off the Beaten Path with Backtrack If you enjoy off-road or off-path adventures, Backtrack is your new best friend! Pick Backtrack in your Action Button settings so that you can start recording your route with a click of the orange button. The first time you do this, you'll have to enable Precise Location in your Settings on your iPhone under Compass app. Once enabled, you start recording your route to retrace your steps! Remember that magnets in some Apple Watch bands may affect the Compass in your watch. If you expect to rely on it to get you home, consider picking a non-magnetic band to be extra safe. Tap the steps icon to begin recording your route.   Once you want to return to the start of your route, tap the pause button or press the Action and Side buttons simultaneously, then select Retrace Steps. If you are confident that you know your way back or if you recorded a route accidentally, you can also tap Delete Steps.   Tap the Waypoint icon to label your exact location at that moment. I’ll explain this more thoroughly in the next section because the steps are the same! Return to top 2. Drop a Waypoint on the Map to Find Your Way Back to a Special Place  If you want to mark a special location on a map, for example, a great spot to pick an edible mushroom that is known to grow in the same place every year or the location of a buried time capsule, you'll want to select Waypoint in your Action Button settings.   Now, when you press the Action Button, you’ll be able to label your current location and see it on a map with the exact coordinates.   You will also be able to pick a color to color code all your marked locations.   Next, you'll be able to select an icon for easier reference. Unfortunately, there isn't a mushroom, which is disappointing, but maybe Apple will add some foraging icons in the future!   Finally, you’ll be able to decide if you want your Waypoint to show up on a map or keep it a little more private.  Return to top 3. Start a Run with a 100 Calorie Burn Goal To start an activity with a specific goal, you can review the steps in the 'how to customize your Action Button on your Apple Watch Ultra' section because I used it as an example. To recap, select Workout as the Action, then return to the main menu and tap First Press to see your options.    Make sure Start a Workout is toggled on and scroll down until you see the gray text under the workout type showing specific goals. I see options such as 5x5 s, Tempo Run, 1 min Hill Repeats, 6 x 800m Repeats, 3.11mi (5k), 30 minutes, or 100cal, which I find the most intriguing! With this selected, pressing the Action Button twice will start the workout, and I'll get an alert once I've reached my goal of burning 100 active calories! How cool is that?   If you are a real athlete, are training for a special run, or just have an exercise minutes goal, you may find one of the other options more appealing! Return to top 4. Mark a Lap with Stopwatch  If you are training for a race or just against your best time in any activity (even if it's non-athletic like knitting or baking), Stopwatch is a great option to pick from the Action Button menu.   With this selected, you can press the Action button once to start your Stopwatch then again to stop it.  If you press the Action and Side buttons simultaneously, the stopwatch will be paused (or resumed).  You can select different formats for your Stopwatch app that suits your needs best. Tap the text in the top left (that differs depending on the format you selected) to see or change these options.    I like Graph for tracking sprints because it is a clear way to see your times and reflect on them. However, you might find that one of the other options suits you better!  Return to top 5. Turn Your Flashlight On & Off  Since I rarely travel without my iPhone, I don’t use the flashlight on my Apple Watch too often. However, I was intrigued by the option to set the Flashlight app as my Action Button.   I can also see myself using it during a power outage since the Apple Watch Ultra has a much longer battery life than my iPhone. It could also be helpful on nighttime dog walks or for frequent cave explorers.  Return to top 6. Start a Dive or Perform Secondary Underwater Actions What intrigued me the most about the Apple Watch was the built-in dive computer because I’m in the process of getting certified to dive! I was already excited to track my dives with the watch, but discovering that I can pick Dive as an Action is even more exciting.   Right now, since I only have the native Dive app, I don't have any First Press options, so pressing the Action Button starts the dive and stops it, while simultaneously pressing the Action and Side buttons will pause it.   However, if you find a compatible app, you'll be able to activate a second action by pressing the Action Button. This is really exciting to me because you can't tap the display underwater, and this will be the only way to use my Apple Watch mid-dive.   Return to top 7. Create a Shortcut for Your Bedtime Routine  As promised, I saved the best (and hardest) Action for last! If you pick Shortcuts in the Action Button menu, you can make the button do almost anything, which is a little overwhelming. I decided to use it to create a bedtime routine because I’d like to automate the many little tasks I need to do before I can finally rest.   Next, you can pick which Shortcut runs when you First Press the Action Button. The first on my list is Shazam, which listens to any music playing near me and identifies the song. You can set up a shortcut to open any Apple Watch compatible app. The caveat here is that in order to do what I’m about to describe, you need several hundred if not thousand dollars worth of smart home equipment. Before I blow your mind, I'd like to point out that a shortcut can also be something simple yet valuable, like sending your loved one an automatic good night text, setting your alarm, or ordering a pizza. There really isn't much you can't do with the Shortcuts app once you get the hang of it!   I won't get into the nitty-gritty because this would be a 100-step tutorial, but you can create a Shortcut on your iPhone to do an entire series of actions in order, one after another. The list of Actions below shows some great examples that can all be triggered in your preferred order with one press of your Action Button, as long as you have compatible devices and apps. Shortcuts can have your: * Homepods/smart speaker(s) start playing music or white noise * Lights turn off/on * Smart plug disable/enable your doorbell * AC turn on/off * Furbo toss your pet a treat/record a video * Heat turn on/off * Thermostat auto-set to a preferred day/night/summer/winter temperature * Windows and doors lock/unlock * Stove turn on/off * Sleep apps start/stop recording your snoring/tracking your sleep cycle * Smart faucet pour a specific amount of water (you'll have to place the cup under it yourself, though) * Smart car warm up/cool down before you get in * Security camera begin/stop recording * Roomba start a cleaning cycle The list goes on and on, with new apps and smart home gadgets coming out regularly! Return to top Now you know the many exciting ways to use the Action Button on your Apple Watch Ultra. Which one is your favorite? Please share with us and leave a comment below! How-ToApple WatchCompassSettingsDevice ManagementMaster your iPhone in one minute a day: Sign up here to get our FREE Tip of the Day delivered right to your inbox.
http://dlvr.it/SdZxgM

Tuesday, November 29, 2022

Samsung Sees Significant Adoption of Foldable Smartphones as Enterprise Demand Doubles

Samsung Electronics today announced the number of Galaxy Z Fold and Galaxy Z Flip smartphones sold for enterprise use has more than doubled year on year. From
http://dlvr.it/SdYsk5

Samsung Lights up Swiss Life Arena With the Largest Indoor LED Cube Installation in Europe

  Samsung Electronics recently completed the installation of an upgraded display solution in the Swiss Life Arena, making it the most modern ice hockey
http://dlvr.it/SdXQ5W

How to Change Calendar Color on iPhone (iOS 16)

If you have multiple calendars in your phone, assigning unique colors to each one allows you to easily differentiate between different events. We’ll show you how to change calendar colors on iPhone so that you can keep things organized. Why You’ll Love This Tip * If you have multiple calendars, you can keep better track of events using color coding. * Stay organized and on top of your most important appointments at a glance. Change Color of iPhone Calendar When you want to get organized, color coding is a great way to get started. The iPhone’s calendar settings allow you to assign colors to your different calendars to more easily keep track of your upcoming appointments. For more useful iPhone tips and tricks, be sure to sign up for our daily Tip of the Day newsletter. Now here’s how to change the color of iPhone calendars. * Open the Calendar app. * Tap Calendars. * Tap the info icon next to a calendar (it looks like an "i" inside a circle). * Tap the calendar's current color under the Color heading. * Select a color from the list to assign it to that calendar. * You can also select Custom to choose a custom color. * You can choose from a wide variety of colors using the color spectrum, a grid, or sliders. * Tap the x when you are satisfied. * Tap Back. * Tap Done to save your selection. * All events for this calendar will now show up in the color you have selected. Now you can go through your work, Google, or family calendars and set a color that fits each one. Now, when you look at your calendar app, you can see which event belongs to which calendar with ease. Maybe you want to color code your most important calendar red or your social calendar your favorite color. With your color-coded calendar app, you can now better manage all of your upcoming events. If you want to add more calendars to your Calendar app, we have an article on that, too. How-ToiPhoneAppsCalendarProductivity & BusinessMaster your iPhone in one minute a day: Sign up here to get our FREE Tip of the Day delivered right to your inbox.
http://dlvr.it/SdWnpc

Wednesday, November 23, 2022

[Infographic] Game With Unmatched Clarity on Samsung’s First OLED Gaming Monitor, the Odyssey OLED G8

With the Odyssey OLED G8 — the first OLED gaming monitor from Samsung Electronics — you won’t miss a thing, no matter what game you play.   The Odyssey
http://dlvr.it/SdD9Yb

Samsung’s Latest Best-in-Class Technologies Take Center Stage at RSNA 2022

  Samsung Electronics will be unveiling its latest artificial intelligence (AI) technologies and presenting its premium diagnostic solutions in
http://dlvr.it/SdCwh0

Thanksgiving Apps, Tech Gifts & Black Friday Tips

In this week’s episode, David and Donna share all the apps, gear, and iPhone tips they’re using to plan their Thanksgiving feasts. They’ll also ease you into the weekend with shopping tips and tech gift guides for Black Friday. Click here to listen and subscribe. If you like what you hear, be sure to leave a review. And remember to tune in every other week to hear our editors share with you the latest Apple news, best apps, iPhone tricks, and coolest accessories. Black Friday special! Claim a lifetime subscription to iPhone Life Insider for $299 ($199 with a senior discount) when you visit iPhoneLife.com/LifetimeOffer. This episode was brought to you by: Fanatic Software Informant 5 can help you meet all your organizational goals! Start your summer on the right foot with the free app that lets you manage projects with tasks and notes, sync your calendar among all your devices, enjoy a user-friendly 30-day calendar view, and so much more. Upgrade to the best calendar app and task manager for iOS! Embrace the "out with the old, in with the new" spirit with Informant 5. Question of the week: How are you using tech to plan your Thanksgiving? Let us know at podcast@iphonelife.com. Articles referred to in this episode: * How to Track a Shipment with Live Text in iOS 16 * Apple Watch Digital Crown Not Working? 5 Troubleshooting Tips Thanksgiving apps, gear, tips referred to in this episode: * New York Times Cooking ($4.99/month) * America’s Test Kitchen ($9.99/month) * Youtube TV * Tasty: Recipes, Cooking Videos (Free) * Sling TV * Joby GorillaPod Tripod (Starting at $20.99) * YouTube Fireplace 10 hour HD * Molly Baz Club ($5/month) * How to Take Selfies Using Your Apple Watch * PayPal Honey: Coupons, Rewards (Free) * Shop: all your favorite brands (Free) iPhone Life Buyer’s Guide Links: * Best Earbud Picks * Best Accessories for the MacBook * Best Cases, Accessories & More for Your iPad * Best Speakers * Best Apple Watch Accessories * Best AirPod & AirTag Accessories * Best Smart Home Gadgets Useful links: * Join the iPhone Life Facebook Group * Insider walk-through: get a sneak peek of members-only benefits * Get the Insider discount for Podcast Listeners * Sign up for the free Tip of the Day Newsletter * Email the Podcast * Subscribe to iPhone Life magazine NewsiPhoneApple EventsApple StoreEducationMaster your iPhone in one minute a day: Sign up here to get our FREE Tip of the Day delivered right to your inbox.
http://dlvr.it/SdCfd2

Tuesday, November 22, 2022

How to Turn Off Voice Control on iPad in iPadOS 16

Voice Control on iPad is a really interesting and fun feature that allows you to use your tablet completely hands-free. You can tap anywhere on the screen without using your fingers by saying "show grid," and telling the iPad to tap certain quadrants. However, it can become a bit of a nuisance and you may find you need to turn off Voice Control. We'll show you how to enable and disable Voice Control on your iPad. Related: CarPlay Not Working? How to Fix Apple CarPlay Today! (iOS 16) Jump To: * How to Turn Voice Control Off & On * How to Use Voice Control on iPad How to Turn Voice Control Off & On Turning off Voice Control is fairly simple and can be accessed the same way you turn on Voice Control. You will need to be connected to Wi-Fi before turning on Voice Control, as the iPad will need to complete a one-time file download from Apple. But afterward, you will be able to use Voice Control on or offline.  * To turn Voice Control off or on, go to Settings on your iPad. * Tap Accessibility. * Tap Voice Control. * Toggle Voice Control to off or on. It will be gray when disabled and green when enabled. How to Use Voice Control on iPad If you're curious about how to use Voice Control on your iPad, I walk you through a step-by-step example to show you how it works. If you like tips like this about using your Apple devices in fun new ways, be sure to sign up for our Tip of the Day! Be sure to notice the command confirmations at the top of each of these screenshots! * Once you've enabled Voice Control on your iPad, say "Go to Home" to go back to the home screen. * To open a particular app, say "Open Messages" and the Messeages app will automatically open. * To work within an app, you can use what's called the grid. To access the grid say, "Show grid". * If you want to tap one of the grid sections, say, "Tap 11," and the iPad will act as if you tapped the center of that particular grid square. * If the button or place you'd like to tap is somewhere within a grid square, you can simply say the number of the grid to get more options for that section of the screen. So say, "23". * Now, you will have additional options of places to tap. Say, "tap 5" and the iPad will act as if you tapped that specific number. You can continue to scale down in size and become even more specific about where you tap the iPad by continuing to say the number. * Once you're in the text field in most apps, you can just begin to speak and the iPad will automatically fill in your words to the text field. * To backspace, say "delete character". * You can also use commands like "select all". There are a bunch of other cool ways to use Voice Control. Be sure to read the hints that are provided for you at the top of the iPad for clues on how to use Voice Control and what exact commands to give. And that's how you use Voice Control on your iPad! This is one of those amazing features both for folks with hypersensitivity to touch, and for those who simply want to go hands-free every once in a while! How-ToiPadVoice ControlDevice ManagementMaster your iPhone in one minute a day: Sign up here to get our FREE Tip of the Day delivered right to your inbox.
http://dlvr.it/Sd8mTK

How to Track a Shipment with Apple Wallet & Have It Actually Work (iOS 16)

Can Apple track a package for you using the Wallet app? Allegedly, though as of this writing the feature is spotty at best. Apple did add tracking to the Wallet app in iOS 16, but only with partner services. Here's how to track orders in the Wallet app and what to do if it isn't showing up. What to Know: * iOS 16 allows you to track a shipment with Apple Wallet, but it doesn't always work. * If it has worked, you'll be able to see it in your Apple Wallet right away by tapping the package tracking icon. * Only a limited number of partners have currently added support for this. Jump To: * How to Track a Shipment with Apple Wallet * Why Is Tracking Not Showing Up? How to Track a Shipment with Apple Wallet With iOS 16, a new order you placed should automatically appear in your Apple Wallet when you use Apple Pay (Apple should be adding other partners you can use to pay, but we haven't found any that reliably work yet). However, as I've tested this, I've found orders showing up very inconsistently with no obvious rhyme or reason. Make sure to update your phone to iOS 16 before trying to below steps, and sign up for the Tip of the Day newsletter for more helpful iPhone tips. Here's how to view Apple tracking in your Wallet app. * Open your Wallet app by tapping the icon on the screen. The shortcut of double tapping your side button will not work for this. * Tap the Orders icon at the top right of the screen, just to the left of the add button. * Here, you will see all orders that your Wallet is tracking. Tap on an order to manage it. * Once you've tapped on an order, you'll be able to see its status, cost, order number, and where you ordered it from. * Tap the menu icon up top to mark it as complete, pause updates, mute notifications, or delete the order (this will not cancel your order; it only removes it from your Apple Wallet). * Once you've marked an order as complete, you'll see it listed under the year below your current open orders. Why Is Tracking Not Showing Up In my Apple Wallet? If your order is not showing up in your Apple Wallet, it could be for several reasons. You might have used a card that is not linked to your Apple Wallet, or paid with a system that is not currently linked to the Wallet app, such as Amazon or PayPal. However, the feature is finicky right now, and when I repeated the exact same steps from the exact same store as I did last week, for some reason this time, the order didn't show up while my last order is still visible. As always, with bugs like this, I recommend making sure your iOS is up to date. How-ToiPhoneWalletShoppingMaster your iPhone in one minute a day: Sign up here to get our FREE Tip of the Day delivered right to your inbox.
http://dlvr.it/Sd8TxV

Monday, November 21, 2022

How to Turn Off Apple Watch’s Nightstand Mode

You may have noticed that when you put your Apple Watch on its charger, it displays a large digital clock. This is nightstand mode, and it’s meant to make it easy for you to check the time in the middle of the night. Why You’ll Love This Tip * Prevent your Apple Watch from lighting up multiple times throughout the night if you accidentally jostle your nightstand. * Avoid disruptions to your sleep schedule if you tend to move around at night. * If you charge your Apple Watch during the day, prevent it from functioning as a digital clock while charging. How to Turn Off Nightstand Mode on Apple Watch This useful feature can be a bit bothersome, as even the slightest nudge is enough to illuminate the screen. For more Apple Watch tricks, be sure to sign up for our Tip of the Day newsletter. Now, here’s how to turn off nightstand mode on Apple Watch. * Press the Digital Crown to open the Home Screen, and tap the Settings app. * Tap General. * Tap Nightstand Mode. * Tap the toggle to turn off Nightstand Mode. Now, when you put your Apple Watch on its charger, it won't enter nightstand mode. Related: Which Series or Model Is My Apple Watch? How to Turn Off Nightstand Mode on iPhone While the iPhone itself does not have a nightstand mode, you can change Apple Watch-related settings from the Watch app. Here’s how to turn off your Apple Watch’s nightstand mode from your iPhone. * Open the Watch app. * Tap General. * Scroll down and tap the toggle next to Nightstand Mode to turn it off or on. If you tend to move around in your sleep and jostle your Apple Watch on its charger, the device might be lighting up multiple times throughout the night, disrupting your sleep schedule. However, with this tip, you can now easily switch off the Apple Watch’s nightstand mode. How-ToApple WatchSettingsWatch AppLifestyleMaster your iPhone in one minute a day: Sign up here to get our FREE Tip of the Day delivered right to your inbox.
http://dlvr.it/Sd7kBp

Bespoke Around the World: How Users Are Experiencing Bespoke Appliances Across the Globe

Samsung Electronics is striving to meet consumers’ needs in line with its evolving lifestyle. Samsung Electronics’ Bespoke home appliances allow
http://dlvr.it/Sd5kCs

Friday, November 18, 2022

Easily Answer Calls on Apple Watch with Gestures (watchOS 9)

Apple Watch Assistive Touch is an accessibility option designed for those with mobility limitations or those who only have the use of one hand. That said, this nifty setting is an awesome shortcut for anyone, as it allows you to quickly answer or decline calls on your Apple Watch without having to touch your display. Sound convenient? We'll show you how to enable Assistive Touch and answer calls on your Apple Watch using these simple gestures! What to Know:  * On your iPhone, open the Watch app, tap Accessibility, select AssistiveTouch, and tap the AssistiveTouch toggle to enable the feature.  * Once Assistive Touch is enabled, pinch twice to answer or end calls on your Apple Watch. To decline an incoming call, pinch once then clench your fist. Enable Apple Watch Assistive Touch to Answer Calls with Gestures Before we get into how to answer calls with the Apple Watch Assistive Touch feature, we have to first turn it on. The simplest way to do this is through the Watch app on your iPhone. * Open the Watch app on your iPhone and tap Accessibility. * Scroll down and tap AssistiveTouch. * Tap the AssistiveTouch toggle to turn the feature on. Now that Assistive Touch is enabled, we'll show you how to answer calls on your Apple Watch using these quick-and-easy gestures. To learn more about your Apple Watch features and useful shortcuts, sign up for our free Tip of the Day Newsletter.  How to Answer Calls on Apple Watch Using Gestures The Apple Watch Assistive Touch feature has default gestures assigned for answering, ending, and declining calls, which we'll cover in more detail below. However, if you don't like the default gestures, you can easily customize your Apple Watch Assistive Touch settings to select a movement that's more convenient for you. Now, here's how to answer and decline calls on your Apple Watch using gestures: * When receiving a phone call, pinch twice to answer. A notification on your Apple Watch will also let you know how to answer the phone. * To end a call you've started, pinch twice to hang up. * To decline an incoming call, use a single pinch gesture to move your selection from the answer call button to the decline call button. The red decline button will have a gray outline. * Clench your first once to confirm your selection, which will decline the call. With AssistiveTouch enabled, you can avoid having to punch buttons on the tiny screen, and can instead control your Apple Watch with hand gestures, allowing for quick and easy navigation. Also, if you often use your Apple Watch to track your daily step count, you might want to learn how to enable this hidden setting so you can see steps on your Apple Watch face.  How-ToApple WatchAccessibilityCommunicationMaster your iPhone in one minute a day: Sign up here to get our FREE Tip of the Day delivered right to your inbox.
http://dlvr.it/ScxnFr

Samsung Further Develops Bixby, Introducing a New Language and Setting a Foundation for Future Growth

Samsung Electronics today announced that Bixby and its Artificial Intelligence (AI) voice assistant, now supports Latin American Spanish as a language option.
http://dlvr.it/ScxmtK

Thursday, November 17, 2022

USB-C vs. Lightning Cable: Which Cable Does What?

USB-C cable vs. Lightning cable: both cables charge, transfer data, and connect devices, but how are they different? Which is better, Lightning or USB-C? And which cable is set to become the industry standard? We've got the answers to all your questions. Jump To: * What Is a USB-C Cable & What Is a Lightning Cable? * USB-C vs. Lightning Cable Overview * Which Cable Will Become the Standard? What Is a USB-C Cable & What Is a Lightning Cable? Let's start with the similarities. Both USB-C and Lightning cables can be used to charge your iPhone, iPad, and other Apple devices and accessories, but that's not all. You can use your USB-C or Lightning connector to transfer photos, videos, files, and more between devices. For more great Apple charger cord and adapter articles, check out our free Tip of the Day.   So, what are the differences between the two cables? A Lightning cable is an Apple proprietary cable that has a Lightning connector at one end, which fits, of course, into a Lightning port. The Lightning connector has eight pins and can be inserted into the port face up or face down. The other end of the cable can have a USB or USB-C connector, or an alternate connector, depending on the purpose.  A USB-C cable has a USB-C connector on one end, which fits into a USB-C port. This connector can also be inserted face up or down and has 24 pins arranged around the interior of an oval-shaped plug. As with the Lightning cable, a USB-C cable can have a USB or USB-C connector at the other end, but can also have a Lightning connector or other connector, depending on its purpose.  Beyond differences in shape, the USB-C cable performs all the functions a Lightning cable does as well or better. Let's go over why the USB-C cable is set to become the industry standard. Related: Phone Battery Myths, Fast Charging, Charger Cable Safety & More USB-C vs. Lightning Cable Overview Here are the differences between USB-C and Lightning cables at a glance. USB-C Cable Lightning Cable Charging Speed 100 W/3 A up to 250 W/5 A 12 W/2.4 A and higher USB Support USB4 USB2 Data Transfer Speed up to 40 Gbps up to 480 Mbps Lightning & USB-C Power Delivery As mentioned before, both Apple's Lightning cable and the USB-C cable can power your device. The difference is that Lightning cables support a maximum current of 2.4 amps, while USB-C cables carry 3 amps with support for up to 5 amps. So, USB-C cables are able to charge your devices faster and support Apple's fast charge feature.  To fast charge your iPhone, you'll need an iPhone 8 or later and a USB-C to Lightning cable with a USB-C power adapter that delivers between 8 and 140 W. The fast charge feature can recharge your iPhone's battery up to 50 percent in only half an hour!  Lightning & USB-C Data Transfer Sorry, Lightning cable, the USB-C beats you in upload and download speeds, as well! The USB-C cable supports USB4 specification, the latest update that enables the highest USB bandwidth to date, and offers up to 40 Gbps of data transfer speed. While Apple hasn't released the exact technical specifications for the Lightning cable, it performs at a USB2 standard speed and transfers data at up to 480 Mbps. Lightning & USB-C Cable Compatibility Here's where the Lightning cable really loses out to the USB-C. Apple's Lightning cable compatibility is far more limited than USB-C, extending only to most (but not all) iPhones, iPads, and iPods released since 2012, as well as adapters and Lightning-compatible accessories.  Meanwhile, the USB-C connector is becoming universal and is supported by newer PCs and Android phones, as well as the Xbox series X, Nintendo Switch, the PS5, and even the third-generation iPad Pro and later, and the latest iPad, iPad Air, and iPad mini. Which Cable Will Become the Standard? The European Union passed a law in October 2022 that makes the USB-C cable the universal charging standard for personal electronics by the end of 2024. This means that manufacturers, including Apple, will need to make separate electronics for the European market or standardize their charging ports to USB-C on all their devices. With Apple's move to USB-C ports on its latest iPads, I think it's pretty much inevitable that the USB-C cable will become the new industry standard, at least until there's an even more powerful option on the market!  Top image credit: Ivan_Shenets / Shutterstock.com Cables & AdaptersChargingDevice ManagementMaster your iPhone in one minute a day: Sign up here to get our FREE Tip of the Day delivered right to your inbox.
http://dlvr.it/ScxLcG

Samsung Wins 46 CES 2023 Innovation Awards From the Consumer Technology Association

  Samsung Electronics, a global leader in technology, announced today that 46 of its new products and service innovations have received CES® 2023
http://dlvr.it/ScvL2x

Wednesday, November 16, 2022

Samsung Electronics Announces Exciting New Ways To Experience Game Streaming

Samsung Electronics announced exciting new ways for gamers to experience game streaming with the addition of new partners and the introduction of game
http://dlvr.it/SctHJQ

Tuesday, November 15, 2022

How to Fix: iPhone 14 Pro Always-On Display Stays Bright While Charging

The iPhone Always-On Display is a new feature of the iPhone 14 Pro and iPhone 14 Pro Max. This setting displays useful information on the Lock Screen while keeping it dim, but you may have noticed that it stays annoyingly bright when charging. If this issue is bothering you, we'll show you how to deal with it by enabling Sleep Focus mode! How to Dim iPhone 14 Pro with Always-On Display While Charging Wirelessly Always-On Display uses a low-power mode to limit power consumption while still showing useful information on your Lock Screen. You'll notice, however, that the screen may still be brighter than you want when charging, especially if you're trying to sleep. Fortunately, you can make your iPhone 14 Pro or Pro Max darken even with Always-On Display by using the Sleep Focus mode, and we'll show you how. For more information on this useful feature, check out our general guide on how to use Focus mode, and be sure to sign up for our free Tip of the Day newsletter for more information on new features like the Always-On Display. Of course, if you find that Always-On Display simply isn't worth the trouble to you, another option is to simply disable Always-On Display completely, and we'll show you where you can turn it off at the end of the article. * If you'd like to dim the screen temporarily while charging your phone, start by swiping from the upper right corner of the screen toward the center. This will open the Control Center and can be done from just about any screen, including your Lock Screen. * In the Control Center, there is a button labeled Focus. Tap it to open a menu of Focus options. * One of the default Focus Modes is simply called Sleep. Tap it to dim your screen and set other options to keep you from being disturbed while resting. * When you're done and ready to turn off the Sleep Focus, you can do so by tapping Sleep at the bottom of the Lock Screen. This will open the Focus mode menu again, where you can tap tap the highlighted Sleep focus to turn it off. When your Sleep Focus is on, your screen should be darker than usual, and this may dim it enough to let you sleep comfortably. If not, keep reading to find out how to turn off Always-On Display entirely. How to Disable Always-On Display Sleep Focus not enough to let you sleep at night? Luckily, you can disable Always-On entirely. Here's how: * If you'd like to simply disable Always-On Display, the option to do so is in the Settings app. * In Settings, find and tap the Display & Brightness option. * Here you'll find a toggle labeled Always On. By default, this will be enabled (green), but you can tap it to turn it off (gray). After this, the Always-On Display feature of your iPhone 14 Pro or iPhone 14 Pro Max will be disabled. You can turn it back on at any time from the same setting if you decide you want to use it again. How-ToiPhoneDisplay & BrightnessFocusSleep ModeLifestyleMaster your iPhone in one minute a day: Sign up here to get our FREE Tip of the Day delivered right to your inbox.
http://dlvr.it/ScmrSh

Thursday, November 10, 2022

Samsung Electronics Launches Newsroom in the Philippines

Samsung Electronics today announces the launch of Samsung Newsroom Philippines, which will serve as the official news source of Samsung Electronics for local
http://dlvr.it/ScXHFy

A Leveled-Up Gaming Experience: Gamers Around the World Meet Odyssey Ark

In August, Samsung Electronics unveiled the Odyssey Ark, surprising the world with its groundbreaking curved gaming screen and providing an innovative and
http://dlvr.it/ScXH41

Thursday, November 3, 2022

Wednesday, November 2, 2022

Installing iPadOS 16, the Case for the iPad Pro & Why No One’s Using iOS 16 Messaging Features

It’s time to update to iPadOS 16 and macOS Ventura! In Episode 193, David and Donna discuss Apple’s new OS releases and unveil which iPad Donna decided to buy thanks to listener feedback. They also take a look at why nobody seems to be using new iOS 16 messaging features like marking as unread, editing, and unsending. Click here to listen and subscribe. If you like what you hear, be sure to leave a review. And remember to tune in every other week to hear our editors share with you the latest Apple news, best apps, iPhone tricks, and coolest accessories. Limited time offer! Claim 30% off your subscription to iPhone Life Insider when you visit iPhoneLife.com/PodcastDiscount. This episode was brought to you by: Jamf Effortlessly set up and manage all of your Apple devices with Jamf Now! This cloud-based device management software allows you to remotely configure the devices your team uses on a daily basis (such as iPads, iPhones, Mac computers, and more), giving you the ability to set up new equipment, add apps, manage security features, and much more. With Jamf Now, one person can do in a day what a small team of people could do in a week. Start with three devices for free and add more for just $2 per device, paid monthly. Question of the week: Does your iPad hold a charge when you’re not using it? What are your thoughts on iPadOS 16 Stage Manager? Let us know at podcast@iphonelife.com. Articles & gear referred to in this episode: * Apple’s iPad Comparison Chart * How to Mark iMessage as Unread on iPhone (iOS 16) * How to Edit Text Messages on iPhone after Sending (iOS 16) * How to Unsend iMessage After You've Sent It (iOS 16) * STM Dux 16L Slim Backpack: ($229.95) * STM Dux Messenger Bag ($249.95) * Youtube TV ($64.99/month) * The Verge - In Defense of the Voice Message Useful links: * Join the iPhone Life Facebook Group * Insider walk-through: get a sneak peek of members-only benefits * Get the Insider discount for Podcast Listeners * Sign up for the free Tip of the Day Newsletter * Email the Podcast * Subscribe to iPhone Life magazine NewsiPhoneApple EventsApple StoreEducationMaster your iPhone in one minute a day: Sign up here to get our FREE Tip of the Day delivered right to your inbox.
http://dlvr.it/Sc5CGt

Tuesday, November 1, 2022

How to Turn On Battery Percentage in iOS 16

A few years ago, Apple made the decision to remove the ability to see the battery percentage in the battery icon on the iPhone. This decision was widely contested, and as of iOS 16, Apple has returned this extremely useful feature to iPhone users. While the battery display is not exactly the same as it used to be, it's pretty comparable and the best part is that it is so much easier to view your iPhone's percentage of battery at a quick glance. Related: Can You Allow Paste in All Apps for Items Copied to the Clipboard in iOS 16? Jump To: * How to Show Battery Percentage on Battery Icon * Which iPhones are Compatible with Battery Percentage Icon? How to Show Battery Percentage on Battery Icon Whether it's important to you to be able to see exactly what percentage your iPhone's battery is on at any given moment, or you're attempting to track and preserve your iPhone's battery usage, showing the battery percentage in the battery icon can be super helpful. For more tips and tricks about how to use your apple devices, be sure to sign up for our free Tip of the Day! * To turn on the battery percentage in the battery icon, go to Settings on your iPhone. * Tap Battery. * Toggle Battery Percentage to on. It will be green when enabled. Which iPhones are Compatible with Battery Percentage Icon? Unfortunately, not all iPhones are compatible with the new feature. It appears to be because these iPhones don't have the graphics display capabilities for the feature, either because they are too old or too small to live up to Apple's readability standards. The five iPhones that are not compatible with this feature are as follows: * iPhone XR * iPhone 11 * iPhone 12 mini * iPhone 13 mini This means that the supported iPhones that can display the battery percentage within the battery icon on the home screen are as follows: * iPhone 14 Pro Max * iPhone 14 Pro * iPhone 14 Plus * iPhone 14 * iPhone 13 Pro Max * iPhone 13 Pro * iPhone 13 * iPhone 12 Pro Max * iPhone 12 Pro * iPhone 12 * iPhone 11 Pro Max * iPhone 11 Pro * iPhone XS Max * iPhone XS * iPhone X Now, you should be able to see the percent of your iPhone battery. As a long-time Apple user, I am extremely grateful to have this feature back, as it helps me better gauge my iPhone's battery life and quickly discern if I should take a portable charging bank with me if I'm on the go. This super quick and easy fix will hopefully make your life just a little bit easier too! How-ToiPhoneBatteryMaster your iPhone in one minute a day: Sign up here to get our FREE Tip of the Day delivered right to your inbox.
http://dlvr.it/Sc2G67