Monday, July 31, 2023

First Galaxy Unpacked in Seoul: Samsung Galaxy Unfolds in Korea

On July 26, Samsung Electronics hosted Unpacked for the first time in Seoul, Korea, unveiling its latest Galaxy smartphones and technologies designed to open
http://dlvr.it/SszGBX

Samsung TV Plus Expands Its Sports Offering With FIFA+ as the FIFA Women’s World Cup 2023™ Unfolds

  Samsung Electronics today announced that FIFA+ is the latest global addition to the list of channels on Samsung TV Plus,1 its free ad-supported
http://dlvr.it/Ssz1dZ

Saturday, July 29, 2023

[Interview] Explore the Complexity of Animal Emotions With Wolf Ademeit on Samsung Art Store

Samsung Art Store continues to draw the attention of art enthusiasts worldwide, offering an expansive collection of impressive artwork and photos directly to
http://dlvr.it/SsvMhm

Friday, July 28, 2023

Samsung and Microsoft Unveil First On-Device Attestation Solution for Enterprise

Samsung Electronics today announced the first step in a plan to reimagine mobile device security for business customers in partnership with Microsoft. This
http://dlvr.it/SsrkjP

Thursday, July 27, 2023

Solved: How Do I Get My Phone Out of SOS Mode? (2023)

What to Know * Some iPhone users have reported that their devices have gotten stuck in Emergency SOS mode. * You can do a forced restart on your iPhone or try leaving it plugged in while turned off for a few hours. * When all else fails, you can put your iPhone in Recovery Mode and restore your phone from a backup. Apple's Emergency SOS feature available on iPhones is an extremely useful feature when you find yourself in an emergency. But you may be wondering what does SOS mean on iPhone, or even worse, why is my iPhone stuck on emergency SOS mode? Luckily, we've found out the best ways to turn off SOS on iPhone. Jump To: * What Does SOS Mean on iPhone * How to Get iPhone Out of SOS Mode with a Forced Restart * Fix iPhone Stuck in SOS Mode by Powering Off & Charging * How to Turn Off SOS on iPhone with Recovery Mode What Does SOS Mean on iPhone? The Emergency SOS feature that comes with the iPhone is a way to call emergency services quickly when you're in trouble. Not only does the Emergency SOS feature automatically call the services that will come to your aid, but it also sends a text message to your emergency contacts.  However, there are instances where you may trigger the feature accidentally. This may happen if you press the Sleep/Wake button more than five times in a row, or if you hold the power button and the volume button down for a few seconds. Additionally, jailbreaking your iPhone can also make this feature perform a little strangely.  For some, especially with an iPhone 13 or later, what can happen is that the iPhone will remain stuck in SOS mode, unable to return to the normal screen and the phone is unresponsive. This can be awfully inconvenient for everyone involved, especially if you unintentionally call emergency services. Keep reading to find out the best ways to solve iPhone stuck on SOS mode. How to Get iPhone Out of SOS Mode with a Forced Restart The best way to get your iPhone unstuck from the Emergency SOS screen is by doing a forced restart. When the iPhone isn't responding, and you can't turn it off by swiping, this is how you do a forced restart. If you like tips about using your iPhone, be sure to sign up for our free Tip of the Day! * Press and release the Volume Up button. * Press and release the Volume Down button. * Press and hold the Side button. * Release the Side button when the Apple Logo appears. Fix iPhone Stuck in SOS Mode by Powering Off & Charging Another suggestion that can potentially work to help an iPhone stuck on Emergency SOS is by charging it. Follow the steps above and then leave the iPhone plugged in for more than an hour. For some reason, the extra battery power seems to help the iPhone get out of SOS only. How to Turn Off SOS on iPhone with Recovery Mode If your iPhone is still stuck in Emergency SOS mode, using recovery mode to restore it could help. However, putting your iPhone in recovery mode is a drastic step that should only be taken if you have no other options. Recovery mode allows you to restore your iPhone by re-installing iOS and setting the device up as if it were new. Warning: This method will completely erase your device, as if you just got it brand new, out of the box. Be sure that you have a backup of your iPhone before restoring it in recovery mode. Now, once you’re sure you have a backup of your device, and you have no other options, you can follow the steps outlined in this article to put your iPhone in recovery mode. Then you can check out this article on how to restore your iPhone from an iCloud backup and get your phone back to normal again. If none of the other options listed the above have worked to get your phone unstuck from Emergency SOS, I recommend that you contact Apple Support or visit your local Apple Store for further assistance. Next, find out how to reset your iPad when it is frozen. FAQ: * Why is iPhone stuck on SOS only? In the status bar on an iPhone, it may show up that it says "SOS only." Thankfully, this is not the same as being stuck in SOS. Instead, it means that your device is not currently connected to a network, but you can still complete an emergency call. This feature is only available in Australia, Canada, and the United States. * How do I turn off SOS? If you don't want to trigger the Emergency SOS feature accidentally, you can disable it by going into Settings > Emergency SOS and toggling off all the switches. * Which iPhones are getting stuck in SOS mode? According to user reports, the iPhones most likely to get stuck on the Emergency SOS screen are the iPhone 13 and 14. Older iPhones don't seem to be experiencing this bug as frequently. iPhoneEmergency SOSTroubleshootingDevice ManagementMaster your iPhone in one minute a day: Sign up here to get our FREE Tip of the Day delivered right to your inbox.
http://dlvr.it/SsnvF8

Wednesday, July 26, 2023

Let Your Family Know When You Get Home Safely (2023)

One of the coolest new features in iOS is called Check In. This iMessage feature allows friends to temporarily see your location and automatically notifies them that you have made it to a specific location safely. Read on to find out how to use Check In on iPhone. Why You’ll Love This Tip: * Automatically let your friends or family know when you get home safely. * Easily alert loved ones if something delays your return home. How to Use iMessage’s New Check In Feature System Requirements This tip works on iPhones running iOS 17 and later. The recipient must also have an iPhone running iOS 17 and later. Within your iMessage apps is a new safety feature called Check In. This handy tool allows you to automatically notify friends or family when you reach your destination safely. I’m particularly excited about this feature since I can now automatically let my friends know when I get home safely after leaving their place. For more iPhone safety tips, be sure to sign up for our free Tip of the Day newsletter. Now, here’s how to get started with the new Check In feature in iMessage. Keep in mind that this tip will show you how to use Check In for the first time. When you use it subsequent times, the steps may be slightly different, since you have already set the feature up. * To start, tap the plus icon in any text conversation with another iPhone. * If you don’t see Check In in the list of apps, tap More at the bottom. * Tap Check In. * Your iPhone will offer an explanation of how Check In works. Tap Continue, and Continue again. * Choose whether you’d like to share limited information with your friend or share full information. * You can also tap Show Example to see an example of what data your friend will see. * Limited shows your current location, as well as the battery levels of your devices and whether or not you have cell reception. * Full shows the same data listed above, as well as where and when your iPhone was last unlocked, where and when your Apple Watch was removed (if applicable), and the route you took from your previous location. I prefer to choose Full when sending a Check In to close friends so that they can see exactly where I am and whether or not I’m almost home. * Once you have chosen how much data to share with your friend, tap Continue. * Tap Send a Check In. * Tap Edit. * Choose either When I arrive or After a timer. * Under When I arrive, you can tap Add Destination to select a location. If this is your first time using Check In, your iPhone might automatically suggest a location, so make sure this is correct before leaving this screen. * Tap the Search Bar and type in a location. * Tap Done to return to the When I arrive screen. * Tap your preferred travel method to select an Estimated Travel Time. * You can also tap Add Time to extend how long the estimate is. * If you choose the After a timer tab instead, you will be prompted after the timer finishes counting down to let your contact know that you have arrived safely. If you do not respond within 15 minutes, they will be notified. * Tap Done when you have chosen your preferred Check In method. * Tap the send icon to the right of the text field. Note: When sending a Check In to a contact for the first time, they may receive a pop-up asking them to Allow critical alerts. If they decline, they may not receive notifications about your progress. If your iPhone detects that you are not making progress toward your destination, it will send you notifications and ask you if you need more time. If you fail to respond within 15 minutes, your friend or family member will be notified that you haven’t made it to your destination, so be sure your destination location and estimated time of arrival are both accurate before sending your Check In! How-ToiPhoneiMessageApple AppsMessagesCommunicationMaster your iPhone in one minute a day: Sign up here to get our FREE Tip of the Day delivered right to your inbox.
http://dlvr.it/Ssl3cL

Tuesday, July 25, 2023

Review: Upgrade Your Home with the Smart Level Lock+

Have you ever misplaced or forgotten your keys? Gotten all comfy in bed just to wonder, anxiously, if you locked the door? Wished you could let your friend or neighbor into your home while you’re at work? The Level Lock+ makes all these concerns a thing of the past! This smart lock is Apple HomeKit compatible and comes with Apple Home Keys, giving you dozens of quick and easy ways to lock and unlock your door, even if you’re continents away. Reasons to Get a Smart Lock for Your Home There are many reasons why adding a smart lock to your home is a good idea, especially if you pick the Level Lock+ ($329). While Level's locks are compatible with both Android phones and iPhones, the Level Lock+ is specifically designed to work with the Apple HomeKit. It is also the first smart lock to come with Apple Home Keys. These are two key cards, like you’d use at a hotel, that can be used physically or added to our Apple Wallet so that you can easily access them on your Apple Watch, iPhone, or iPad. This makes unlocking your door as easy as making an Apple Pay payment!  What I love about having the physical cards, plus a set of keys, is that your guests have the option of using whatever suits them best. If they don’t have an iPhone, they can simply use a physical card or a key. This is also a good option if you run a rental property or an Airbnb, so you don’t have to worry about them having access once they leave. Of course, I get a notification any time the door is locked or unlocked so I can keep track of who is coming and going, even if I’m away from home. If using your Apple Wallet or physical cards or keys to open your door isn’t ideal, that’s fine too. Anyone with a smartphone can get the Level Home app (free) and get smart access to their home, allowing them to unlock or lock the door. The app lets you grant others permanent or even temporary access, see the history of when the door is locked or unlocked, and whether it was accessed manually, automatically, by touch, or via HomeKit. This can be useful for security purposes and to keep track of who enters your home and how. Another exciting feature of the Level Home app is that it allows you to set up automatic locking and unlocking. For example, you can set the door to lock after it’s been unlocked for a certain amount of time. This is one of my favorite features because it makes me feel safe knowing that the door will lock itself no matter what. It can also be set to auto-unlock! This happens once you enter your home boundary and are within Bluetooth range. For safety reasons, you have to first leave your home boundary for auto-unlock to work. Finally, my favorite way to control my Level Lock+ is with Apple HomeKit. You can easily add it as an accessory, making it possible to lock and unlock your door using just your voice! I just activate Siri and ask it to lock or unlock the door. If you have HomePods in your home, this lets anyone inside use the smart lock! The Level Lock+ has been a great addition to my Apple ecosystem and smart home. Pros: * You can unlock and lock your door using the physical keys and card, your Apple Wallet, or any Siri-compatible device. * The auto-lock and auto-unlock features make it extra safe and easy to come and go. * A smart lock makes it much harder to lock yourself out. * Guests can be granted temporary access to your home. * Level Lock+ integrates seamlessly with your Apple ecosystem. * You can check that your door is locked from bed, work, or even a trip abroad. * You can add a smart keypad to your Level Lock+ if you wish to add an extra way to unlock your home. Cons: * Unlocking with Siri isn’t instantaneous and can take a few seconds. * If you try to open the door before it is done unlocking, it may jam temporarily and take a longer time to open. * The Level Lock+ is on the pricey side, although the features make it worth the cost. Final Verdict I have nothing but good things to say about this smart lock. So far, having the Level Lock+ has brought me so much peace of mind by automatically locking itself and making it possible for me to enter my home without carrying keys. It has also saved me a lot of time searching for missing keys and even resulted in fewer marital disputes over who misplaced the key or left it in the car after a long trip. I have also enjoyed being able to unlock the door for friends and neighbors, even when away from home. I love knowing that I can let people in to let out my dogs or get all the animals out in case of an emergency. The Level Lock+ with Apple Home Keys has truly upgraded my home, and it could be a great addition to yours too! ReviewsApple WatchiPhoneHomeWalletHome & GardenPrivacy & SecurityMaster your iPhone in one minute a day: Sign up here to get our FREE Tip of the Day delivered right to your inbox.
http://dlvr.it/SsjZnF

[Interview] Taking the First Step Towards 6G Standardization: Meet the Researchers Behind the Development of the Draft 6G Framework Recommendation

When we travel abroad, we can freely use our smartphones in different countries and regions through connected roaming services. This is because most countries
http://dlvr.it/SshfkY

Samsung Electronics Launches the Samsung Climate & Circularity Tech Challenge in Partnership With Extreme Tech Challenge

Samsung Electronics has partnered with Extreme Tech Challenge (XTC), the world’s largest startup competition and ecosystem for entrepreneurs addressing global
http://dlvr.it/SshG0y

Monday, July 24, 2023

[Video] From New York City to London and Beyond, It’s Time for Unpacked To Shine in Seoul

Before the start of Galaxy Unpacked 2023 on July 26, taking place in Seoul, Korea for the first time, Samsung Electronics is releasing its “Join the flip side”
http://dlvr.it/Ssd7RQ

Friday, July 21, 2023

[Interview] Clean Smarter, Not Harder: The Story Behind the New Bespoke Jet™ AI

With the rise of artificial intelligence (AI), smart technologies have entered many aspects of our lives, particularly in the form of home appliances that
http://dlvr.it/SsVwJV

Samsung and Warner Bros. Pictures Unite To Bring Movie Trailers to Consumers in Stunning 8K Quality

Samsung Electronics, the world’s leading TV manufacturer for 17 consecutive years, today announced a partnership with Warner Bros. Pictures that will bring
http://dlvr.it/SsVw3C

Thursday, July 20, 2023

Samsung Wallet, Thermo Check and WhatsApp Are Coming to the Galaxy Watch Series

A range of new apps for its Galaxy Watch series will bring more responsive, adaptable and multi-functional smartwatch experiences for Galaxy users. With
http://dlvr.it/SsS5HM

Tuesday, July 18, 2023

How to Find Apple Watch If Dead or Offline Every Time

What to Know * You can find your Apple Watch using Find My; even if it runs out of battery or turns off, you might still see the last seen location. * If you mark your Apple Watch as lost, you'll get notified if your watch is found. * You can take steps to make losing your Apple Watch less likely. Lost Apple Watch? Don't panic! I'll teach you how to find your Apple Watch, even if the battery is completely drained or your watch is turned off. I'll explain how to use the Find My device last seen feature to track your Apple Watch. I will also give you Apple Watch location tracking and loss prevention tips! Jump To: * How to Find My Apple Watch Even When Dead or Offline * Apple Watch Location Tracking & Loss Prevention Tips How to Find My Apple Watch Even When Dead or Offline Unless you have a physical tracker attached to your watch band, the only way to track a lost Apple Watch is by using Find My. This is only possible if you set up Find My on it. The good news is, if you set up Find My on your iPhone, your Apple Watch was automatically added when you paired it to your phone. Here's how to find your Apple Watch from your iPhone: * Open Find My on your iPhone. * Navigate to Devices if you're not already there. * Select your lost Apple Watch. * 
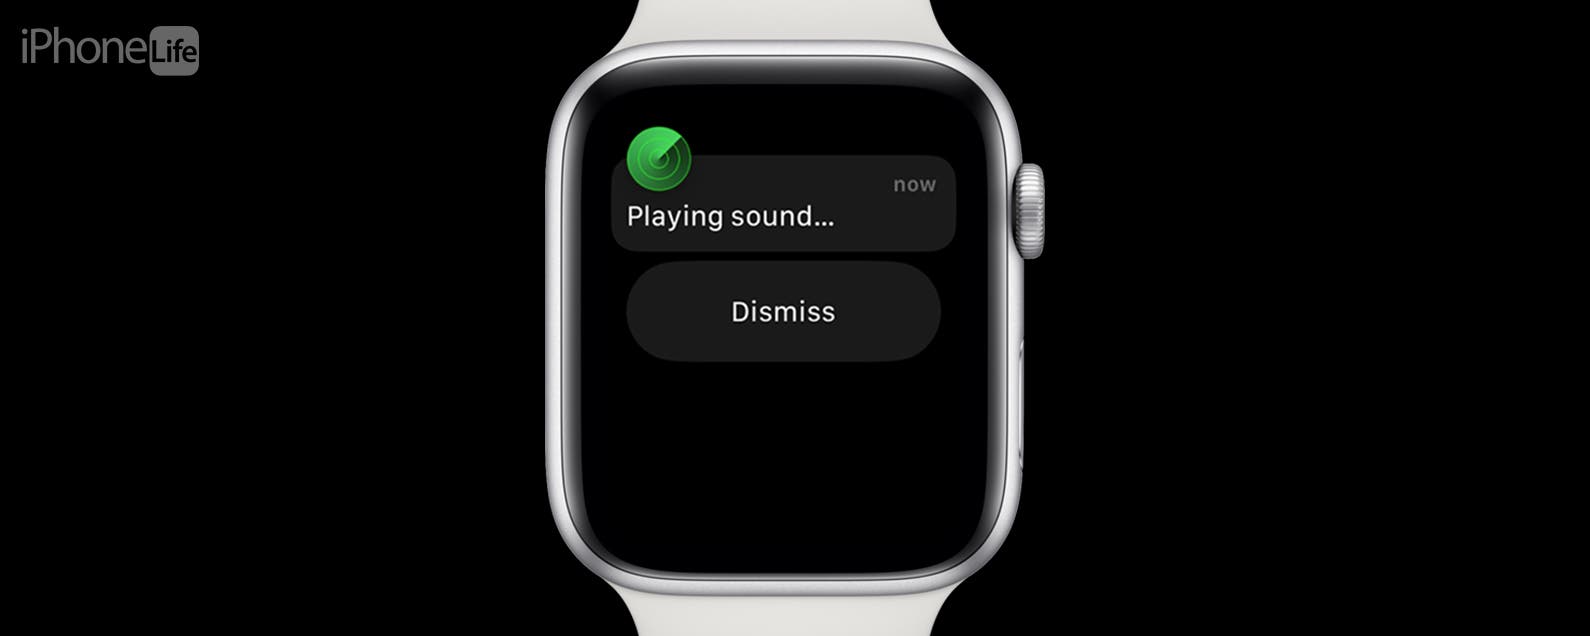
If your Apple Watch wasn't dead or offline, you'd be able to Play Sound to hear it ring if it's nearby or tap Directions to navigate to it. * However, if the battery is completely drained or your watch is off, you will still see these options, but you won't be able to use them. If the Find My icon shows a black display, then you won't be able to ping it or navigate to it. You will be able to see the last seen location on the map for a limited amount of time. * If you no longer see the location anymore, you'll have to scroll down and mark your Apple Watch as lost. To do this, tap Activate under Mark As Lost. * Tap Continue. * Enter your phone number and tap Next. * Enter a custom message with your contact information or potentially even offer a reward for finding your Apple Watch, or leave the default message, then tap Next. * Make sure Notify When Found and Receive Email Updates are toggled on, verify your phone number and message, then tap Activate. Now if someone finds your Apple Watch and charges it or turns it on, you will get an updated location for your watch, or they may contact you directly to return it. Until that happens, you may consider retracing your steps to try to find it, contacting local lost and founds, posting in community social media groups, and maybe even filing a police report. Pro Tip If you have AppleCare Plus with Theft and Loss Protection, you will be able to file a report and purchase a new Apple Watch for a fraction of the original cost. This is only possible if you purchased the Theft and Loss addition to AppleCare Plus with your Apple Watch. You can check if you have coverage directly on Apple's website. You can also use your other Apple devices to follow the steps above. You can even borrow someone else's iPhone or Apple device, log into your iCloud account using your Apple ID, then follow the steps above. For more Apple Watch tips, check out our free Tip of the Day newsletter. Apple Watch Location Tracking & Loss Prevention Tips If you've already lost your watch, these tips won't help you get it back, but I highly recommend you check these out to keep your Apple Watch and other devices safe in the future. A few things to consider to make your Apple Watch easier to find and track: * Purchase AppleCare Plus with Theft and Loss Protection from the get-go, so that even if you lose your watch, you can replace it without breaking the bank. * Make sure Find My is set up on your Apple Watch by setting it up on the iPhone that is paired to your watch. * Set up Device Left Behind alerts for your Apple Watch or whatever device you are worried about losing. * Make sure to keep your Apple Watch charged whenever you leave the house and bring a charger with you on longer trips in case you run out. That way, if you lose it, you are more likely to be able to track it. * Attach an AirTag to your Apple Watch band. While this solution is bulky, it is a more reliable way to find your lost Apple Watch if you are prone to losing it. * Consider adding trusted family and friends to your Find My network. The more eyes on your devices, the more likely you'll be able to find them if they go missing. * Get an Apple Watch band with your phone number or address engraved on the inside in case it is lost. Not everyone who finds an Apple Watch has a charger for it or knows to charge it to help it be found. Now you know how to locate Apple Watches that are lost, even if they are dead or offline. Plus, I gave you some tips to help keep your Apple Watch and other devices safe in the future. Next, learn how to share your location from your Apple Watch! FAQ * How can I find my Apple Watch in my house? It can be surprisingly hard to find an Apple Watch that's lost in close quarters. The best thing to do is to play a sound on your Apple Watch using Find My; just follow the steps in the first section of this article. * Will Apple Watch play sound when dead or off? No, your Apple Watch will only make a sound once charged and turned on. * Can I beep my Apple Watch from my iPhone? Yes, you can! You can use Find My to play a sound on your Apple Watch from any Apple device. You can also skip the steps by activating Siri and asking for it to ping your Apple Watch. How-ToApple WatchiPhoneAppsFind MyApple AppsDevice ManagementMaster your iPhone in one minute a day: Sign up here to get our FREE Tip of the Day delivered right to your inbox.
http://dlvr.it/SsLWR9

Monday, July 17, 2023

Join the Flip Side From Around the World at Galaxy Experience Spaces

  Samsung Electronics today announced that it will open seven interactive Galaxy Experience Spaces around the world, including locations in Seoul, South
http://dlvr.it/SsJt5x

Samsung Unveils ViewFinity S9, an Astounding New 5K Monitor

Samsung Electronics today announced it is expanding its ViewFinity monitor lineup with the global availability of the 27-inch ViewFinity S9 (S90PC model). The
http://dlvr.it/SsJPqx

Saturday, July 15, 2023

Voices of Galaxy: Meet the Gaming-Obsessed Innovators Behind Galaxy’s Next-Level Gaming

Samsung Electronics is on a quest to optimize the gaming experience for Galaxy users. In the world of mobile games, it’s not just about the looks or the
http://dlvr.it/SsCVkJ

Friday, July 14, 2023

[Interview] AI-Driven Sound Innovation: Redefining the TV Audio Experience

It is no secret that Samsung Electronics — the global leader in TV manufacturing for 17 consecutive years — also has a strong presence in the soundbar market,
http://dlvr.it/Ss8s6B

Thursday, July 13, 2023

How to Refresh AirTag Location Manually & More Often (2023)

What to Know * AirTags don’t have a built-in GPS and require nearby Apple devices in order to be tracked, so you cannot refresh the location manually. * When set up properly, your AirTag’s location will refresh automatically. * Putting your AirTag into Lost Mode will send you notifications if the location is updated. AirTags are a great tool that help users find otherwise untrackable belongings like keys, wallets, documents, etc. When the time comes to actually track your AirTag, it's important to understand exactly how to locate AirTags, which may require you to wait for them to refresh their location. I'll also explain why the location may be updating more slowly and how to access your AirTag location history. Jump To: * How Often Does AirTag Update Location Automatically * How to Refresh AirTag Location Manually How Often Does AirTag Update Location Automatically What many users don't realize is that AirTags don't have a built-in GPS or tracking device; they are tracked using a network of nearby Apple devices. For this reason, your AirTag's location will refresh more frequently when located in a crowded area with lots of other people's Apple devices. At the same time, it will refresh less and potentially become untraceable if it is located in a really remote area far from any Apple devices. If this happens, you can still track it by going to the AirTag's Last Seen location or marking it as lost so that you get a notification if it comes within range of an Apple device. For more AirTag tips, don't forget to sign up for our free Tip of the Day newsletter! How to Refresh AirTag Location Manually You cannot refresh your AirTag's location manually. To get the most accurate AirTag location reading, you need to make sure to check your AirTag’s battery life to make sure it has enough battery to be tracked. Your AirTag must also be in range of other Apple devices—this means any Apple devices, not just your own. Here's how to update AirTag locations on your iPhone: * Open the Find My app. * Tap Items if you are not already there. * Tap on the AirTag, and it will show you the most recently updated location. You can wait for it to refresh automatically if you want to see a more recently reported location. * If the location isn’t updating and you can’t find it by tapping Find, scroll down and enable Lost Mode. * Tap Continue. * Enter your phone number, then tap Next. * Make sure Notify When Found is toggled on. * Double-check your phone number and fix it if necessary. * Tap the message to change it if you wish, then tap Activate. You will now get notified if your AirTag is found! If your AirTag is low on battery, this might only work if whoever finds your AirTag replaces the battery and leaves it somewhere where an Apple device can track it Pro Tip If you receive a Last Seen alert, this means that your AirTag was last seen in a really remote area where it can't currently be tracked in real-time. There isn't a way to manually access this, as it will only show up automatically if your AirTag seems 'lost.' Now you know how to locate AirTags and refresh their location on your iPhone. The best way to keep your items safe with AirTags is to turn on notification alerts if you forget your AirTag-tracked item. You can disable places like your home so that you don’t get overwhelmed with notifications. Don’t forget to change those AirTag batteries as soon as you get the low battery warning! FAQ * Can you share AirTag locations? Yes! If you are running iOS 17 or later. Sharing AirTag locations is a new iOS 17 feature, and this software update will be available to the public in the Fall of 2023 or earlier if you want to experiment with the iOS 17 beta. * Are AirTags waterproof? No, but they are water-resistant. Learn more about how to protect your AirTag from water damage here. * How to set up AirTag properly? AirTag setup is easy, and your iPhone will walk you through it. For step-by-step instructions on how to set up your AirTag, read this. How-ToAirTagFind MyDevice ManagementMaster your iPhone in one minute a day: Sign up here to get our FREE Tip of the Day delivered right to your inbox.
http://dlvr.it/Ss64Sv

Wednesday, July 12, 2023

How to Delete Multiple Apps on iPhone (2023)

What to Know * While you can't mass delete apps on the iPhone or the iPad anymore, you can still delete multiple apps quickly. * You can delete multiple apps via the Home Screen or Settings on iPhone or iPad. * If you don't want to delete multiple apps at once but you want to free up storage, you can try Offloading Apps. Years ago, Apple used to allow you to bulk delete apps on your iPhone by going into iTunes. While this feature doesn't exist anymore, there are still a few ways you can delete multiple apps on iPhone at once.  Jump To: * Delete Multiple Apps from iPhone or iPad via the Home Screen * How to Delete Multiple Apps on iPhone or iPad via Settings * Mass Delete Apps on iPhone or iPad with the Offloading Apps Feature How to Delete Multiple Apps on iPhone There are three primary ways for how to delete apps quickly on the iPhone or the iPad, and we'll go over all of them. If you like tips about using your Apple devices, be sure to sign up for our free Tip of the Day! Here's how to delete multiple apps on iPad or iPhone: Delete Multiple Apps from iPhone or iPad via the Home Screen If you have a lot of apps you want to delete at once, the method below is the quickest way to permanently remove apps from your iPhone or iPad, saving you time as you do your organizing. * Long press any blank space on your iPhone or iPad's Home Screen. Your Home Screen will enter jiggle mode.  * Find the app you want to remove, and tap the minus icon.  * Then, tap Delete App. * Confirm by tapping Delete. Repeat to delete even more apps. * Tap Done at the upper-right corner of your screen when you're finished deleting apps. How to Delete Multiple Apps on iPhone or iPad via Settings While it's not as quick, deleting multiple apps on your iPhone or iPad in Settings allows you to see the size of individual apps. * On your iPhone or iPad, tap Settings. * Tap General. * Tap iPhone / iPad Storage. * When you've located an app you want to delete, swipe on it from right to left. * Tap Delete App. * Then, tap Delete App again to confirm. Mass Delete Apps on iPhone or iPad with the Offloading Apps Feature While you can't actually mass delete apps on your iPhone or iPad by Offloading them, it does end up keeping a large number of unused apps from clogging up your iPhone or iPad's storage. The feature Offload Unused Apps uninstalls an app you haven't used in 12 days but doesn't delete the app from your device. An offloaded app will still appear on your Home Screen and in your App Library, but it may have a small cloud by it, indicating that it will need to redownload when tapped. * On your iPhone, open the Settings app. * Tap App Store. * Scroll down and toggle on Offload Unused Apps. The toggle will be green and to the right when enabled. Now you know how to quickly delete many apps at once on your iPhone or iPad. Happy purging! How-ToiPadiPhoneAppsApple AppsThird-Party AppsSettingsCloud StorageHome ScreenStorageDevice ManagementMaster your iPhone in one minute a day: Sign up here to get our FREE Tip of the Day delivered right to your inbox.
http://dlvr.it/Ss3DFS

Monday, July 10, 2023

Why Does My Phone Say SOS Only & How to Fix It (2023)

What To Know * SOS on an iPhone turns on because of pressing the Sleep/Wake button quickly five times or holding the side and a volume button simultaneously. * Jailbreaking your iPhone can also cause it to enter SOS mode. * Reboot your iPhone by holding either volume button and the side button simultaneously, then sliding the power-off slider.  Emergency SOS is a great safety feature, but what if your iPhone is stuck in SOS mode? What does SOS only mean on an iPhone or iPad, anyway? Here's how to get rid of SOS only on an iPhone. Jump To: * Restart Your iPhone or iPad * Contact Your Cellular Service Provider * Restore Your iPhone with iTunes or Finder * Contact Apple Support   Why Does My Phone Say SOS Only & How to Turn Off SOS SOS, or SOS only, means your iPhone isn't connected to a cellular network; the only calls you'll be able to make are emergency calls. Your iPhone goes into SOS mode for a couple of reasons, including pressing the Sleep/Wake button quickly five times, pressing either volume button and the side button simultaneously, or as a consequence of jailbreaking. Here's how to turn off SOS on your iPhone if it's stuck in SOS mode. For more great iPhone troubleshooting tutorials, check out our free Tip of the Day.  Restart Your iPhone or iPad Image Courtesy of Apple Stuck in SOS only on your iPhone or iPad? A restart can often fix minor bugs and glitches, so the first thing you'll want to know is how to reboot your iPhone or iPad. If rebooting or restarting your iPhone doesn't fix the problem, it's also recommended that you reboot, charge your iPhone or iPad for an hour, then turn your device back on to see if things are back to normal.  Contact Your Cellular Service Provider If you've worked through all the other steps and your iPhone is still stuck in SOS mode, contact your cell phone company. Whether you use Verizon, AT&T, or another provider, there may be a glitch or outage on their end, or a service problem they can resolve for you.  Restore Your iPhone with iTunes or Finder If rebooting and contacting your cellular provider hasn't gotten rid of SOS only on your iPhone, it's time to restore to a backup made before this issue began. You can restore a backup using the Finder on a Mac, or restore your iPhone from an iTunes backup. Remember that this step will mean you lose any data and settings you've saved or changed since creating the backup you're using to restore your iPhone. If you don't want to take this step yet, contact Apple Support first, to see if they can offer any other solutions.  Contact Apple Support If your iPhone is still stuck on emergency SOS, it's time to contact Apple Support. They'll hopefully be able to get your iPhone or iPad out of SOS only. I hope your iPad or iPhone isn't stuck in SOS mode anymore, and that you'll check back with iPhone Life for all your Apple hardware and software questions!  How-ToiPadiPhoneSettingsCellular Service & DataDevice ManagementMaster your iPhone in one minute a day: Sign up here to get our FREE Tip of the Day delivered right to your inbox.
http://dlvr.it/Srz22F

Samsung Presents Contemporary Artist Park Seo-Bo’s Masterpiece on ‘The Wall All-in-One’ at New York’s Rockefeller Center

  Samsung Electronics today announced that it is displaying a masterpiece by Park Seo-Bo, a leading figure in contemporary Korean art, on The Wall
http://dlvr.it/Srx4yJ

Friday, July 7, 2023

[Video] Samsung Galaxy Z Series Returns, and There’s No Escaping It: ‘Join the Flip Side’ Season 2

Samsung Electronics has released a new global film as part of the “Join the flip side” campaign, providing teasers for the next generation of Galaxy devices
http://dlvr.it/Srp19G

Thursday, July 6, 2023

Samsung Electronics and MediaTek Achieve Innovative 5G Uplink Breakthrough With Three Transmit Antennas

Samsung Electronics and MediaTek completed the successful testing of 5G Standalone Uplink (UL) 2CC Carrier Aggregation (CA) with C-Band UL MIMO to reach top
http://dlvr.it/Srn0MQ

A Snapshot Galaxy Unpacked Event Invitations

The countdown begins. It’s that time of year when Galaxy Unpacked takes center stage, captivating the world with devices that rewrite the rules. And it
http://dlvr.it/SrlH2f

[Invitation] Galaxy Unpacked July 2023: Join the Flip Side

A new cultural driver is coming. Come along on our journey to discover an all-new Galaxy as we showcase our latest technologies designed to open possibilities
http://dlvr.it/Srl2QM

Wednesday, July 5, 2023

Back to School: Stay on Track This Semester With the Connected Power of Galaxy Ecosystem

Whether you’re a seasoned student or a first-time undergrad, the back-to-school season is an exciting time for all. In order to help you celebrate the start of
http://dlvr.it/SrkSJ8

Tuesday, July 4, 2023

Samsung Partners With TwitchCon Paris 2023 for an Epic Celebration of Gaming

Samsung Electronics today announced that it will take center stage as the presenting partner at TwitchCon Paris 2023. The much-awaited event, which runs from
http://dlvr.it/SrfGK9

Can You Delete Apple Pay Transactions? Here's What You Can Do

What to Know * You can't delete Apple Pay Transactions, but you can remove the associated card. * Tap on the card in Wallet, tap Card Details, then tap Remove Card. * The card will no longer be linked to your Wallet, and the transaction list will be gone. You might want to know how to delete your Apple Pay history for a number of reasons: maybe you bought a gift from a recognizable store, or maybe you just don't want your transactions listed out. Whatever the reason, if you're wondering how to delete Apple Cash transactions or Apple Pay history, the answer is: you can't. You can, however, remove the card entirely. There are pros and cons to this, so let's dive in. How to Delete Transactions on Apple Pay You cannot delete your Apple Pay transaction history. Whether you use a card or Apple Cash, your transactions are there for the long haul. The only way to remove your Apple Pay transaction history is to delete a card altogether. This means that the card will no longer be in your Wallet or linked to Apple Pay, so you will not be able to use it through those means going forward. You can always add it again, but it's a lot of effort to go through in order to erase your history, so think before you do it. For more ways to keep your data private, check out our free Tip of the Day newsletter. * In your Wallet app, tap the card you want to remove. * Tap the More icon in the top right corner. * Tap Card Details. * Tap Remove Card. * Tap Remove to confirm. Your card will no longer appear in your Wallet, nor will your transaction history for that card. However, your future transactions will still show up under whatever new card you are using, so if you want absolutely no record, the only thing to do is not use Apple Pay. Next, learn how to protect your privacy with Hide My Email. How-ToiPhoneAppsApple PayApple AppsWalletShoppingMaster your iPhone in one minute a day: Sign up here to get our FREE Tip of the Day delivered right to your inbox.
http://dlvr.it/Srd67J

Monday, July 3, 2023

Proactive Tips for Protecting Your Data While Working on the Go

  Learn more about how Samsung Secure Wi-Fi works here.     * This content was originally published on Inverse on December 23, 2022. Click here
http://dlvr.it/SrcM5M

Saturday, July 1, 2023

‘Concerts You Can Capture’ With the Samsung Galaxy S23 Ultra Camera and Sabrina Carpenter

Nowadays, remembering experiences is just as important as the experience itself. That’s why concert and festival crowds are often lit up with a sea of
http://dlvr.it/SrWXLG

Samsung Electronics Releases 2023 Sustainability Report

On June 30, Samsung Electronics released the 2023 edition of its Sustainability Report.   Through this report, Samsung discloses its sustainability
http://dlvr.it/SrVvyh