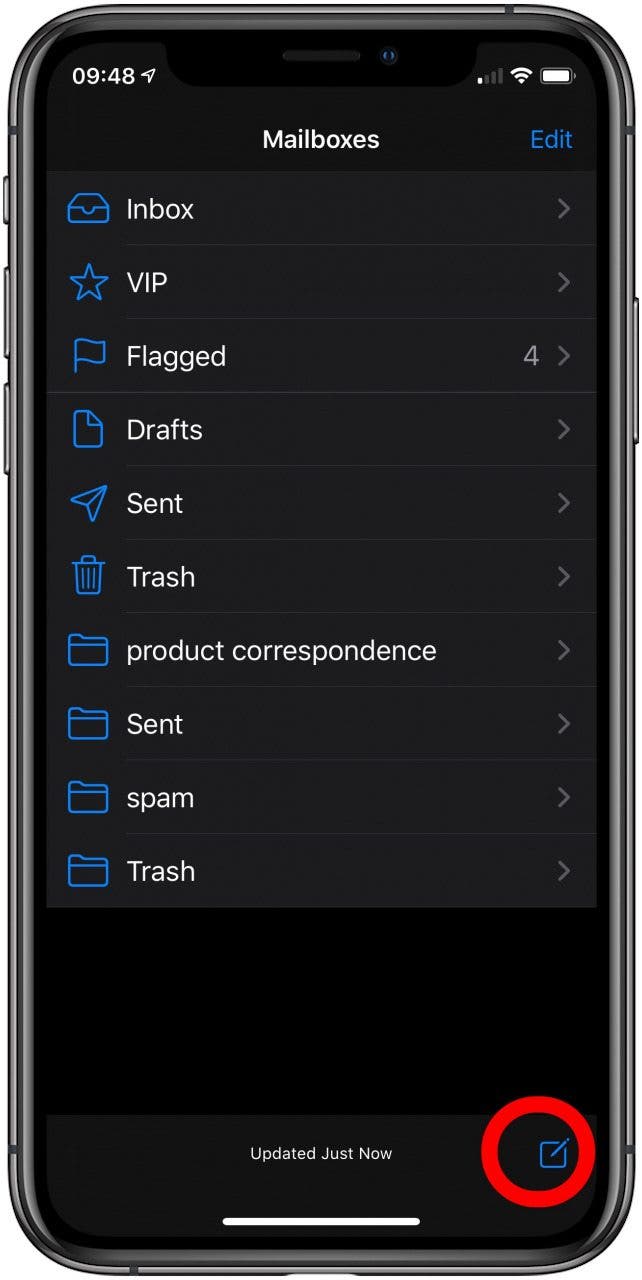
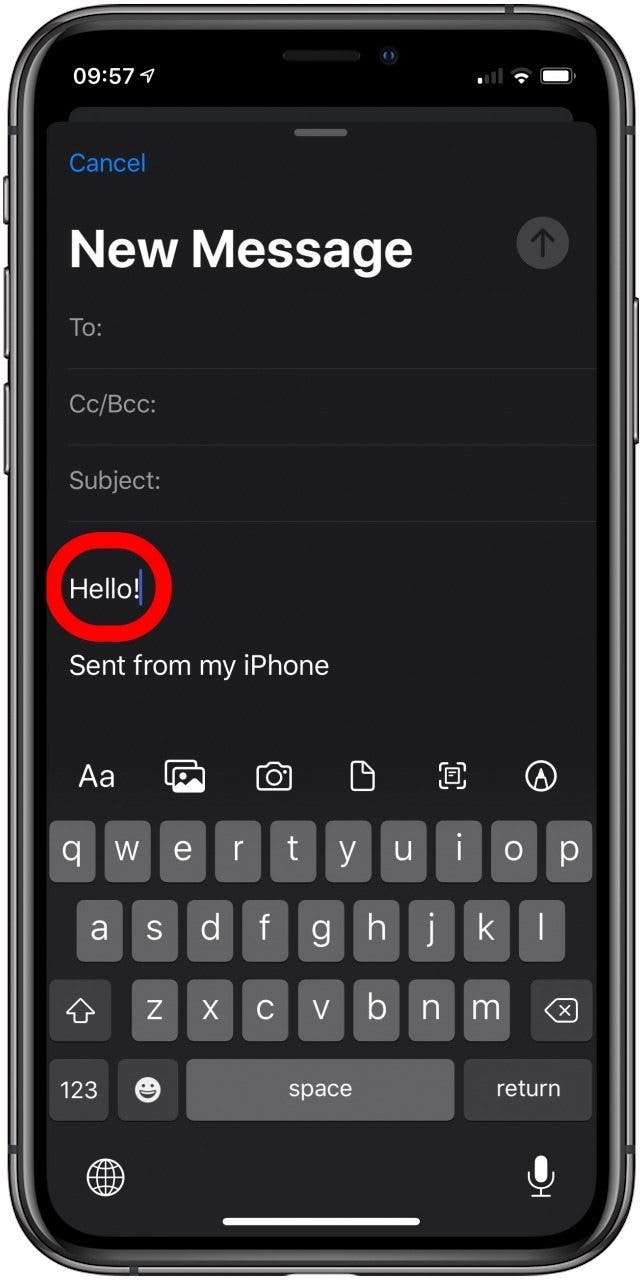
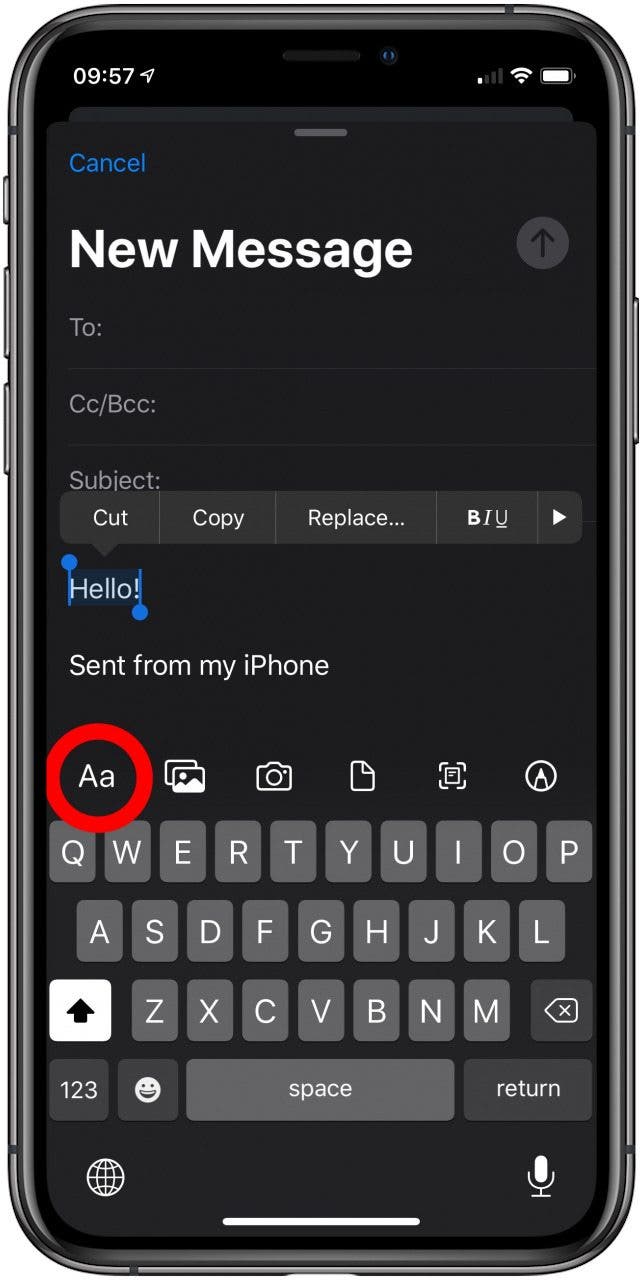
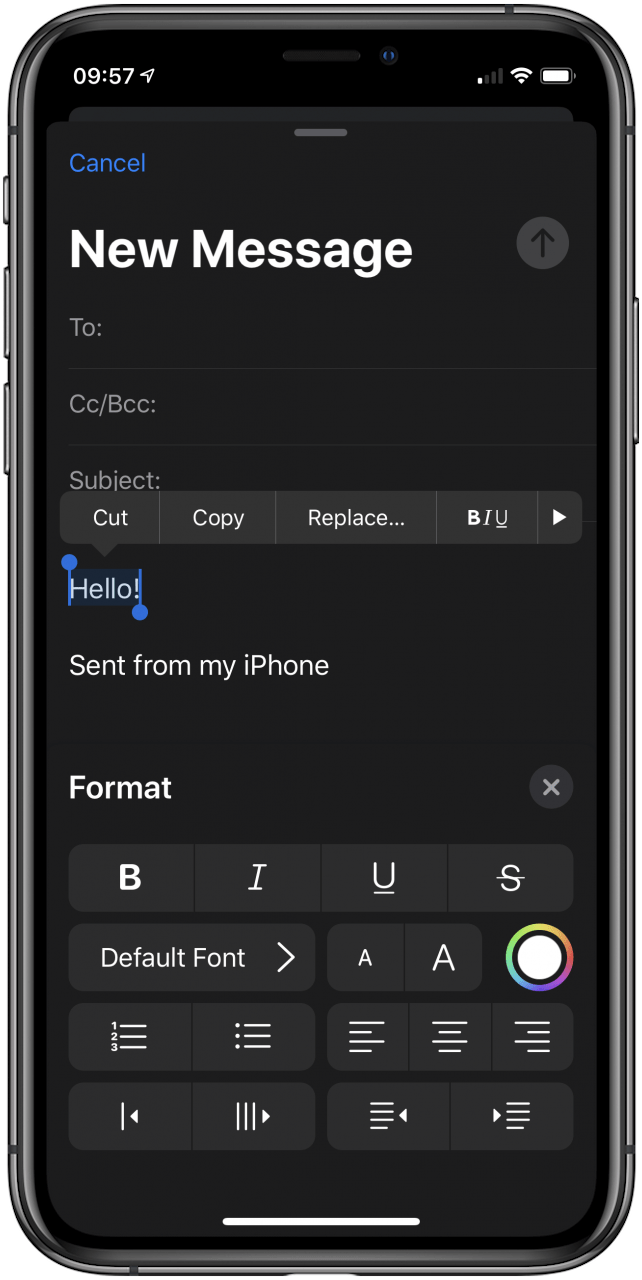
Rich text email, including bold text and fonts, has come to the iPhone! As of iOS 13, you can format emails to your pleasure in the Mail app by simply composing an email, selecting the text you want to format, and then tapping the "Aa" option just above the keyboard. A menu of text formatting options will replace the keyboard, and you can format your email like a pro. Here’s how to format your text in the Mail app on an iPhone with iOS 13.
Decluttering my physical surroundings changed my life. Getting rid of the things I didn’t need or that brought me down gave me space to breathe and feel more peaceful. I knew that this would become a lifestyle for me and that I could never go back. Once my physical possessions were under control, I realized that although I had taken the time to clear out my closet and my bookshelf, I had let myself hang on to digital possessions long past when they served a purpose. And just like with physical clutter, removing digital clutter reduced stress and gave me peace of mind. So even if you’ve used the KonMari method on your wardrobe and narrowed down your books and files, you’re not done if you haven’t decluttered your phone and computer. That’s where I come in.
With essentially unlimited digital space available, it might seem silly to monitor how much you’re using on your devices. But the problem isn’t limited space—it’s the limited mental bandwidth we have to keep track of it all. Hanging onto things, whether physical or digital, takes up some of your memory and awareness, and depending on what exactly it is, it can cause you more stress than you realize. The following are just a few ways you can start organizing everything from your text messages and emails to your photos and notes to help you create a more Zen digital environment.
Clearing Out Old Digital Notes
I once created a very in-depth folder system on my laptop that involved many levels of subfolders. The system was very logical, and I could usually find what I was looking for. It worked passably for a few years, until I ran out of space and moved the whole folder system onto an external hard drive. I didn’t look at the hard drive again for years. What was in it? Useless documents called things like “24 things to do before age 24” or “Tuesday to-do list” or “Potential jobs to get Sept 2012.”
These notes were useful to me at the time as a brain dump exercise where I would just write down a bunch of ideas to help better sort them in my mind. Before the age of everything digital, people used to brainstorm their ideas on real paper. And then they would crumple the paper up and throw it in the trash when they were done. But today, we tend to CTRL + S every single file we create just in case we need it later, thus immortalizing our digital clutter.
These days, I constantly write digital notes, but I only keep a few at a time. Instead of keeping multiple to-do lists, I have one, which I keep adding to and checking off items as I complete them. I try to take care of any other notes I create ASAP so I can delete the whole thing and move on. I hang on to work-related documents only until that project is over. And anything uploaded online to a blog or shared workspace doesn’t need a second copy on my hard drive.
Keep Only Your Very Best Photos
Most of us keep literally hundreds if not thousands of photos on our iPhones and computers. Pairing down your shots will make it so much easier to enjoy your photo collection. To do this, first, make a decision about where you’re going to store your photos, and keep them contained to that place. Are you going to keep them on your computer’s hard drive, or online in something like Google Photos? Are most of your images stored in your phone’s Photos app or on Instagram? You only need to store one copy of any given photo. (Do keep the original version of the photos you care most about so that you have the highest resolution if you ever want to print and frame them.)
Next, get rid of duplicate shots, blurry pictures, or group photos where someone’s eyes are closed. These will be easy to delete and will give you a feeling of momentum. Now you’re left with all pretty good photos, but you only need one from each set. I’ve found that when I’ve taken the photos recently, I can’t decide which photo is the best one. In one, the lighting is better, but I prefer my smile in the other one. When this happens, I have to just give up and come back later. It’s amazing how looking at a photo with fresh eyes gives you such a better perspective.
Sorting through vacation photos is another beast entirely. You might have a bunch of photos of buildings you saw, fountains, lakes, and beaches. I hate to break it to you, but there are already hundreds of photos of that exact landmark, and dozens of them are way better than yours. If you really want a photo to remember how beautiful Lake Tahoe was, find one on Google taken by a professional landscape photographer and look at that when you feel like reminiscing. You don’t need your own photo collection to prove you were there. Instead, keep the photos of people. The selfie you and your partner took in front of the beach or with the crazy cab driver photo-bombing you will likely elicit much fonder memories than a photo of the place itself. The people are what make a photo rare or special, not the place.
Banish Unwanted Emails
There are easy ways to bulk-delete email, so have no fear! You’re likely subscribed to a ton of mailing lists you no longer care about. On your iPhone, you can go to your inbox in the Mail app and tap the Unsubscribe option at the top of a message from a mass mailing list.
Email is another one of those places where we tend to organize subfolders into subfolders, often called Labels. I used to have a label called “Shopping”, where I kept all my automated promotion emails from various stores (there are so many embarrassing aspects of that sentence, but this was years ago). If you’re in that boat now, delete the label and delete everything inside it.
Avoid Downloading Too Many Apps
Download an app that you still haven’t opened? Uninstall it. Find that you only waste time using a certain app and it doesn’t bring anything constructive to your life? Uninstall it. Do you already have another app that has the same function? You don’t need more than one.
I like to have only two screens of apps on my phone. On the Home screen, I have the apps I use on a daily basis, like the Mail app, Spotify, Messages, and Google Keep. Swipe to the second screen, and you’ll find my photo gallery, some social media apps, and a language learning app. I intentionally don’t put any “distracting” apps (Facebook, Instagram, etc.) on my Home screen, because I don’t want to find myself opening them by default or because I saw a notification bubble.
All my other random apps aren’t used even close to daily, so they don’t need to take up space on my home screens. I can still access them in the folder where I keep them when I need them.
Delete Old Text Messages
I dislike seeing texts that no longer serve me. Whenever I get a text with a confirmation code or automated alert (such as when resetting a password or opening a new account), I promptly delete the text conversation when I’m done. If someone random texts me with the wrong number, I’ll delete it. I’ll also delete group text conversations if it’s not a group of people who talk to me regularly. Having fewer texts makes it easier to find the conversations that actually matter to me, with people and groups I plan on talking with again in the future.
Determine Which Social Media Accounts You Want to Follow
You have been using social media for a long time and probably have years’ worth of people you’ve followed on Instagram, Facebook, YouTube, and all the rest. You likely don’t care about a lot of the same things you cared about five years ago, so why are you still following so many of those accounts?
It is okay to unfollow people that no longer interest you, whether that’s hiding people from your Facebook News Feed, unfriending them altogether, or unsubscribing to YouTube channels. If you feel badly about yourself when you look at a certain account, do your self-esteem a major favor and unfollow it. Clear your Instagram feed from the boring photos you quickly scroll through, so everything you see is better.
Enjoy Your Newfound Brain Space
Clearing out the digital clutter can give you a surprising amount of peace. When you look back through the things you have chosen to keep, you will find that you have only stored joy and happiness. What wonderful things to hang on to!
There's a lot to like in the NEX202 Dual Drivers In-Ear Headphones (starting at $47.99)that RevoNext sent me to try. They have an elegant, twisted cable, which is a good point to remind readers that these are wired earbuds. The earpieces are built well with a metal housing and rugged-looking Torx (star) screws to keep the gadgetry in place. There are rubber cord protectors for ear comfort and to prevent fraying. They include different size ear tips and are sold in a couple of variety of matte finish colors, black or gray, and with or without microphone ($2 extra for the microphone.) And they sound great thanks to dual dynamic drivers.
They use a 3.5mm jack, not Apple Lightning, so Apple users will need an adapter. The cheaper model does not have a microphone, unlike the free earbuds that ship with every iPhone. And they don't have in-line controls to pause audio, skip tracks, or adjust volume. All of those features could be forgiven for the right customer, who is planning to listen to music only, and if need be, use the phone's controls and built-in microphone for talking. So I can see an audience for them. However, at around $50, they are more expensive than many Bluetooth earbuds. Perhaps the perfect use case is for someone flying. There's no need to talk or take phone calls. You just want-high quality audio. Many iPads still have a headphone jack and the in-flight entertainment does as well. So for that particular customer, I can recommend the NEX202.
Pros
Stylish braided cable
Premium construction
Lightweight
Comfortable
3.5mm headphone jack
Cons
No microphone for cheaper model
No inline controls
Pricey given no Bluetooth, lacking features.
Final Verdict
For the right consumer, the advantages of the RevoNext NEX202 Earbuds should outweigh any missing features.
If you're planning a big trip or a busy weekend, you can use Apple Map's new iOS 13 Collection feature to create a list of the places you'd like to go. To create a Collection, swipe up from the bottom of the screen in Apple Maps and select New Collection to begin your list of locations. Let's dive in with how to create a Collection using Apple Maps.
One of the unlikely rumored products that didn't make it into Apple's recent product reveal event was the tech giant's rumored augmented reality glasses. While there's little doubt that a select number of Apple engineers are working in some secret Apple Park security-sealed room on such a device, the likelihood of such a device seeing the light of day any time in the near future is slim.
Apple is a company that doesn't follow the first mover advantage business strategy, but rather the first improver advantage. They carefully evaluate technology trends and attempts by other companies who boldly place the innovations into the marketplace. As consumers use the products and report their delight and frustration with them, Apple carefully considers how to enhance and simplify the delightful aspects while minimizing or entirely eliminating the annoying ones. Their history proves this approach has been incredibly successful, as shown with the rabid consumer adoption of the iPod, iPhone and iPad. That's why we will likely see a foldable iPhone a few years from now because Samsung is shipping the Galaxy Fold today. And that's why we won't see any Apple AR glasses for awhile, because no one is shipping any compelling hardware to make consumers excited about augmented reality.
Remember how 3D televisions were going to revolutionize the way we watch movies at home? Once the inflated promises of marketing reached the real world experiences of competing standards, uncomfortable ugly glasses, headaches, and general malaise, the bloom dropped from the rose. Today, you would be hard-pressed to find any major television manufacturer offering 3D capabilities in their high-end, expensive 4K HDR OLED offerings. And good luck seeking out any new movie releases in 3D format. A similar flip of consumer interest is happening in the augmented reality space. Instead of the Tony Stark Iron Man visor experiences of flashy projected overlays giving its users an overlay of visualized data streams, we get jerky stuttering animations viewed through a small window as our iPhone or iPad battery charge is rapidly depleted.
Remember the enthusiasm and excitement generated by Microsoft's demonstration of HoloLens? Their Minecraft AR presentation fooled us into thinking the AR experience was wide and expansive when in fact the presenter's view using the actual HoloLens was like looking through a postage stamp cut out while the headset was tethered to a huge rig powering the headset. And whatever happened to the mythical Magic Leap Lightwave headset that has yet to see any significant consumer launch or adoption? Given that any of these headline grabbing technologies have yet to see any kind of uptick in market acceptance and penetration, Apple would be antithetical in their established business practices by releasing any such device before its competitors at the very least captured a toehold of consumer acceptance. Unfortunately, there isn't any consumer-grade augmented reality hardware we have seen that will achieve this any time soon. And that is why we likely won't see any wearable AR glasses product from Apple for several years, if ever.
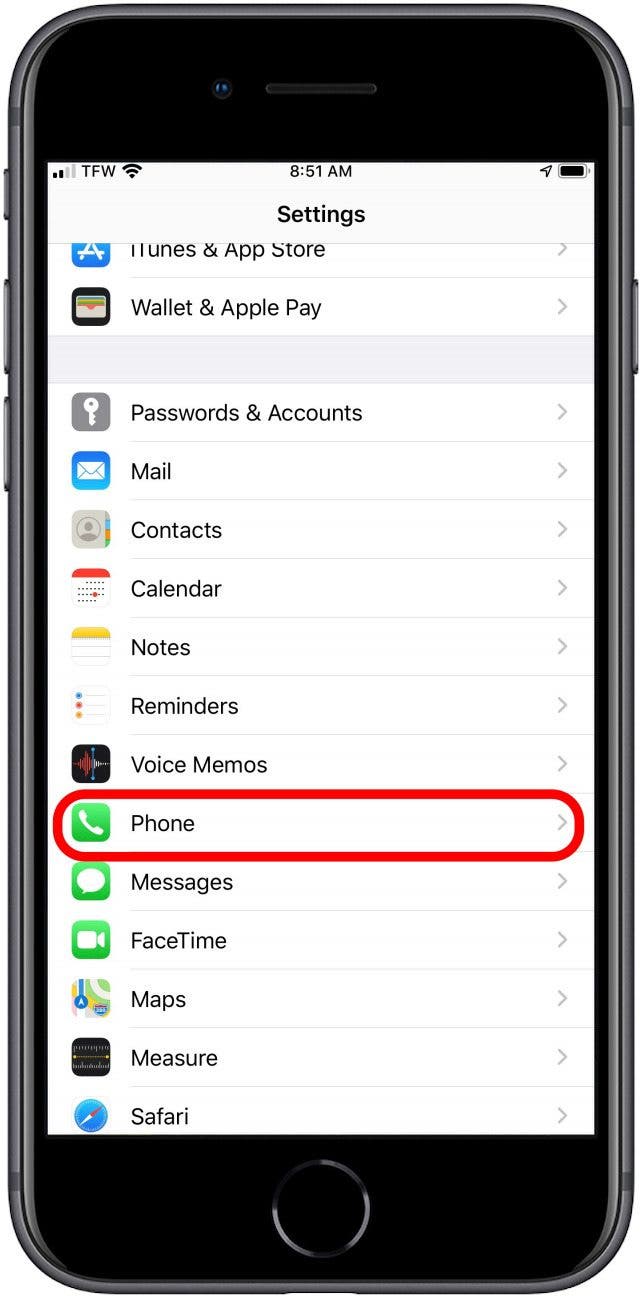
The iPhone's new Silence Unknown Callers feature is a great way to avoid annoying robo calls without having to keep your iPhone muted. Before iOS 13, iPhone users had to rely on third-party apps of varying effectiveness to block spam calls. The new feature is enabled by default, but if it's been disabled, you'll need to head to the Phone menu inside the Settings app to enable it. This is also where you will turn the feature off if you find you're missing important calls and don't want calls from unknown numbers to be silenced. Let's get started with how to silence unrecognized phone numbers on your iPhone.
I am a big fan of Qi-based wireless charging and I have a wide variety of chargers from a bunch of different companies spread throughout my home and office. But I think I may have found the best versions around. In fact, Apple doesn't have an offering of its own, as the AirPower failed to be delivered, so Fuse Chicken has stepped in. The company sent me a review unit of its Gravity Touch wireless charging base (starting at $39.95).
If you removed the Fuse Chicken logo and put an Apple logo on the charger, it wouldn't seem out of place. Like many Apple products, the Gravity Touch chargers make extensive use of aluminum, with rounded rectangles. They also have rubbery feet to keep the charger in place on most surfaces. Speaking of surfaces, the entry-level model has a layer of eco-friendly bamboo with a circular target to help you place your phone on for optimal charging.
For $5 more, you can choose the black pebbled leather version. You don't have to worry about scratching your phone, if you don't use a case, thanks to the soft surface. If you prefer your chargers raised at an angle, Fuse Chicken sells a Gravity Lift model with black leather, multiple coils so it charges in portrait or landscape mode, and an integrated USB cable, while the Gravity Touch comes with a separate microUSB cable. No wall charger is included with either model. All models support 10 watt for fast wireless charging via Qi.
Pros
Elegant aluminum body
Choice of bamboo or leather surface
Rubbery feet for stability
Optional angled version with multiple coils
10 watts for fast charging via Qi
Cons
Leather is an extra $5 charge and angled model is $20 more
Gravity Touch uses microUSB not Lightning or USB-C
No wall adapter included
Final Verdict
The Gravity Touch wireless charging base from Fuse Chicken looks like Apple designed it.
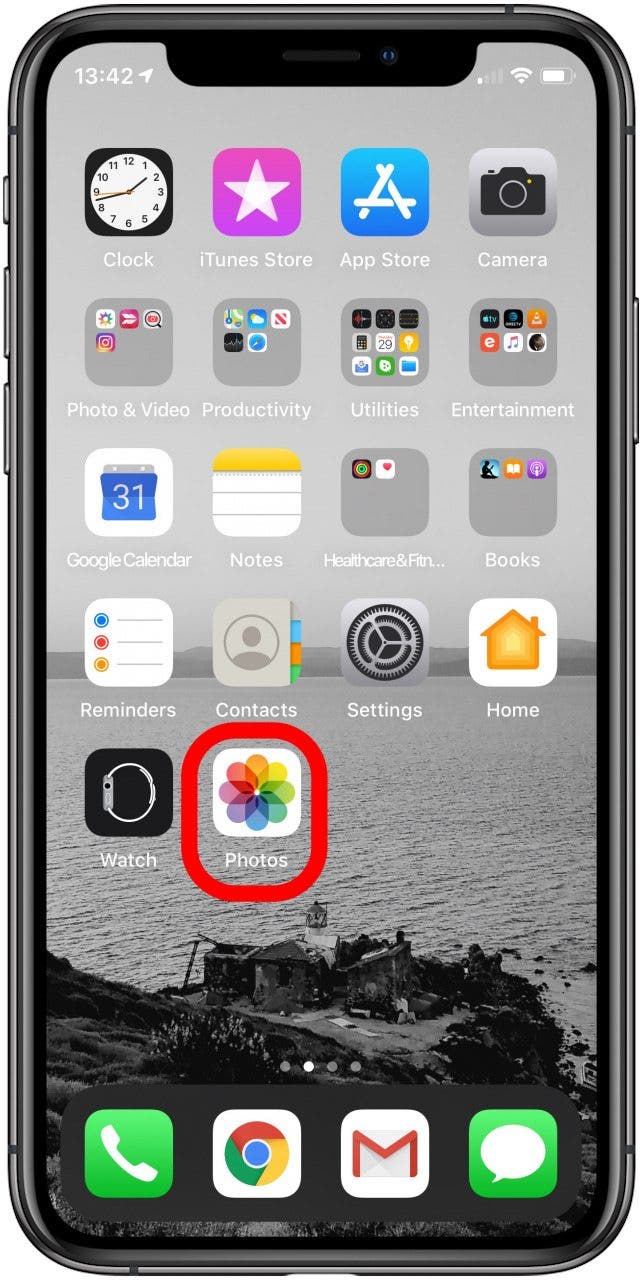
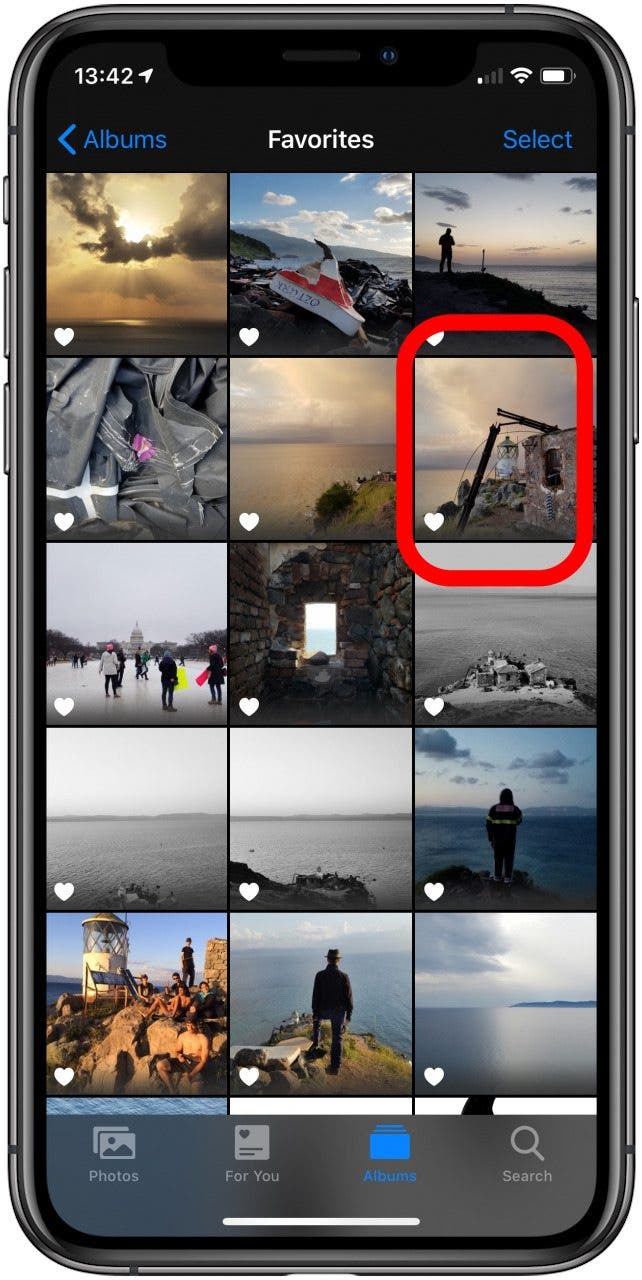
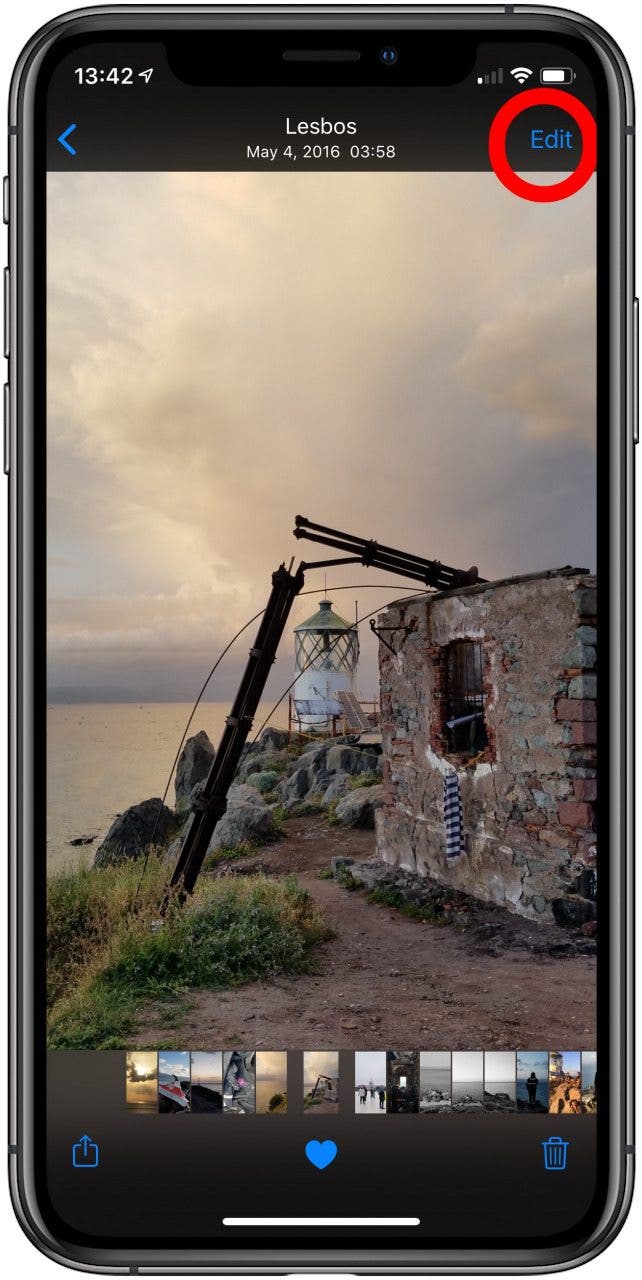
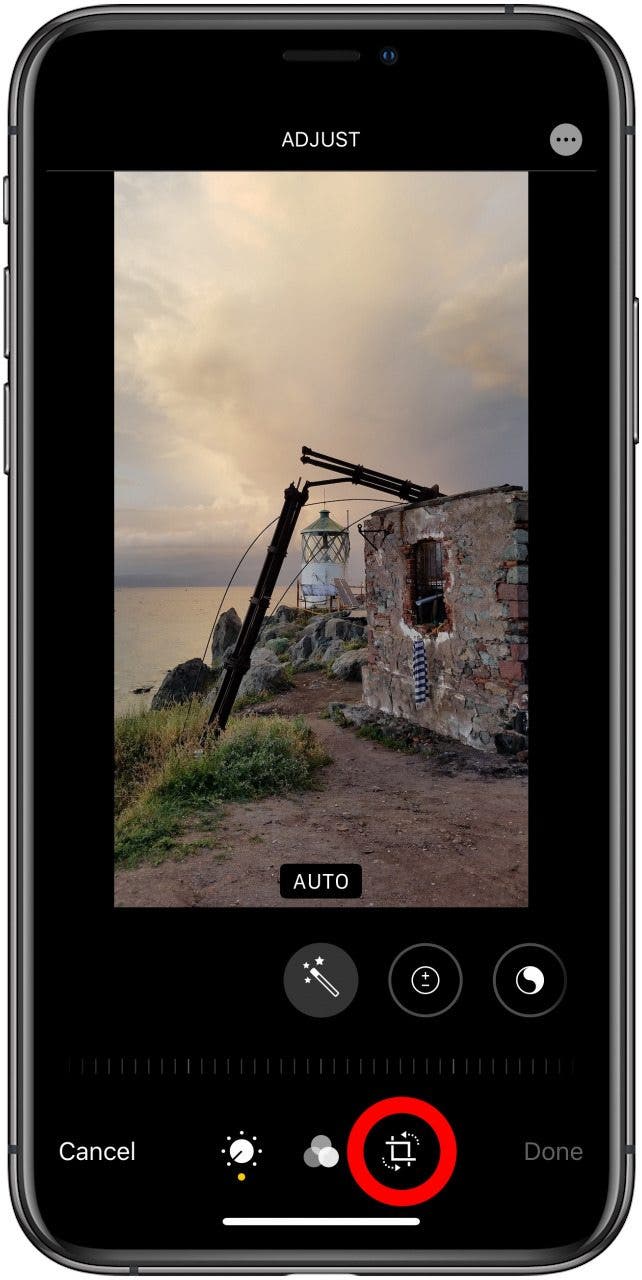
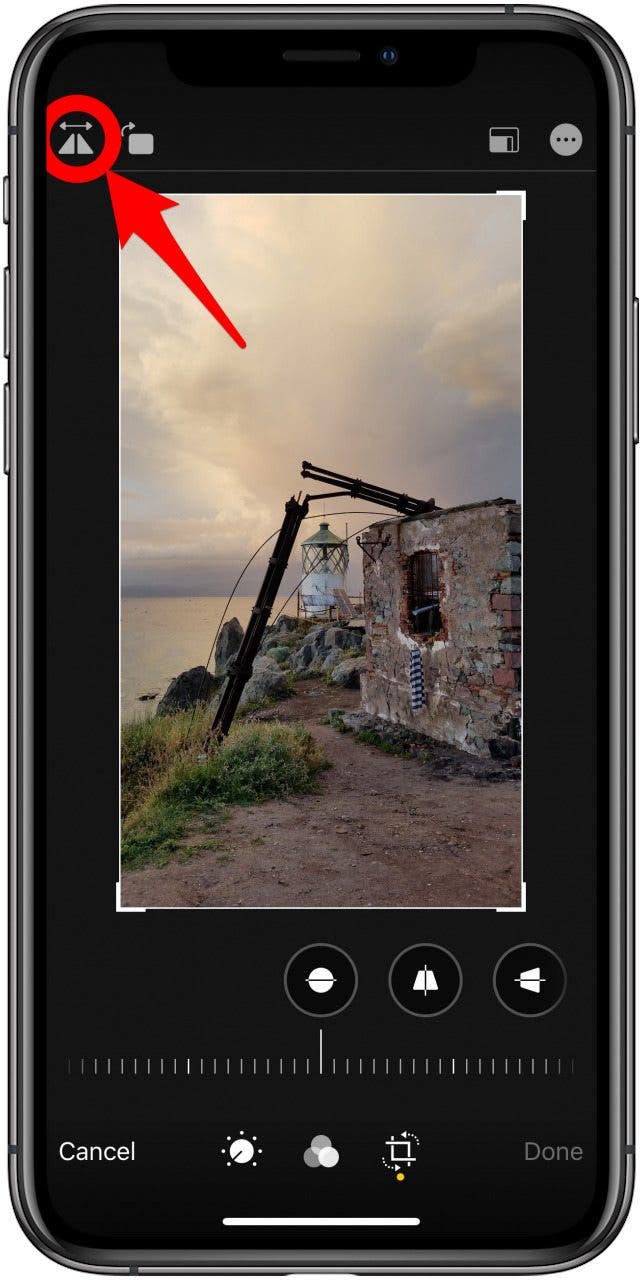
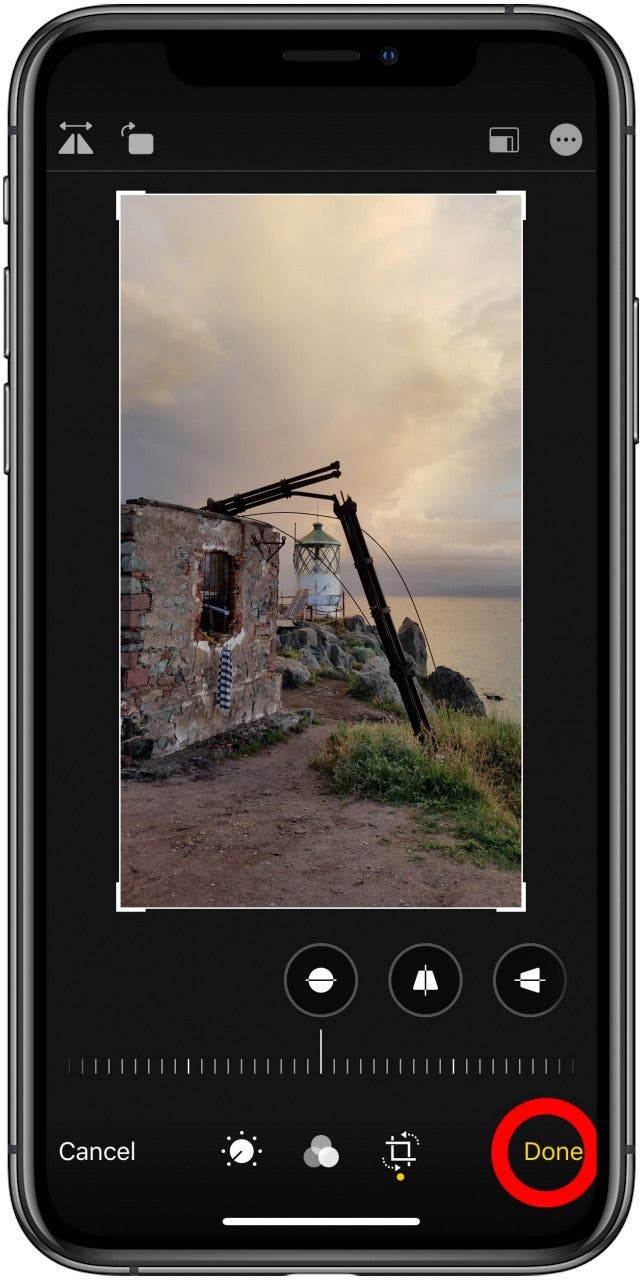
Sometimes the right side is the left side—you've taken a picture that needs to be flipped, or mirrored, in order to get the best effect. This effect is super easy in iOS 13; simply open the image in Photos, tap Edit, and use the mirror/flip icon. Images in mirrors are flipped around right to left, so this lets you take a selfie that looks like you do in the mirror, and can also be useful when you need to imbed an image in a collage or other media, since sometimes the direction the subject is facing makes all the difference. Read on for how to horizontally flip pictures or images in the Photos app on the iPhone.