I love the Notes app for the ability to, well, take notes on my iPad wherever I am. But up until now, to use the Notes app with another app, you've needed to enter Split View. Now, with iPadOS 15, available to the general public in fall 2021, you can pull up a Quick Note anywhere, from any app. Let's learn what you can do with the new Quick Note tool.
Related: What iPad Do I Have? How to Identify Apple's Different iPad Models & Generations
Jump To:
* Quick Note & the Notes App
* Call Up a Quick Note from Any App
* Add Links to Your Quick Note
* Resize Quick Note
* Switch between Quick Notes
* Dismiss a Quick Note
* Delete a Quick Note
* Share & Print Quick Notes
Quick Note & the Notes App
Quick Note is not a replacement for the Notes app. Think of it more like an addition and upgrade: Quick Note works with the Notes app to make your note-taking on iPad more versatile and powerful. Now, you don't have to fumble with setting up Split View in order to take notes while working in another app. Instead, you can open a Quick Note right from any app, add links to your notes with a single tap, keep your notes easily accessible at all times, and more. You can access all your Quick Notes from the Notes app, as well. To learn more about new iPadOS 15 features, check out our Tip of the Day newsletter.
I can't possibly cover every single way you can use Quick Note on your iPad, but I will go over some basics to get you started in Quick Note. Before we begin, make sure you have updated your iPad to run iPadOS 15 (currently available in its public beta version).
Call Up a Quick Note from Any App
You won't find a Quick Note app on your Home screen or in your App Library, but you can summon a Quick Note at any time, from any app, or even when an app isn't open at all. Here's how:
* Open an app you'd like to take a note about, like Safari, or just stay on your Home Screen if you'd like.
* Swipe up from the bottom-right corner of your iPad. A Quick Note should open.
* Tap anywhere in the Quick Note window to begin typing, or simply start scribbling with your Apple Pencil or third-party stylus.
* Tap the grid icon to see your Quick Note in the Notes app.
Now you can jot down whatever's on your mind!
Add Links to Your Quick Note
Quick Note has some very cool features that work with Safari and other apps to make compiling notes with links easier than ever.
Create a Link When You Create a Quick Note
You can add links to a Quick Note simply by creating a new Quick Note in Safari.
* Open Safari.
* Navigate to the web page you would like to save a link to.
* Swipe up from the bottom-right corner to open Quick Note.
* If you have a Quick Note already open, you can add a link to your existing note or tap the new note icon.
* Tap Add Link.
* Now a link has been added to your Quick Note.
Anywhere you open this Quick Note, you can tap on the link and be taken back to the page. You can even use this feature in Apple Maps to save a link to a specific location, or in Messages to add a link to a specific conversation.
Create a Link With Text in a Quick Note
You can also highlight text and add the text to a Quick Note—this will also create a link in the Quick Note that will take you right back to the location on the web page.
* Make sure you are still on the Safari page you'd like to copy text from.
* Open Quick Note by swiping up from the bottom-right corner of your iPad.
* Select the text you'd like to copy into your Quick Note by tapping and holding the text.
* Drag the cursor to include as much text as you need.
* Tap Add to Quick Note.
* The text will be copied into your Quick Note along with a link to the page you copied it from.
You can pull up this Quick Note anywhere else on your iPad and tap the link to bring you back to the exact spot on the page where you copied the text.
Resize Quick Note
My one gripe with Quick Notes is that the window can sometimes get in the way of what I'm trying to do in other apps. If you want to make your Quick Note smaller, so you can see more of the app behind it, you can do that with just a quick pinch of the fingers. If you have the opposite problem and would like your Quick Note to be bigger, you can do that too. Here's how:
* Open a Quick Note by swiping up from the bottom-right corner of your iPad.
* Place two fingers on your screen on top of the Quick Note window and pinch your fingers in to shrink the Quick Note window.
* Drag your fingers out to enlarge the Quick Note window.
* Release your fingers when the window is the size you prefer.
Switch between Quick Notes
If you've made multiple Quick Notes, you can easily scroll between them from the Quick Note window, or you can see them all together in the Notes app.
Scroll through Quick Notes
* Open a Quick Note by swiping up from the bottom-right corner of your iPad.
* If you have created more than one QuickNote, you'll see a row of gray dots at the bottom of the window (these will fade after a moment).
* Swipe to the left or right to scroll through all available Quick Notes.
Find Quick Notes in the Notes app
* Open the Notes app.
* If you have an existing note open, tap Notes in the top-left corner.
* Tap Folders.
* Tap Quick Notes.
* You'll see a list of all Quick Notes you've made.
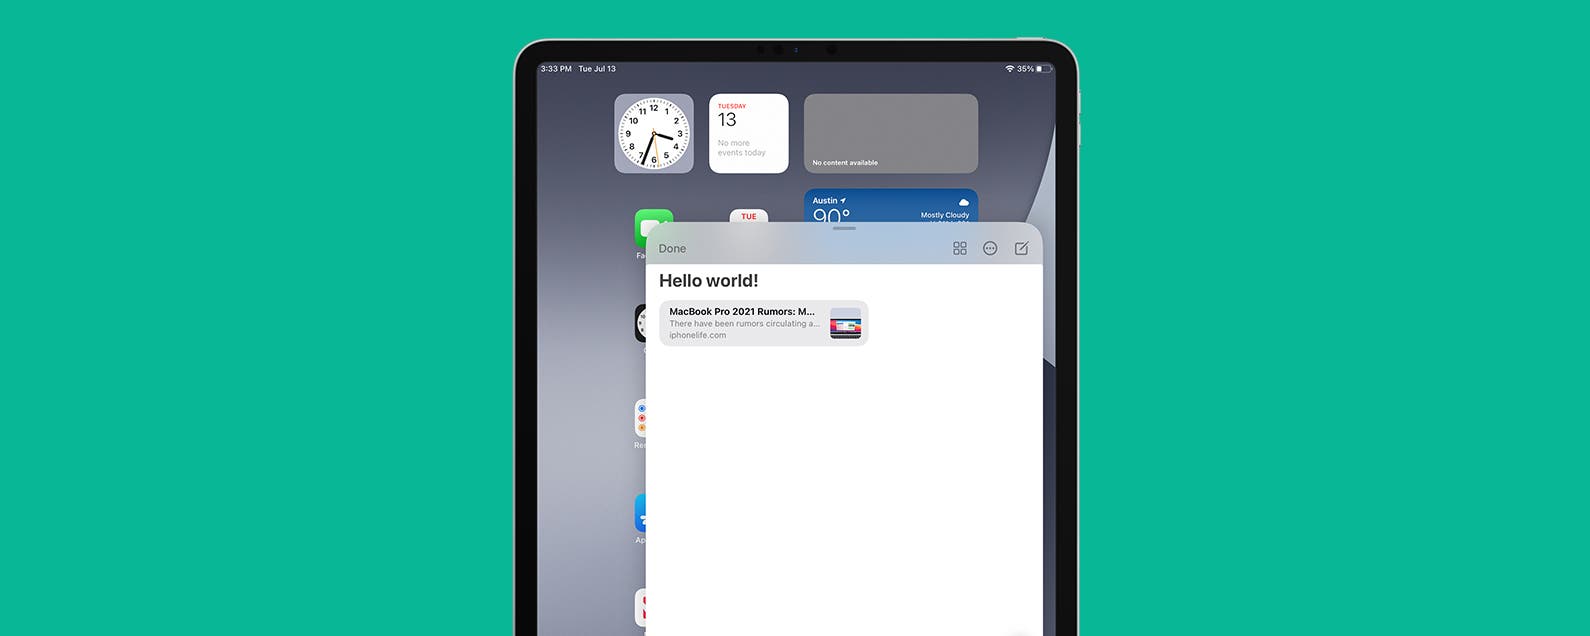
Dismiss a Quick Note
Now that you have a Quick Note open, how do you get rid of it? There are a few ways you can dismiss a Quick Note and get back to your app.
Dismiss a Quick Note by Closing the App
You can minimize a Quick Note any time you close the app you're currently using Quick Note with.
* Swipe up from the bottom of your iPad to close the app and minimize Quick Note.
* You will see a tab on the side of your screen where the Quick Note is minimized. Tap the tab.
* Your Quick Note will reopen.
Dismiss a Quick Note by Swiping It to the Side
You can also minimize Quick Note by swiping it away to the side of your screen.
* Tap and hold the top bar of the Quick Note.
* Quickly swipe the Quick Note to either side of your screen.
* The Quick Note will be minimized to a tab. Tap the Quick Note tab to reopen it.
Close a Quick Note by Tapping Done
Unlike the above two tips, this method will close Quick Note entirely (never fear, it's easy to get back).
* Make sure Quick Note is open on your screen.
* Tap Done.
Now Quick Note is closed and can be reopened by swiping up from the bottom right corner of the screen.
Delete a Quick Note
If you're done with a Quick Note and want to get rid of it, here's how to delete it:
* Open Quick Note by swiping up from the bottom-right corner of your screen.
* Tap the more icon.
* Tap Delete.
That's it. That particular Quick Note will bother you no more!
Share & Print Quick Notes
Say you've used Quick Note to put together the perfect itinerary for a weekend trip with the family. Now, you can share it directly with your family, either digitally or by printing straight from Quick Note.
How to Share a Quick Note
* Open Quick Note by swiping up from the bottom-right corner of your screen.
* Tap the more icon.
* Tap Share.
* Tap a contact to share the Quick Note with, or an app to send the Quick Note through.
Keep in mind that any links you've created in the Quick Note will not be shared, only the text. So, for instance, if you send a Quick Note that includes a link to an article you found online, the recipient will only see the article's headline, not a link to the article itself. Maybe in a future iPadOS update we'll get that functionality, but for now, we must soldier on.
How to Print a Quick Note
* Open Quick Note by swiping up from the bottom-right corner of your screen.
* Tap the more icon.
* Tap Share.
* Tap Print.
* If your preferred printer is not already selected, tap on the Printer section to select a printer.
* Select the printer you'd like to use.
* Tap Print again.
Now you should be ready to get started exploring in Quick Notes and find new tips and tricks of your own! How-ToiPadAppsNotesProductivity & BusinessMaster your iPhone in one minute a day: Sign up here to get our FREE Tip of the Day delivered right to your inbox.
http://dlvr.it/S4vp16