Friday, March 31, 2023

Samsung Named ENERGY STAR Partner of the Year for Continued Environmental Commitment

Recognizing our commitment to sustainability as demonstrated by our environmental strategy, Samsung Electronics America today received two 2023 ENERGY
http://dlvr.it/SlmHxX

Samsung Electronics Updates ‘Try Galaxy’ App for Non-Galaxy Users To Explore the Latest Galaxy S23 Series Experience

Samsung Electronics announced its enhanced “Try Galaxy” app, which allows users of non-Galaxy smartphones1 to test drive new features from the
http://dlvr.it/SllmbG

Clean Energy Charging: What Does It Mean & How to Turn It Off (2023)

What to Know * Clean Energy Charging was added in iOS 16.1 and is designed to reduce your iPhone's carbon footprint. * This feature can suspend charging for your iPhone but is unlikely to affect your charging habits. * To turn off Clean Energy Charging, open Settings > Battery > Battery Health > Clean Energy Charging. You may have heard about Clean Energy Charging since Apple recently added this eco-friendly feature to your iPhone. But what is Clean Energy Charging? What does it do? It is turned on by default, leaving many wondering if their iPhones are now going to charge slower or less efficiently. However, that is not always the case. Clean Energy Charging is a great new feature. Find out why below! Jump To: * What Is Clean Energy Charging? * Why You Should Use Clean Energy Charging * How to Turn Off Clean Energy Charging Apple Clean Energy Charging: What Is It? So what is Clean Energy Charging? This new iPhone feature works by selectively charging your iPhone when lower carbon emission electricity is available. This helps decrease your iPhone's carbon footprint and reduce the environmental impact. Does this mean your iPhone will charge slower now? Yes and no. To learn more about how your iPhone functions, be sure to sign up for our free Tip of the Day newsletter. Now, let's take a look at why you should use Clean Energy Charging. Why You Should Leave Clean Energy Charging On If lower carbon emission electricity is not available, your iPhone will wait to start charging until it is. However, your iPhone will send you a notification about this, and, if you absolutely need your phone to charge right away, you can tap and hold the notification. Then, simply tap the Charge Now option, which will allow you to immediately begin charging your iPhone. However, most people tend to charge their phones overnight while they are sleeping. If that's you, it is highly unlikely that you will experience any negative side effects by leaving this feature turned on. Since most people are less active at night, there are more opportunities for lower carbon emission electricity to become available. So your phone will more than likely be ready to use when you get up in the morning.  Personally, I have not noticed a difference in my charging routine while using my iPhone with Clean Energy Charging turned on. I even regularly plug in my phone during the day and have yet to encounter the notification that my phone can't be charged (I even tried many times to get the notification to appear so that I could get a screenshot for this article, but I had no success). I say leave it on. It doesn't hurt you, it costs nothing to leave the feature toggled on, and it has a small positive impact on the environment. In fact, Apple added Clean Energy Charging in iOS 16.1, which at the time of this writing was more than four months ago, and people seem to only just now be finding out about it. So if your iPhone is up-to-date and you haven't seen any Clean Energy Charging notifications yet, it's unlikely that this feature has had any sort of noticeable effect on your charging habits. How to Turn Off Clean Energy Charging If your iPhone is charging slowly or you just don't want to use Clean Energy Charging, here's how to turn it off: * Open the Settings app and tap Battery. * Tap Battery Health & Charging. * Tap the toggle next to Clean Energy Charging to turn it off. * Select whether you only want to turn Clean Energy Charging off until tomorrow or turn it off completely. With Clean Energy Charging turned off, your iPhone should charge the way it did before iOS 16.1. Next, find out how to turn off Optimized Battery Charging. FAQ When and where does Clean Energy Charging activate? Like Optimized Battery Charging, Clean Energy Charging learns from your charging habits and only activates once it knows you're charging your phone at home or at work. It will not activate if your charging habits are too variable or if you're in a different location than usual, so if you're traveling and trying to charge your iPhone at the airport, you likely don't need to worry about Clean Energy Charging stopping you. What settings need to be turned on for Clean Energy Charging to work? First and foremost, you need to have Clean Energy Charging enabled, as seen in the previous section (except you'll be turning it on instead of off). Second, you need to go to Settings > Privacy & Security > Location Services and make sure Location Services are enabled. From that same screen, scroll down to the bottom and tap System Services. Check that System Customization is toggled on. From there, scroll down and find Significant Locations. Tap that and make sure the toggle is turned on. How-ToiPhoneBatteryChargingDevice ManagementMaster your iPhone in one minute a day: Sign up here to get our FREE Tip of the Day delivered right to your inbox.
http://dlvr.it/SllTm7

Thursday, March 30, 2023

[Video] Share Your Epic Moment on Epic Screen: Photobooth Hacked With 200MP ISOCELL Image Sensor

  The image sensor is a smartphone’s key component that determines the quality of photos and videos. Have you ever wondered the use of 200MP image sensors
http://dlvr.it/Slj0L3

Wednesday, March 29, 2023

Samsung Electronics Unveils Interactive Display With Enhanced Usability for Education at Bett 2023

  Samsung Electronics today unveiled a new interactive display with upgraded features and a powerful software solution at Bett (British Educational
http://dlvr.it/SlgCCQ

Samsung Electronics and the New York Mets Hit a Home Run, Unveiling Newest and Brightest Outdoor LED Technology at Citi Field

Samsung Electronics America and the New York Mets recently made sports history with the installment of the largest scoreboard across all professional
http://dlvr.it/Slf1Zx

View Edit History on Shared Notes (2023)

One of the best things to happen to my family is shared notes. But, something that has always been an issue is not knowing what or who changed something on a shared note. And while this may be somewhat of a niche issue, if you’re someone who stays organized and productive by using the Notes app and the shared notes feature, this might be really useful for you as well. Why You’ll Love This Tip * See who made changes to your shared notes. * Check what changes have been made recently to your shared notes. View Shared Note History with Show All Activity As work and other pursuits take our loved ones in all directions, being able to collaborate on shared notes in the Notes app on the iPhone is an excellent way for us to plan holidays, make shopping lists, or assemble data about our colleges' competing sports teams. But working on notes with other people can sometimes get confusing: who said what when? There are two distinct ways to see a shared note's edit history that are equally informative. I will show you both. If you’ve never used shared notes, check out our guide for how to share a note on iPhone. To continue getting the most out of your iPhone's Notes app, be sure to sign up for our free Tip of the Day newsletter. The first method you can use to track the activity of a shared note is a feature called Show All Activity. It allows you to see the time and date of each edit, as well as who made it. * Open the Notes app. * Open a shared note. * Tap the Add People icon at the top of the note. * Then, tap Show All Activity. * Now, you will be able to view recent changes made by other collaborators. The Activity view is separate from the text itself, so you won’t be able to see the text at the same time, but you can get a better sense of activity over time. For more iPhone Notes app secrets, be sure to sign up for our free Tip of the Day newsletter. View Shared Note History with Highlights The second method to track the activity on a shared note is called Highlights, and this will allow you to see edits and when they occurred directly next to the text itself. * To see Highlights, simply swipe from left to right while viewing the Note. * You can also access Highlights by tapping the Add People icon at the top of the note. * Then tap Show Highlights. * To get more info about each highlight, tap it. * You will see more detailed descriptions of the edits made to that particular section. Tap anywhere to get out of it. * Swiping left or going back to the Add People button will turn Highlights back off again. Now, you can easily see the notes history on your iPhone! How-ToiPadiPhoneAppsApple AppsNotesCommunicationMaster your iPhone in one minute a day: Sign up here to get our FREE Tip of the Day delivered right to your inbox.
http://dlvr.it/Sld8RL

Tuesday, March 28, 2023

[Interview] Natasha Durley Brings More of the Natural World to the Art Store

The natural world has inspired countless songs, photographs, movies and other works of art. Illustrator Natasha Durley also draws inspiration from nature and
http://dlvr.it/SlbldK

What to Do When iPhone Is Stuck on the Apple Logo (2023)

What to Know * If your iPhone screen is frozen, try force restarting the device. * When your iPhone is stuck on the Apple logo for an hour or longer, you may need to restore it with Recovery mode. * If the above methods don't work, there might be a hardware problem. Contact Apple Support. Is your iPhone stuck on the Apple logo? Or is it stuck on a loading screen and now you don’t know what to do? Fortunately, there are many ways to save an iPhone that has become unresponsive. In this article, we’ll go over some of the most common solutions for when your iPhone freezes up or is stuck on the Apple logo. Jump To: * How to Restart iPhone When Frozen * How to Enter Recovery Mode How to Restart iPhone When Frozen When updating your iPhone, you will likely see an Apple logo and a progress bar. Sometimes your iPhone will also restart several times during the update process. However, if you have found yourself stuck on that screen for longer than an hour, something has gone wrong. For more iPhone troubleshooting advice, be sure to sign up for our free Tip of the Day newsletter. The first thing you should try is force restarting your iPhone: * Press and release the volume up button. * Press and release the volume down button. * Press and hold the side button. * Wait for the iPhone to restart, and when you see the Apple logo reappear, release the side button. Sometimes, the simplest answer is the right one. A hard restart could be exactly how to fix a frozen iPhone. Of course, if that doesn’t work, there are more options to try. iPhone Screen Frozen? Try Recovery Mode If your iPhone is frozen, using recovery mode to restore it could help. However, putting your iPhone in recovery mode is a drastic step that should only be taken if you have no other options. Recovery mode allows you to restore your iPhone by re-installing iOS and setting the device up as if it were new. Warning: This method will completely erase your device, as if you just got it brand new, out of the box. Be sure that you have a backup of your iPhone before restoring it in recovery mode. Now, once you’re sure you have a backup of your device and you have no other options, you can follow the steps outlined in this article to put your iPhone in recovery mode. If neither of the above solutions solved why your iPhone is stuck on the Apple logo, then there might be a hardware issue. In that case, you will need to contact Apple Support or visit your local Apple Store for further assistance. Next, find out how to reset your iPad when it is frozen. FAQ Why does my iPhone keep restarting? When installing an update, your iPhone will typically restart several times. This is normal. You only need to be concerned if you see the Apple logo for an hour or longer. Why is my iPhone stuck on the Apple logo? We’ve covered how to fix your iPhone when it’s frozen on the Apple logo, but why exactly does it happen in the first place? No one can really say for sure. Perhaps the update file was corrupted during the download. Maybe there was a critical error when your iPhone was restarting. Software can sometimes behave unpredictably, so it could happen for any number of reasons. Top image credit: Primakov / Shutterstock.com How-ToiPhoneTroubleshootingDevice ManagementMaster your iPhone in one minute a day: Sign up here to get our FREE Tip of the Day delivered right to your inbox.
http://dlvr.it/SlZWw4

Are AirPods Worth It? We Know the Answer (2023)

What to Know * AirPods may be worth it to many due to their seamless integration with other Apple devices, specialized features such as Adaptive Transparency and Spatial Audio, and Find My capabilities. * The AirPods Pro 2 offer the most features that a broad range of users will enjoy. * If you're on a budget, you may do better with a cheaper third-party option. Are Apple AirPods worth it? As someone with a household already well stocked with headphones and earbuds, this was a tough question as I considered adding Apple's offering to the mix. The short answer: yes. Soon after getting the AirPods Pro 2, they became my daily drivers and I've all but forgotten all my other earbuds. Here's how to know if AirPods are worth it and who would benefit most from which model. Are AirPods Worth It? In my experience, yes, AirPods are worth it. Specifically, the AirPods Pro 2, though that's flexible based on your budget and needs. My article-writing adventures have taken me to all sorts of earbuds and headphones, many of which have a much higher price tag than the AirPods Pro 2, but after getting my AirPods, I stopped using the others almost entirely. Why? Let's break it down: * Seamless integration with other Apple devices. Instead of needing a separate app, my AirPods come with their own spot in my Control Center. Here I can adjust volume and switch between Noice Cancellation and Transparency modes. Plus, they can switch between which device they're pulling sound from automatically or with a simple click in my Bluetooth Devices menu. With my other earbuds, switching between devices is a whole rigamarole with disconnecting and reconnecting manually. * Lots of sound for little weight. My AirPods weigh less than most of my other earbuds and therefore don't make my ears as sore when I wear them for an extended period of time. Even with how lightweight they are, the sound quality and noise cancellation are impressive. * Spatial Audio, Adaptive Transparency, and top-tier Active Noise Cancellation. These three features make a difference. Spatial Audio and Active Noise Cancellation are available on most AirPods models (though the really good ANC quality doesn't come into play until the later generations of AirPods and AirPods Pro), but Adaptive Transparency is as of now exclusive to the AirPods Pro 2. Spatial Audio makes everything you listen to, but especially music, much more immersive, and the ANC of my AirPods Pro 2 is unmatched (at least in my current collection). As soon as I turn it on, the world mutes and I relax. Adaptive Transparency means I can hear the world around me with loud or repetitive sounds filtered out. I haven't found any other earphones so far that offer a comparable experience to having all three of these features. * Siri integration. Did you know you can activate Siri on your AirPods Pro? Just hold them stem and speak. No need to pull out any other device! A very cool and underrated feature. * Can be paired with any Bluetooth device. Even though they work so well with Apple devices, your AirPods can be paired with any Bluetooth device (even a smart TV!) and you'll still receive most, if not all of the benefits. So if you're not fully in the Apple ecosystem, they might still be worth it! * Find My support. The third-generation AirPods, AirPods Pro and AirPods Pro 2, and AirPods Max all have built-in Find My capabilities, so if you misplaced your earphones (which I do a lot), you can simply use Find My on one of your other devices to locate them, and, if you left them behind somewhere, you'll get a notification once you're out of range. With all that in mind, what reasons would AirPods not be worth the purchase? There are a few ways AirPods might not be suitable for a buyer: * You're an audiophile with specific needs. If you have specialty needs for your earphones, another kind of earbuds might be your better bet. AirPods don't offer a lot of customizable settings, so those really into sound tinkering may not be satisfied. * You're looking for budget earphones. If you're looking for earbuds that do the job without a lot of bells and whistles for a minimal price, AirPods likely won't be for you. * You need earbuds with a long battery life. AirPods are not known for having a super long battery life, so if you find yourself needing to use them for long stretches at a time and want something that is really going to last you, you might have better luck elsewhere. Bottom line, in most circumstances, I strongly feel AirPods are worth the purchase, especially if you're springing for the AirPods Pro 2. I've tried a lot of earbuds and my AirPods are the easiest and most intuitive to use, plus the noise cancellation is unmatched. However, there are a few situations where it might be good to see what else is out there. OpinionAirPodsHeadphonesFind MySiriBluetoothShoppingMaster your iPhone in one minute a day: Sign up here to get our FREE Tip of the Day delivered right to your inbox.
http://dlvr.it/SlZ9fm

Monday, March 27, 2023

Oops! Our Most Embarrassing Tech Stories

We’ve all had it happen: you get a little too comfortable with autocorrect, and all of a sudden you’ve sent a horrifying text to your mother-in-law when all you wanted to do was ask if she wanted to come over for dinner at six. And then there are the times when the real world decides to assert its dominance over our digital fantasy world. How many of us have fished our iPhones out from bodies of water and hopefully dumped them into bags of rice? Devices that cost us thousands of dollars brought low by the humble toilet. PowerPoint presentations gone wrong, errant sleeves sending coffee cups swan diving onto coworkers’ keyboards, financially illiterate pets making our expensive tech toys their expensive chew toys. Who can forget the lawyer who got his 15 minutes of fame when he couldn’t remove the cat filter over his face in a courtroom Zoom call? There are so many ways our favorite gadgets can humiliate us. Below, some iPhone Life readers have been brave enough to share with us their most embarrassing tech stories. New iPhone and Apple Watch. Went to a funeral. Turned off iPhone but didn’t know my watch could still ring. Yep, it rang, and of course, everyone turned and glared at me. - Anonymous Short but devastating. In this day and age, you really have to worry about being embarrassed by your own watch. I give this story 3 out of 5 calls at inappropriate times. To follow this new contender for saddest short story ever written, let’s have Jacklyn’s very long, very bad day. You should know this all happened within a 12- to 13-hour period. My bathroom is very, very small. I’ve been trying to find possible ways to make it less cluttered and still be able to have my daily essentials in it. You should also know that I’m the type of person who constantly misplaces items or forgets where my key, phone, etc. is. One morning I was running a little behind and didn’t want to be late for work. I kept running into my bathroom to grab something off the shelf above my toilet. I have a cabinet about two or three feet above my toilet, but I sometimes forget to shut the toilet lid to keep from accidentally dropping anything in it. While I was rushing, I grabbed for a beauty accessory from that cabinet and accidentally dropped my new iPhone in the toilet. Then as I was trying to dry my phone, I went to reach for some tissues in that same cabinet and forgot that I had my Beats Fit Pro earbuds on top of the tissue box. They fell in the toilet as well. Unfortunately, it does not end there. After this disastrous morning, I was finally home from work and unloading groceries I just bought. I’m going back and forth, rushing around again because all I wanted to do was put my feet up and have a much-needed glass of wine. Well, when I was done putting my groceries away, I realized that I couldn’t find my iPad anywhere! I was racking my brain. I even thought I might have left it at work. All of a sudden, something just clicked. I opened up my freezer, and my iPad was in it. Must have been in there at best for 45 minutes. In closing, I thank God for paying extra for an extended and better warranty! -Jacklyn C. Wow, Jacklyn! That is one terrible, horrible, no good, very bad day. At least it wasn’t a very expensive one, too. Let that be a lesson for all of us clumsy folk: get the extended warranty. I give this story 4 out of 5 shattered iPhone screens. Next up, we have another story you’ll have a hard time forgetting. I was at a church lectureship with 30,000 other Christians. There was an extremely popular preacher that everyone had gathered to hear. He put his portable mic on before going to the men’s room and put this PowerPoint up on the overhead from his phone. Then his grandson called him on FaceTime. When he answered it, it shut off the PowerPoint and put the FaceTime on the overhead. Everyone in the audience could hear him using the men’s room. -Linda L. It’s kind of cheating to use someone else’s embarrassing moment, but I’ll allow it because this is just too funny (and mortifying!). 4 out of 5 text messages from your best friend appearing on the screen while you’re giving a work presentation. I brought my brand-new iPhone home and plugged it in for the first time on my kitchen counter. My husband witnessed a strange incident. Our darling kitty jumped up on the counter and mistakenly thought the power cord was a mouse tail. She pulled on it, and to his horror, the phone plopped into the sink, which was full of hot water and unwashed dishes. The phone did not survive, but thanks to Apple Care, it was replaced very quickly. Kitty was not punished but got her own play phone with a ”mouse tail.” Wish I had a photo! -Rosemary Rosemary, let’s not give everyone else’s cats ideas on how to get new toys! 3 out of 5 chewed-up Lightning cables. Next up is a genre I like to call “iPhone Life After Dark.” These stories are a bit spicy, so I’ve edited them to maintain the air of sophistication and dignity that we, the iPhone Life team, value so highly (but not highly enough to not include these stories at all). I thought I texted, “I’ll meet you to go over it at six.” My phone took over and said, “I’ll meet you at the corner for…” -Sue C. Well, you can use your imagination. Let he whose phone has never sent an accidentally suggestive text cast the first stone. 3 out of 5 monocles shattering upon receipt of a scandalous message. While speaking to my daughter on the phone, she mentioned [redacted to protect the innocent] had his first girlfriend. My response was, “I expect ya better buy some condoms!” A little later, while checking my email, I noticed that Alexa had ordered three dozen large condoms! I had no idea at the time who had put in the order and falsely accused my 40-year-old son of using my account! I called Amazon to cancel the order and told them I never placed it. They told me “Alexa” did. When I said, “I expect ya,” it must have heard “Alexa,” and put in the order. Once canceled and refunded, I thought that was the end of it! Boy, was I surprised and embarrassed a few days later, when I received a notification on my phone while I was waiting for a meeting to begin. I was told that my package containing three dozen condoms had been delivered! I am a seventy-two-year-old widow!! Thanks, Alexa! Alexa is no longer allowed to listen in on my conversations, and I will never have my notifications announced unless I’m home alone! -Anonymous I’ve got to say, Anonymous takes the cake here. Not only did she accidentally order three dozen—ahem—adult accessories, but she then falsely accused her son of being responsible and had the delivery of said adult accessories announced in a work meeting! That’s it, folks, pack it up. This is the one. 5 out of 5 reasons to never trust Alexa again. Thank you again to everyone who shared their embarrassing tech stories with us. Even if your story wasn’t included, rest assured I humiliated myself laughing at it while I forgot my mic was on in a Zoom meeting. If you are cursing the missed opportunity to make hay from your mortifying tech disaster, make sure to subscribe to our Tip of the Day newsletter. You’ll not only get helpful Apple device tips from us every day, but you won’t miss the next call for your best tech-related stories. Illustration by Mikaila Maidment, mikailamaidment.com Apple WatchiPadiPhoneSmart HomeSpeakersApple AppsFaceTimeAmazonLifestyleMaster your iPhone in one minute a day: Sign up here to get our FREE Tip of the Day delivered right to your inbox.
http://dlvr.it/SlYkrX

Sypherpk and NickEH30 Introduce Odyssey Universe: A New World Created in Fortnite

Exciting news for gamers across the globe: Samsung Electronics has opened Odyssey Universe, a new customized map created in Fortnite, one of the most popular
http://dlvr.it/SlX5JL

Friday, March 24, 2023

Why the Army Protecting the Vatican Added Samsung Knox Suite to Its Arsenal

The Pontifical Swiss Guard (Guardia Svizzera Pontificia or GSP) is responsible for protecting the Pope and the Papal Palace in Vatican City, a location visited
http://dlvr.it/SlPDFD

Thursday, March 23, 2023

How to Add Siri Suggestions to Home Screen on iPhone (2023)

While I have a lot of love for many of the iPhone widgets, the one that stands out above all the rest is the Siri Suggestions Widget. The magical thing about the Siri Suggestions Widget is that it always knows what your most used apps or shortcuts are and adjusts its suggestions based on the apps or features you open and use most often. Why You'll Love This Tip * Never lose track of your most frequently used apps with this widget that always has them grouped together and easily accessible. * The Siri Suggestions widget will update according to your usage and will automatically adjust to show you the apps you love the most. Related: How to Add the Siri Suggestions Widget to iPad Home Screen How to Add the Siri Suggestions Widget to Home Screen The Siri Suggestions widget is cool because, not only can you add it to either your Home Screen or Today View, but you can choose whether you want it to only display your favorite apps, or if you’d like to also see shortcuts to actions you perform frequently. If you like cool tips like this about using your Apple devices, be sure to sign up for our free Tip of the Day! * You can add widgets to both your Home Screen and the Today View. Depending on where you want to add the Siri Suggestions Widget, long press any app on your Home Screen or in Today View to open the Quick Action menu. * Tap Edit Home Screen. * In the top left corner, tap the white plus sign. * Scroll down and tap Siri Suggestions. * From here, you can choose to have only your frequently used apps displayed, or, if you scroll to the right, you can select different sizes for your widget, and functions that include shortcuts to actions.  * When you’ve found one you like, tap Add Widget. * When you’ve finished, tap Done. Be prepared for these suggestions to change over time according to your habits. And that's how to add the Siri Suggestions widget to your Home Screen. You can also add the Siri Suggestions widget to your iPhone's Today View by following the same steps from your Today View. This might be a good option for you if you want the widget, but don't want it to take up so much space on the Home Screen. How-ToiPhoneAppsSiriApple AppsThird-Party AppsWidgetsCustomization & PersonalizationMaster your iPhone in one minute a day: Sign up here to get our FREE Tip of the Day delivered right to your inbox.
http://dlvr.it/SlK3dZ

Tuesday, March 21, 2023

Samsung Announces Ultra-Wideband Chipset With Centimeter-Level Accuracy for Mobile and Automotive Devices

Samsung Electronics, a world leader in advanced semiconductor technology, today announced its first ultra-wideband (UWB) chipset, the Exynos Connect U100. With
http://dlvr.it/SlCtjq

Monday, March 20, 2023

[Interview] Realistic Graphics in Real-Time: Samsung Experts Explain Ray Tracing for the Galaxy S23 Series

As the popularity of smartphones has increased, so too has the popularity of mobile games in the mainstream gaming market. Today, more and more consumers want
http://dlvr.it/Sl8wlC

Friday, March 17, 2023

[Design Story] Refined, Powerful, Essential: Galaxy Book3 Series

  Essential Design, an approach that sees the refinement of a product’s design down to its most fundamental elements, serves as the basic design principle
http://dlvr.it/Sl2Q1y

[World Sleep Day] Not All Sleep Is Equal: How Galaxy Watch5 Series Helps You Get the Sleep You Want

  There’s a reason we sleep for approximately a third of our lives — sleep enables our bodies and minds to recover, and a lack of it reduces our ability
http://dlvr.it/Sl1kdd

Thursday, March 16, 2023

How to Change Background on iPhone Based on Time of Day (2023)

Learn how to utilize the iPhone’s Focus modes to change your backgrounds throughout the day. Use a more professional-looking background while at work, a bright and sunny wallpaper on your days off, and then a darker wallpaper for the evening while you wind down. You can use Focus mode to change wallpapers on your iPhone according to the time of day or days of the week.  Why You’ll Love This Tip * Customize your iPhone wallpaper and notification settings according to the time of day or day of the week. * Use fun backgrounds on your days off and professional wallpapers while at work. * Have your background switch automatically with pre-set schedules, so you don't have to manually set a new Focus each time you want to switch. Change Wallpaper on iPhone according to Time of Day To change your iPhone wallpaper depending on the time of day, you can use a combination of preset Focus modes and your own custom Focus modes. In each Focus’s settings, there is an option to customize the wallpaper for both the Home and Lock Screens, allowing you to change the background of your phone by switching Focus modes. For more iPhone customization tips and tricks, be sure to sign up for our free Tip of the Day newsletter. Now, here’s how to change backgrounds on iPhone using Focus: * On your iPhone, open Settings and tap Focus. For this example, I will be using Personal, Sleep, and Work, and then I will be creating my own Focus called Evening. But this is your iPhone, so you should do whatever works best for you! That’s the fun part about customizing. * First, I’ll set up Personal. This will be my daytime wallpaper while I’m not at work. If you don’t see Personal in your list of Focuses, tap the Plus icon in the top right. * Tap Personal. * Tap, Customize Focus. * Choose the people and apps you’d like to receive notifications from during this time of day. This will most likely vary according to which Focus you are setting up. You may want to limit certain apps and people from notifying you if you're in Work Focus, for instance. * Next, get creative and choose the background you want for both your Lock Screen and your Home Screen. * You can play around with Apple’s preset backgrounds, use your own photos, or go to Google or Pinterest to find fun wallpapers as well. For a more detailed look at choosing a Lock and Home Screen wallpaper for your Focus, check out this article. * When you’ve finished putting the wallpaper together, tap Add Schedule. * Select Time. * I work four days a week, Mon-Thur from 9-6 pm, so I will set Personal to only turn on from 9-6 Friday through Sunday. * When you’re finished customizing the time, tap Done. * And now you have your first Focus mode set up! Now, go back to Focus settings and set up Work and Sleep based on your own schedule, each with its own individual wallpaper. Simply repeat steps 1-11 for each Focus mode that you want to customize, selecting the times and days of the week you want these Focuses to be activated. * Then, to create your own custom Focus mode, tap the Plus in the top right. * Tap Custom. * Name your Focus, and pick a color and an icon to go with it. I will name mine Evening. Then, tap Next. * Tap Customize Focus, and now you can set up this Focus mode to come on after work or when the sun sets. Now that you have individual backgrounds set up to correspond with your Focus settings, anytime you shift in and out of a Focus mode, your wallpaper will change. By setting a schedule for each Focus, they will each activate on their own at the specific time or location that you set, automatically changing the wallpaper as well. You can also manually turn on a Focus any time you'd like. This allows you to have the best of both worlds by giving you a fun Home Screen when you’re on your time off, then automatically switching to a more professional wallpaper while at work, and a darker, more relaxed background for winding down in the evening. Of course, you don’t have to set your Focus modes exactly as in the above steps. Feel free to play around with your Focus modes or create your own custom Focus for specific days of the week or times of day. Next, find out how to share your Focus status with your contacts. How-ToiPhoneSettingsFocusWallpaperCustomization & PersonalizationMaster your iPhone in one minute a day: Sign up here to get our FREE Tip of the Day delivered right to your inbox.
http://dlvr.it/Skxpvk

Wednesday, March 15, 2023

The Samsung Galaxy A54 5G and Galaxy A34 5G: Awesome Experiences for All

Samsung Electronics today unveiled the Galaxy A54 5G and Galaxy A34 5G, two innovative smartphones that advance Samsung Galaxy’s commitment to designing
http://dlvr.it/SkwJC6

How to Set a Different iPhone Home Screen Layout at Work (2023)

If you want to crack down on the way you use your iPhone while you’re at work, this tip about how to ensure productivity might be perfectly suited to your habits. With a Work Focus, you can customize your Home Screen to ensure you have fewer distractions throughout the day. Let’s go over how to set a different iPhone Home Screen layout while at work! Why You’ll Love This Tip * Stay productive and on-task at work by minimizing Home Screen distractions. * Switch to an entirely different Home Screen automatically upon arriving at your office. Change Home Screen on iPhone When You Arrive at Work You can set a Focus to automatically shift depending on your location or the time of day. And because you’re really serious about staying productive, setting the Focus mode to automatically turn on when you’ve entered the office ensures you won’t sit down at your desk and immediately open social media. For more Focus mode tricks, be sure to sign up for our free Tip of the Day newsletter. Now, here’s how to automatically change your Home Screen on your iPhone when you arrive at work: * Open Settings on your iPhone, and tap Focus. * Since this tip is work-related, tap Work, or, if you don’t see the Work Focus, tap the Plus icon, and add the Work Focus. * Scroll down to Customize Screens, and tap Edit or Choose under the Home Screen icon (depending on if you’ve customized this Focus before). * Tap a Home Screen under Create a New Page. * Tap Edit Apps. * Pick and choose the apps you want to appear on your Home Screen while you are in this Focus mode. Then, tap Done when finished. * Tap Add. * Then, tap Edit under the new Home Screen again. * Uncheck all other Home Screens you do not want access to when you’re in this Focus, and tap Done. * Next, scroll down to Set a Schedule, and tap Add Schedule. * Tap Location. * Enter the address you want to trigger the Focus mode with. * Tap Done. With your Work Focus set up, your iPhone will automatically shift into a less distracting Home Screen the minute you arrive at work. And the best part is, you don’t even need to change the settings yourself! Now, every time you look at your iPhone, you won’t be tempted by the Facebook app staring back at you, with notifications waiting to be read. Additionally, you can follow the steps above to make these edits to any preset or custom Focus mode depending on your needs. Lastly, don't forget to customize your Focus Lock Screen, as well. How-ToiPhoneSettingsFocusHome ScreenProductivity & BusinessMaster your iPhone in one minute a day: Sign up here to get our FREE Tip of the Day delivered right to your inbox.
http://dlvr.it/SktlP6

Tuesday, March 14, 2023

See Every Detail, Feel Every Moment: Samsung’s Ultra-Large Neo QLEDs Bring Content to Life Like Never Before

Gone are the days of sitting nose-to-television in order to see every detail and every moment of the action. Now, larger TV screens are not popular for just
http://dlvr.it/SkrNsY

How to Add AirPods to Find My iPhone Easily (2023)

What to Know * Your AirPods are automatically added to your Find My account when you first connect them to your iPhone. * If your AirPods are not appearing in Find My, check your AirPods settings: Settings > AirPods Settings > Find My network. * AirPods Setup Incomplete: simply place your AirPods back in the case, close it, then re-open it, and let your AirPods reconnect. Find My can be used to track more than just your iPhone. You can track all of your Apple devices, including your AirPods. Of course, before you can do that, you have to add them to your iCloud account. Let’s go over how to add AirPods to Find My iPhone. Jump To: * How to Add AirPods to Find My * How to Fix AirPods Setup Incomplete * Frequently Asked Questions How to Add AirPods to Find My Before you can add your AirPods to Find My be sure you know how to set up Find My iPhone first. Then, when you connect your AirPods to your iPhone for the first time, they will automatically be added to your iCloud account, and immediately appear in Find My. However, sometimes software doesn’t work the way it’s supposed to, so if your AirPods are not appearing in Find My, we’ll show you how you can add them. For more AirPods advice, be sure to sign up for our free Tip of the Day newsletter. Note: The steps below will work for all generations of AirPods Pro and AirPods Max, as well as third-generation AirPods, but if you have first- or second-generation AirPods, you will not see the toggle described below. Second-generation AirPods can still connect to the Find My network if you have updated to iOS 16. Now, here’s how to add AirPods to Find My iPhone: * With your AirPods connected to your iPhone, open the Settings app, and tap your AirPods. * Scroll down, and if the toggle next to Find My network is not turned on, tap it to enable Find My (the toggle will be green and positioned to the right if it is turned on). * If your AirPods are second-generation or older, this toggle will not appear. In that case, move on to the next section. Once you turn the Show in Find My toggle on, your AirPods should start appearing in the Find My app. How to Fix AirPods Setup Incomplete If you are seeing an AirPods Setup Incomplete error message when trying to view the location of your AirPods in Find My, this just means that you need to reconnect your AirPods to your iPhone. Luckily, this is a very simple process: * If you see the AirPods Setup Incomplete error below, place both AirPods back in the case. * Close the case, and wait a few seconds. * Open the case again. * Once the pop-up shows your AirPods are connected, dismiss it. * Your AirPods should now show in Find My. Now, you can easily find your AirPods if you ever lose them. If you are still having trouble getting them to show up in Find My, you can also try resetting your AirPods. FAQ How to find AirPod case? If you have AirPods Pro (2nd generation), you can track the case separately from the AirPods themselves. All other AirPods models do not have trackable cases. How to find AirPods? If you have already lost your AirPods and you are searching for them, we have a separate article on how to find your AirPods with your iPhone. AirPods can only be tracked one at a time. Once you find one AirPod, you can put it back in its case, and the other one will appear on the map, after a refresh. However, with the AirPods Pro (2nd generation), you can track each individual AirPod, as well as the case. Can you use Find My AirPods on Android? If your AirPods have already been added to Find My in the past, you can use the iCloud website to find them, even if you primarily use your AirPods with an Android device. You can also use third-party apps to locate nearby AirPods. However, there is no native Find My app on Android. How-ToAirPodsiPhoneAppsFind MyApple AppsSettingsDevice ManagementMaster your iPhone in one minute a day: Sign up here to get our FREE Tip of the Day delivered right to your inbox.
http://dlvr.it/Skr6Yt

App Store Not Working? How to Fix Common App Store Issues (2023)

What to Know * If you can’t connect to the App Store, check your network and data settings. * If you can't download apps, check your iPhone storage and your Screen Time Settings. * To enable in-app purchases, go to Screen Time > Content & Privacy Restrictions > iTunes & App Store Purchases > In-app Purchases > Allow. The App Store is one of the iPhone’s most defining features. It’s where you go to download other apps onto your phone. But what do you do when the App Store is not working? Whether you are having trouble connecting to the App Store, downloading apps, or making in-app purchases, we are here to help. In this article, we’ll go over how to troubleshoot the most common App Store issues. Jump To: * What to Do When You Cannot Connect to the App Store * Why Can’t I Download Apps on My iPhone? * How to Enable In-App Purchases * Why Won’t the App Store Load on My Mac? What to Do When You Cannot Connect to the App Store It can be incredibly frustrating when you’re trying to download an app, and you keep getting an App Store error that tells you to try again later, or you simply can’t connect to the App Store in the first place. For more App Store troubleshooting advice, be sure to sign up for our free Tip of the Day newsletter. Now, let’s get started with what to do when you cannot connect to the App Store. Check Your Network Connection The first thing to do whenever you are having connectivity problems is to check your device’s network connection. The easiest way to do that is by opening the Control Center. You can do that by swiping down from the top right edge of the screen on iPhones without a Home Button or by swiping up from the bottom edge of the screen on iPhones with a Home Button: * In the top left of the Control Center, you’ll see your carrier name and connection status. An LTE, 4G, or 5G icon indicates that you are connected to your cellular network. * If you see the fan-like Wi-Fi icon, you are connected to Wi-Fi, and you should have no problems connecting to the App Store. If you have a strong network connection but the App Store is still not working, the next step is to check that you have cellular data enabled for the App Store. Check That Data Is Enabled for the App Store One of the many useful features of iOS is that you can restrict certain apps from using cellular data. This can be useful if you are not on an unlimited data plan, but it can also be a double-edged sword if an app that you need to use while out and about has its access to cellular data disabled. To check: * Open the Settings app, and tap Cellular. * Scroll down and find the App Store in the list under Cellular Data. Make sure the toggle is green and positioned to the right to indicate that the App Store has access to cellular data. * If the toggle is gray and positioned to the left, that means cellular data is disabled for that particular app. You can tap the toggle to enable it. If cellular data is already enabled for the App Store and you’re still having trouble accessing it, you’ll want to make sure the date and time are correct. Check Date & Time Settings Sometimes, if your device’s date and time settings are incorrect, it can interfere with other operations. * Open the Settings app, and tap General. * Tap Date & Time. * If the toggle next to Set Automatically is not enabled, tap it so that it turns green and is positioned to the right. Generally, it is a good idea to let your device set the date and time automatically. Your iPhone can use your location and internet connection to set a more precise date and time than if you were to set it manually. Check Screen Time App Limits Screen Time allows you to set App Limits so that you can only use specific apps for a certain amount of time. Here’s how to check if you accidentally set an App Limit that is preventing you from downloading apps: * Open the Settings app and tap Screen Time. * Tap App Limits. * If you see an App Limit for the App Store, swipe left on it. * Tap Delete. * Tap Delete Limit to confirm. If you do not see an App Limit, then you’ll know that Screen Time is not preventing you from opening the App Store. Check for iOS Updates Apple regularly releases updates with bug fixes, so if there is a software-related glitch preventing you from connecting to the App Store, updating your device might help solve the problem. You can check for updates in the Settings app. If your iPhone is up-to-date, and none of the other solutions above seem to have made a difference, it might not be a problem on your end at all. Check Apple Support System Status If nothing you have tried has worked so far, and you still cannot connect to the App Store, check the Apple Support System Status page. This page can tell you whether or not the App Store is currently experiencing an outage of some kind. Why Can’t I Download Apps on My iPhone? So you’re able to connect to the App Store but you can’t download apps. What now? There are a few things you can try to remedy this situation. Firstly, I would recommend going through the steps in the previous section if you haven’t already. The App Store not working and being unable to download apps are similar problems, so it doesn’t hurt to troubleshoot them the same way. If those tips don’t work for you, there are a few extra steps to try to fix when you can't download apps on iPhone. Check iPhone Storage One possible reason for being unable to download apps is that your iPhone’s storage is full. Every electronic device has a limited amount of storage, and when you run out, you won’t be able to download any more apps. Here’s how to check: * Open the Settings app, and tap General. * Tap iPhone Storage. * On this screen, you can see how much storage is available, what types of files are taking up space on your device, and clear out any excess apps or files that you don’t need. For more advice on clearing out your device storage, check out these tips for freeing up space on your iPhone, as well as this article about clearing out System Data. Check Screen Time Restriction Settings If you use Screen Time to manage your phone use, you may have accidentally set a restriction for downloading apps. * Open the Settings app and tap Screen Time. * Tap Content & Privacy Restrictions. * Tap iTunes & App Store Purchases. * Tap Installing Apps. * Tap Allow, if it is not already selected. This setting should allow you to download apps again. How to Enable In-App Purchases If you are trying to make in-app purchases on your iPhone, but you are seeing a pop-up that tells you in-app purchases are not allowed, that likely means you have a Screen Time restriction set up. Here’s how to enable in-app purchases in Screen Time: * Open the Settings app and tap Screen Time. * Tap Content & Privacy Restrictions. * Tap iTunes & App Store Purchases. * Tap In-app Purchases. * Tap Allow, if it is not already selected. With In-app Purchases set to Allow, you should have no problems making purchases in other apps. If you are wondering how to turn off in-app purchases, you can follow the same steps outlined above, but tap Don’t Allow instead. Why Won’t the App Store Load on My Mac? App Store won't load on Mac? We have you covered. Check out this article on fixing all your Mac App Store troubles. The fixes covered there should help you get back online. How-ToiPhoneApp StoreApple SupportSettingsCellular Service & DataControl CenterScreen TimeSoftware UpdatesStorageWi-FiDevice ManagementMaster your iPhone in one minute a day: Sign up here to get our FREE Tip of the Day delivered right to your inbox.
http://dlvr.it/Skqn54

Monday, March 13, 2023

How to Print Google Docs from iPhone & iPad—Quick & Easy (2023)

What To Know * To print from your iPad or iPhone, open the Google Docs app > tap the document you want to print > More icon > Print > Choose printing options > Print. * If your Google doc won't print, you may need to restart your printer and iPhone or iPad, or update your printer's driver.   The Google Docs app on your iPhone and iPad is super convenient, but there are still times you may need a printed copy of a document. Here's how to print a Google Doc from an iPhone or iPad, and what to do if your Google Doc won't print.  How to Print from Google Docs from iPhone & iPad—Quick & Easy If you need a physical copy of a Google Doc, printing from an iPhone or iPad is a great solution. Here are step-by-step instructions for how to print Google Docs, and what to do if your document won't print. Check out our free Tip of the Day for more great iCloud tutorials.  Note: To print from your iPhone or iPad, your printer must be AirPrint and Google Cloud Print compatible, have wireless printing turned on, and be connected to the same Wi-Fi network as your iPhone or iPad. * If you haven't already, download the Google Docs app from the App Store on your iPhone or iPad.  * Open the Google Docs app. * Find the Google Doc you want to print, then tap the more icon (three dots to the right of the title). * Scroll down the menu and tap Print. * If your Google Doc needs to download, you'll see a Preparing to print notification. * Now you can select your printer, the number of copies you'd like to make, which pages you want to copy, and more, then tap Print.  Google Docs Not Printing? Here's the Fix Printing straight from the Google Docs app on your iPhone or iPad eliminates a lot of browser issues that could keep your document from printing. So, if you're using the Google Docs app to print, there are only a few things that could be going wrong. We covered what kind of printer you need to print a Google Doc from your iPad or iPhone earlier; now, let's go over other issues that may crop up. * If you get an error that says No AirPrint Printers Found, we have a troubleshooting article to get your iPhone or iPad connected to your printer again. * Restart your printer and reboot your iPhone or iPad to get rid of any glitches that may be stopping the printing process.  * If the above steps haven't worked, update your printer driver on your Mac or PC.   Now you know how to print a Google Doc right from your iPad or iPhone. As you can see, it's a quick and easy process! How-ToiPadiPhonePrintersThird-Party AppsAirPrintGoogleProductivity & BusinessMaster your iPhone in one minute a day: Sign up here to get our FREE Tip of the Day delivered right to your inbox.
http://dlvr.it/SknDct

How to Delete Wallpaper on iOS 16—the Fastest Way (2023)

What to Know * You can delete a wallpaper in iOS 16 by long pressing on your Lock Screen, then swiping up on the Lock Screen wallpaper you want to delete. * This will also delete the Home Screen wallpaper associated with that Lock Screen, the widgets on that Lock Screen, as well as the clock font, color, and size you selected for that Lock Screen. * You can change a Lock Screen background without deleting the other customizations by long pressing on your Lock Screen, tapping Customize > Lock Screen > Photos icon and choosing a new picture.  If you went a bit overboard with your new ability to create different Lock Screen wallpapers, you'll want to know how to delete a wallpaper in iOS 16. It's easy to do, and will also delete the associated Home Screen wallpaper that comes with it. Here's how to delete a wallpaper in iOS 16. How to Delete Wallpaper iOS 16 If you're like me, when you first accessed the ability to create different Lock Screen and Home Screen wallpaper combos, you probably created many more than you actually ended up using. Having too many wallpaper options can cause needless swiping, especially if you end up only switching between one or two. Here's how to delete wallpapers in iOS 16 to clear out your options. * With your iPhone unlocked, long press on your Lock Screen. If you don't have Face ID enabled, you'll need to unlock your phone first and access the Lock Screen by swiping down from the very top of your Home Screen. * Swipe to the wallpaper you want to delete. * Swipe up on the wallpaper you want to delete. * Tap the Delete icon. * Tap Delete This Wallpaper. Important: Deleting a Lock Screen wallpaper will also delete the font, size, and color of the clock you selected for that wallpaper, as well as the associated Home Screen background and any widgets you had on that Lock Screen.  If you want to keep the widgets and clock font, color, and size you had on a Lock Screen but change the image, you can take the following steps: * With your iPhone unlocked, long press on your Lock Screen. * Tap Customize. * Tap Lock Screen. * Tap the Photos icon or emoji icon to choose a new photo for the background. * Select your new background, then tap Done. Now you know how to delete a Lock Screen from your Lock Screen gallery, and how to change a Lock Screen wallpaper. How-ToiPhoneSettingsHome ScreenLock ScreenCustomization & PersonalizationMaster your iPhone in one minute a day: Sign up here to get our FREE Tip of the Day delivered right to your inbox.
http://dlvr.it/Skn0Gy

Sunday, March 12, 2023

Friday, March 10, 2023

[Welcome to the 8K Universe (2)] Enjoy More of Your Favorite Content on Samsung’s Expanded 8K Ecosystem

  In order to continue bringing the best and most vivid display to its users, Samsung has been expanding its 8K ecosystem, widening the scope of
http://dlvr.it/SkfMlf

How to Send Messages with Effects on iPhone (2023)

You may have heard of Message Effects, the fun animations you can add to any text sent through the Messages app by pressing and holding the blue send button. But do you know the secret code words you can type to automatically trigger iPhone text effects? Not only is this a fun way to impress your friends, iMessage tricks are a super convenient way to make your messages a bit more snazzy with basically zero effort.  Why You'll Love This Tip * Quickly send cute or fun message effects for someone's birthday or celebration by using a secret code word. * No need to go looking through all the animations built into iMessage. Using the code words is a massive shortcut! Related: 7 Fixes for When Camera Is Not Working on iPhone (2023) How to Send iPhone Text Effects in iMessage You may have accidentally stumbled upon the hidden code words that trigger iMessage tricks, but I will provide you with the full list of code words to use the next time you want to send a pretty animation. If you like tips about how to use your iPhone, be sure to sign up for our free Tip of the Day! Here are all the words that trigger effects on iPhone. * On your iPhone, open the Messages app. * Choose any one of the code words below and send your message. You will see the effect produced immediately. Now, I will reveal the secret code words and their effects: * ‘Pew pew’ – laser light show * ‘Happy birthday’ – balloons * ‘Congratulations’ – confetti * ‘Happy New Year’ – fireworks * ‘Happy Chinese New Year’ – red explosion * ‘Selamat’ – confetti And that's all there is to it! Hopefully, you can have some fun with friends with this hidden tip! How-ToiPhoneAppsiMessageApple AppsMessagesCommunicationMaster your iPhone in one minute a day: Sign up here to get our FREE Tip of the Day delivered right to your inbox.
http://dlvr.it/SkdlHn

Wednesday, March 8, 2023

Samsung Electronics Launches Bespoke Top-Mounted Freezer Refrigerator With Stylish Design, Energy Efficiency and Ultimate Freshness

  Samsung Electronics today announced the global launch of the Bespoke Top-Mounted Freezer (TMF) refrigerator. Available first in Thailand from late
http://dlvr.it/SkXv7x

Calendar Apps to Help You Schedule & Prioritize

If you’re firmly attached to the idea of owning a wall calendar, you’re not alone! Unlike many print products, sales of paper calendars are on the increase, alongside an explosion in the digital calendar app market. Instead of choosing between paper or digital, many people opt for both, allowing for the sentimentality of a wall calendar and the convenience of apps. In my quest to find the ultimate digital calendars and planners, I was pleasantly surprised by the range of layouts, sharing, and customization options offered by the different apps. Many of my top picks below combine functional interfaces with fun design elements, making them both easy to use and aesthetically appealing. There’s truly an app for everyone, from the fun and whimsical to the oh-so sleek and professional. Calendars: Planner & Organizer (Free or $19.99/year) This calendar app shines where so many others fail: it provides a simple bird’s-eye view of your upcoming activities. With a menu across the top of the screen, you can tap to view appointments by day, week, month, or in a streamlined list view. And unlike the Apple Calendar app, which only shows a dot in the monthly view to signal an event scheduled on a particular day (why, Apple?), this Readdle app shows you a preview of your day in each view. For more great app recommendations, be sure to sign up for our free Tip of the Day newsletter. 
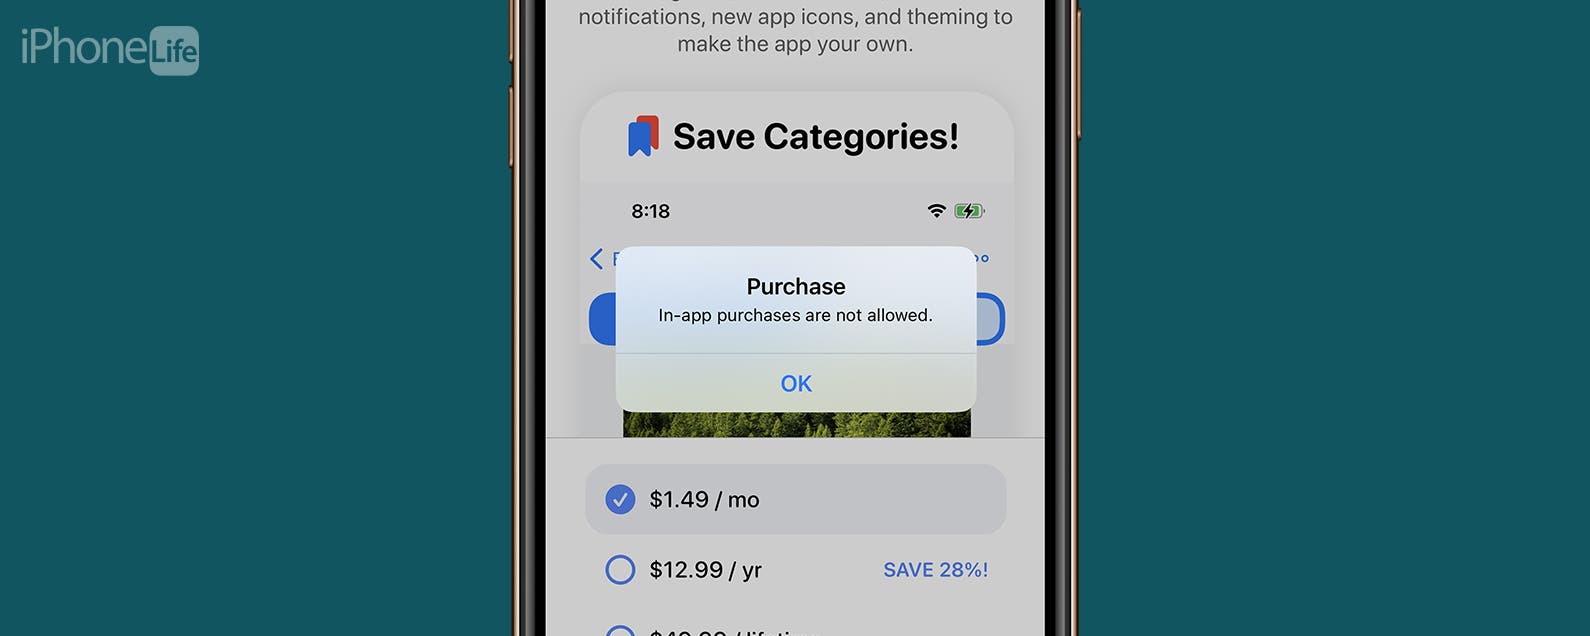
Structured - Daily Planner (Free or $1.49/month) If you love minimalist layouts, this app is for you! While other planners tend to show chunky blocks of your scheduled time, this visual day planner shows a timeline of your day, with colorful icons indicating events and details listed beside it. The layout is pleasing and easy to customize. The downside: this app doesn’t provide a weekly or monthly view, so this might not be a good fit if you often zoom out and view upcoming tasks for several days at once. While you can opt for a Pro subscription, this is for power users, and I was easily able to accomplish everything I needed on the free version. Simple Calendar – SimpleCal (Free or $9.99) The strength is in the name! If you often feel you’re drowning in customization options, this no-nonsense calendar app offers an uncluttered monthly view with a preview of each day’s activities. You can tap a day to view all planned activities and swipe to scroll through upcoming months. Because this is a no-frills format, adding and editing events is fast and easy. The downside: to keep things simple, this app offers fewer customization options, so say goodbye to the ability to add fun icons or set special alerts. You can use SimpleCal for free or pay a one-time fee of $9.99 to remove the small ads that display across the bottom of the screen. Best Overall Timepage by Moleskine Studio (Free or $2.49/month) Famous for beautifully simple journals and planners, Moleskine Studio brings the same strong design elements to its digital apps. Timepage is intuitive, opening on a list view where you scroll through your days to view events. Swipe right on the list view to access a monthly view with a heat map, with lighter-hued circles for days with few activities and darker-colored circles for heavily scheduled days. This app offers a bevy of cool features, such as a display of weather forecasts alongside events (handy for those planned outdoor activities!). No other calendar app widget comes close to topping this one, which offers a variety of options and sizes so you can display exactly the information you need (including those nifty weather forecasts) right on your Home Screen. Tiny Calendar (Free or $19.99) It’s no surprise that the Tiny Calendar app excels at optimizing displays for small screens, making it an ideal choice for those who mainly reference their schedule via their iPhone, iPad, or Apple Watch. In addition to a daily and monthly view, the top menu bar has an extra toggle, allowing you to switch between a Text view (showing a preview of events each day) and a simplified Calendar view (which shows dots beneath each day indicating the number of planned events). I loved the simple layout and fun colors this app offered! However, if you plan to only use the free version, be warned: while you can sync multiple Apple iCloud calendars, you can only sync one Google calendar without upgrading. Cozi Family Organizer (Free or $29.99/year) If you’re fed up with trying to keep track of events, tasks, and activities for multiple people, this handy shared organizer might be your savior! Designed for families, Cozi allows you to set reminders and add events for specific family members. In other apps, shared calendars can sometimes become frustrating, because changes to an event trigger notifications for everyone. Here, you can customize notifications to only receive updates for events you’re tagged in. The Cozi interface is simple, making it easy to use even for family members who aren’t tech-savvy. Like many free apps, Cozi covers costs for the free version by displaying ads, however, I had all the functionality I needed with the free option. So, unless you find the small footer ads frustrating, there’s no reason to upgrade to the paid tier. Planner Pro (Free or $3.99/month) The strength of this digital planner is that it effectively combines tasks, notes, and events in a simple and colorful interface. The app opens on a monthly view, with dots beneath each day indicating the number of scheduled events. Tapping on a day zooms in so you can view the full daily schedule and event details. If you don’t mind paying a subscription fee ($3.99/month or $39.99/ lifetime), you’ll enjoy the clean layout, easy navigation, and fun colors. However, I don’t recommend this app if you plan to use the free option, since functionalities (like recurring events) are not available on the unpaid version. Google Calendar (Free) Many people use other Google services, such as Gmail and Google Drive, making this calendar app an ultra-convenient option. Syncing your various calendars is nearly effortless, and you can easily schedule events and manage multiple calendars from this app. The iPhone and iPad apps are well designed and make it easy to view scheduled appointments whether you’re in a daily, weekly, or monthly view. Notably, this well-known Calendar app is both free and ad-free, so you can avoid subscription costs and the minor annoyance of footer ads. Weekly Planner (Free or $4.99) I was absolutely charmed by this whimsical calendar app layout, designed to look like a paper weekly planner (complete with a small spiral binding down the center of the screen). Swiping “turns the pages” to view previous or upcoming weekly events, and you can tap the calendar icon at the top of the screen to switch to a monthly view. If you want to customize, you’ll just need to pay the one-time $4.99 fee to change text size, select fun background themes, and sync to iCloud. One word of caution: if you attach a lot of details to your events (such as Zoom links or addresses) or want to set reminders for an event, this isn’t the right option for you. Top image credit: cosmaa / Shutterstock.com iPhoneAppsThird-Party AppsLifestyleMaster your iPhone in one minute a day: Sign up here to get our FREE Tip of the Day delivered right to your inbox.
http://dlvr.it/SkWg8x

Tuesday, March 7, 2023

Inspiring and Empowering Women at Samsung: How Diversity, Equity and Inclusion Drive Innovation

Above all, Samsung Electronics believes a company culture that respects diversity, equity and inclusion (DEI) is essential to continued innovation. In honor of
http://dlvr.it/SkTCxt

Friday, March 3, 2023

[Design Story] Create the Essentials: Galaxy S23 Series

Samsung Electronics’ new Galaxy S23 series delivers an eco-conscious, premium smartphone experience to its users. By eliminating unnecessary elements and
http://dlvr.it/SkHN6G

Thursday, March 2, 2023