In the 153rd episode, Donna exchanges practical tips for overcoming pandemic fatigue with Feature Writer and Certified Personal Trainer Erin Smith. Learn hacks for hitting your workout goals with the Apple Fitness Plus service for Apple Watch users and creative ideas for staying entertained from the safety of home.
Click here to listen and subscribe. If you like what you hear, be sure to leave a review. And remember to tune in every other week to hear our editors share with you the latest Apple news, best apps, iPhone tricks, and coolest accessories.
Claim 10% off your subscription to iPhone Life Insider when you visit iPhoneLife.com/PodcastDiscount.
This episode was brought to you by Matias. Get plugged back in and never worry about battery life again with the Matias Aluminum Wired Keyboard ($59).
Questions of the week:
How are you using your Apple devices to combat pandemic fatigue? Email podcast@iphonelife.com and let us know.
Articles referred to in this episode:
* How to AirDrop from Your iPhone or iPad to Your Mac
* iPhone Photography Gear Roundup: Top Tools for Capturing Stunning Images
* Best Apple CarPlay head unit car stereos for 2021
Useful links:
* The iOS 14 Guide: Master Apple's New Widgets, Tools & Features
* Join the iPhone Life Facebook Group
* Insider walk-through: get a sneak peek of members-only benefits
* Get the Insider discount for Podcast Listeners
* Sign up for the free Tip of the Day Newsletter
* Email the Podcast
* Subscribe to iPhone Life magazine
Episode 153 transcript:
- Hi, and welcome to the iPhone Life Podcast. I'm Donna Cleveland, Editor in Chief at iPhone Life.
- I'm Erin Smith, I'm a Feature Web Writer at iPhone Life and I also am a personal trainer. So we'll be discussing a little bit that involves that area of expertise today as well.
- Yes, each episode we bring to you the best apps, top tips and great gear. And I'm so excited to have Erin joining us on the podcast today for the first time. Erin, how long have you been at iPhone Life?
- Six months. I've been here about six months at this point. So I'm pretty excited about that.
- Wow. Time flies. It does not feel like it's been that long, but then at the same time it feels like you've always been at iPhone Life, so.
- I would agree. It's sort of a funny dichotomy in that way.
- So we've been wanting to bring Erin onto the podcast for a while. She's amazing. But we especially wanted to bring her on today because we want to talk about Apple Fitness Plus, and some ideas around fitness to help you overcome pandemic fit fatigue at home. And as Erin said, she's a certified personal trainer so she's really specially qualified to help do that. So we'll be getting into that shortly. The theme for today is staying healthy and entertained to overcome pandemic fatigue. Before we get into any of today's content, though, we have a message from our sponsor, Matias.
- Matias, one of our favorite products from them recently, and you'll see that we are also running these ads on our site. We really love their wired keyboard. One of the things that's coolest about it, they also have wireless versions, but one of the coolest things about the wired keyboard from Matias is that it not only matches what people are missing from the wired version that Apple used to carry before they went entirely wireless, it's actually better performing and it has some cooler keys. So what we've seen from people who use this Matias Wired Keyboard, is that they're much happier.
- Yeah, a few people at iPhone Life use Matias Keyboards and have totally converted. It's amazing 'cause it's, it's better than Apple's keyboards and also like significantly less expensive.
- Yes.
- Which is great as well.
- Yeah, for sure.
- Yeah. Thanks Erin. Erin also does some of our sponsored writing at iPhone Life. So she's very familiar with Matias at this point. So that works out well. So next I wanted to share a daily tip that we wrote recently that we're liking. For those of you who don't know we have a daily tip newsletter that goes out every day and teaches you something cool you can do with your iPhone in just one minute. If you go to iphonelife.com/daily tips, you can sign up for it there. So the tip I wanted to share with you today is how to AirDrop files to a Mac. We are just starting at iPhone Life to incorporate Mac tips into our coverage. So that's something that's exciting. So this one involves your Mac but you do most of the tip from your iPhone or iPad. So before you AirDrop any files you need to have your Bluetooth and Wi-Fi enabled and you can't have your personal hotspot on, which is something that I didn't know before looking at this tip recently. And it's good to know. Well, let me back up a little second, for those of you who don't know what AirDrop is, AirDrop is an Apple-specific file sharing method that lets you share pretty big files between different Apple devices that are within Bluetooth range of each other. So this is really convenient. I use AirDrop all the time if I want to share like a pretty big video with someone that I shot or a bunch of photos. And so it's something that would be a big pain, otherwise, you know, if you're sending a video you might have to upload it to Google Drive or use WeTransfer or something like that. 'Cause a lot of times it's too big to text or to email to someone. Erin, do you use AirDrop often?
- I do. I really like it. Most of what I use is some of the predictive paste features that are on my Mac from what I've copied on my phone. But AirDrop has come in very handy for me. Yeah, no, I've been using it more for work things too like that. Also, like you can AirDrop passwords, if you use the Safari password manager, I'll use that to send a password over to my Mac from my iPhone. So there's lots of ways you might wanna use it. So make sure your Bluetooth is on, you're connected to the same Wi-Fi network on both devices, personal hotspot is off then whatever file you have, whether it's a video and the photos app or you're in your password settings on your iPhone and there's a AirDrop sharing option. You hit the share icon and that's the little, it's like a square with an arrow pointing out of it that you'll see all over the place on your phone and then choose AirDrop. And from there, you'll see some suggested AirDrop devices show up like with my . MacBook will automatically pop up right there. But if it doesn't just tap the AirDrop icon and then from there it'll search for devices within close range and you can choose your device from there. If you don't see it show up... Like AirDrop is amazing, but I do sometimes have finicky stuff with it. And one thing you have to check is to make sure that on your device, that you're accepting AirDrop files. Have you ever had any issues with that too, Erin? Yes. When I first got my MacBook. I actually had to go in on the receiving device and make sure that it was set up to receive AirDrops. So there are a couple of ways that you'll need to do that between devices, but the way that you get to it is pretty much the same it's in your general settings.
- Yeah. And so there's a couple different options. You can either AirDrop off or only receiving AirDrop files from your saved contacts. Or you can turn it on to make sure that anyone can send AirDrop files to you. And I found that if I'm having trouble receiving if I switch it to everyone, it'll usually let it go through. So if you do turn on accepting AirDrop files from everyone you are running the risk, if you're at the airport or at grocery stores, something that anyone there could send you an AirDrop file, but you do have to accept it for it to be saved to your phone. It's never happened to me. And I usually do leave it on to accept AirDrop files from everyone just because I found that to make it a more reliable service. But what about you, Erin? I tend to sometimes like be on the side of being less secure than I should be, so I don't know. I'm not necessarily recommending that to listeners. I'm just saying that's what I do.
- You know, it's funny because I tend to Air on the more secure side, but I actually always leave mine on for everyone. And that's because I've watched people try to sneak AirDrop something to me, like my friends, if we're out doing something and it's so involved that I feel like most people would probably abandon it before they tried to send you anything and you have to accept it. But at the same time, it is a risk. You are leaving yourself open to files being shared. So it's something to consider.
- Yeah, for sure. So that's the tip. The biggest thing, it's pretty easy to do, but it's something I think that people forget about since it is an Apple-only sharing option. At least a lot of my friends don't take advantage of it and it can be really handy. So I think the big tip here is just try AirDrop if you haven't. This one specific about sharing to a Mac, but the same holds true for between all of your Apple devices, including iPhones, iPads, and Macs.
- And most often you're going to be AirDropping from your phone to another device. So it kind of starts the same way anyway.
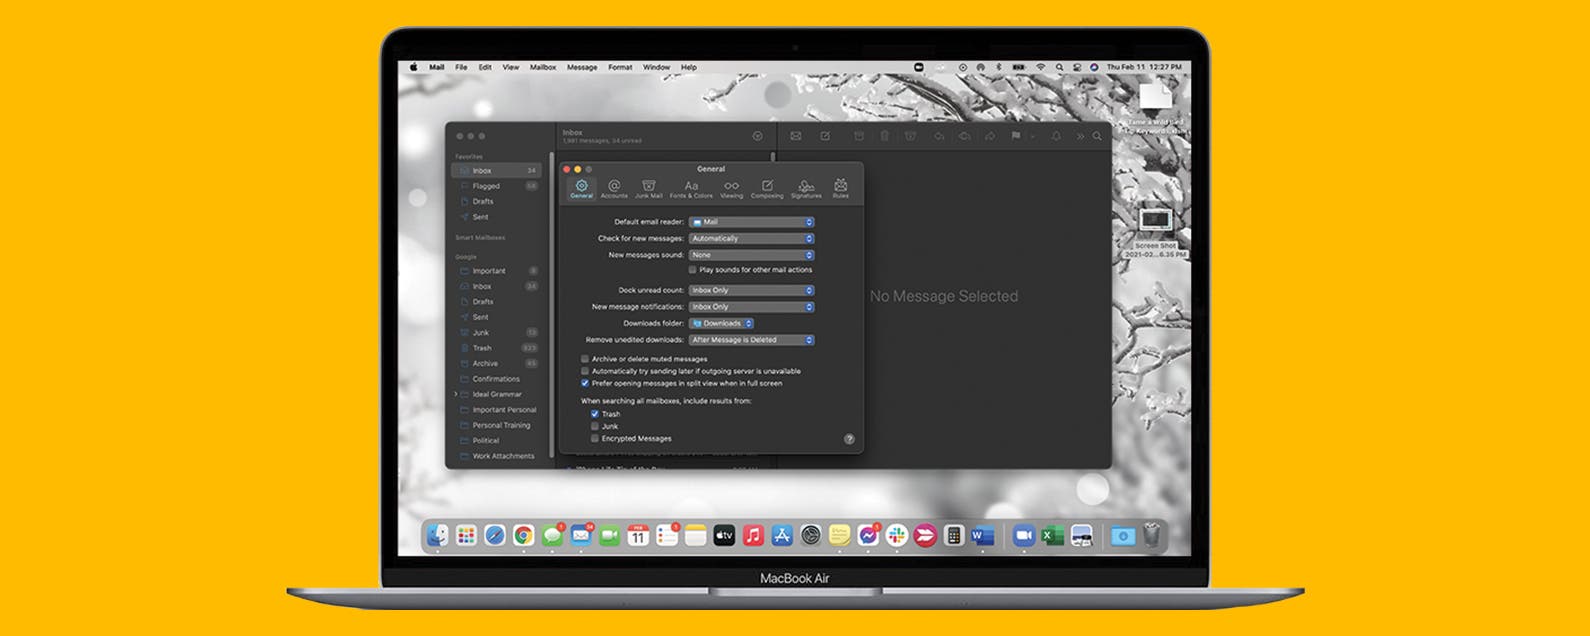
- Oh, and then the last thing I forgot to say is if you're sharing to your Mac and you're both signed in on the same Apple ID, you'll get something on your Mac asking if you wanna accept the files, but where the files are saved is to your downloads. That's something that's important to remember. So if you go into your downloads folder that's where you'll find your AirDropped files.
- That's a good note. I had a hard time wondering.
- Yeah, 'cause you, as it's coming in you can hit open and it'll open it up automatically. But sometimes you miss that and then you might be like, "Did it happen, whereas it?" So check your downloads .
- That's a good call .
- All right, next up. I wanna tell you about our premium subscription which is called iPhone Life Insider. And with this subscription you really can take your iPhone mastery to the next level or the mastery of all of your Apple devices, really. So unlike the daily tip, which just gives you a written tip every day, with Insider you get a video version of that tip so you can follow along on your device as the video plays and learn something in one minute every day. And you also get access to a ton of other features including live online courses with instructors and personal help where you get video guides throughout the year including a video guide that comes out right as the new iOS version comes out in the fall. So you can learn all the new features right away. You also get a digital subscription to iPhone Life Magazine including our full archive of over 30 past issues. And you get our, Ask An Editor Service where you can contact us with any tech problems you're specifically having. And one of our experts will help guide you to a solution. And you also get a premium version of this podcast which doesn't include any of the ads, like I'm doing right now . And I'm also has premium content just for you. So if four of our podcast listeners, we have a special discount. If you go to iphonelife.com/podcast discount you get a percentage off of your annual subscription. So go and check that out now. And we look forward to having you as an Insider . Some of our latest content that we're excited about, we have MacBook guide, and MacBook guide that tells you all about your MacBook or MacBook Pro, including like lots of tips and tricks that you didn't know. Like the MacBook are very easy to use, but there are a lot of features that you have to know about in order to take advantage of like sinking up to pairing two pairs of air pods to the same device, for instance or you can like customize your MacBook Pro to have like your own tapping gestures that trigger different actions and things like that. So we've been finding the guide to be really helpful.
- Yeah, one of the coolest things that I actually just learned yesterday from the guide was that for an extra accessibility option you can actually use your MacBook. If you don't usually use some sort of like auditory enhancement device like headphone or a single headphone can be used for it. Or if you have a hearing aid, excuse me that's the word I was looking for. If you don't normally use a hearing aid or some sort of magnifier, you can use your MacBook for that. You can actually set it up to help magnify the sounds around you which I thought was really cool in loud environments. Or you can use sound filtering or you can just magnify the TV if you're sitting too far away from it.
- Yeah. I think that's pretty amazing too. I know that how our founder has tested that feature out quite a bit, like setting his iPhone close to the TV and it will transfer, pick up the sound and send it to his MacBook, and he says that it works like really great.
- That's a really cool feature.
- I've been meaning to try that out. Yeah. So that is my little plug for Insider for the day. If you go to iphonelife.com/podcast discount you get access to the MacBook guide and all of the other features I was telling you about. We have a new course coming out in March. It's the iPhone fundamentals course. So once you subscribe, you'll get instant access to that. The start date is March 24th, and we'll have weekly live online sessions for six weeks in a row. And we'll take you from like learning all of the basics of your navigating your iPhone through the photos and camera app messaging and making calls. Like all of the main things that you need to know as an iPhone owner. So it's a great time to sign up. I wanted to read out a question that one of our Insiders sent us or Erin, do you want to read it out for us?
- Why don't you give it a go and I'll see if I can contribute.
- Sure. So our question is, "Good day. I intend to do a lot of macro photography in the coming year and all your discussions the best way to tackle this is is never mentioned. Any suggestions would be appreciated. Thanks, David." Hi David. Thank you for reaching out. So this is one of our experts responding. "The best way our team has found to do macro photography on the iPhone is to invest in an attachable external lens. The two brands we've had the best luck with are Olloclip and Moment lenses. An external lens will make a huge difference. So one of our resident, iPhone photography experts Rayanne, really swears by the Moment lenses. She's used both Olloclip and Moment, and they both have great options, but she has a special love for Moment lenses. I do believe it requires you to also buy a special case from Moment for your iPhone. So it ends up being like a little pricier, but she's gotten some really gorgeous flower and bag. She likes taking pictures of bags, so she's gotten some really gorgeous shots with these lenses. Have you seen any of them, Erin they're gorgeous?
- I haven't, but I keep hearing you tell of them, and I really wanna look through her little collection.
- I'm thinking too, for this blog post I should have her send me a few. We always have our show notes that include links to all the products and apps we talk about, but I can also post some of Rayanne's photos. So if you go to iphonelife.com/podcast, you can find the show notes for today's episode. So that's an example of a question that we're asked. A lot of times it's something like technically challenging happening with an iPhone or iPad that we help Insiders with. But sometimes it's more just advice. If you're thinking about making a purchase and want our opinion, we're also happy to offer that. we have some comments from listeners of this podcast that follow a similar theme. One was regarding CarPlay. So I just want to read that out to you. "Hello, out there in iPhone Life land. I'm a huge fan and subscriber of both the Mag and digital." Yay. Thanks for subscribing. I have a question I'm hoping you can help me with or at least give me some direction. I have a sweet Cherry condition 2012 Lexus that actually has only 20K original miles on it. I love this car that I inherited from my aunt and given the condition of it, it's obviously not going anywhere soon. My problem is I transitioned from a 2018 Impala that had Apple CarPlay that I absolutely loved. I am an Apple head as I have a MacBook Pro, iPhone 10, iPad, Apple Watch and MacBook, you get the points. Apple CarPlay wasn't offered in my year, Lexus 2012. So my question is, is there a way for me to have it installed in my vehicle. Thank you, and help, Anthony." So I love this letter. You can really see Anthony's personality shining through, but I definitely wanted to respond to this question on air because our CEO David, had this same exact situation. I mean, he had like a way, way older car. He was driving this Toyota Camry that he'd had for over... I mean, I think it was like 15 years old or more but he had a third-party Pioneer CarPlay system installed in it that worked beautifully. I think he's recently, he's gotten a Toyota Highlander or something that has Apple CarPlay built-in, but for years he was swearing by this. And at the consumer electronics show just last month, Pioneer came out with an updated version that has a wireless version of Apple CarPlay, meaning you don't have to plug your iPhone in with the lightning port in order to get it to work. The car I have right now does require me to plug in, which is not a huge deal, but it definitely would be nicer if I didn't have to do that. So Anthony, I wanted to tell you, check out Pioneer. Also, I'll link to this in the show notes as well, but we have seen that it has a great round-up of third-party car systems. There's several companies that make them. And so I'll include that as well. And you can read reviews and the pros and cons of each.
- One of the best things that I would love about one that I didn't have to plug my phone into it is that I would stop forgetting my phone in my car .
- I know I do that too, all the time.
- All the time. Right now-
- You use CarPlay too?
- I do. I got a new car recently and it has CarPlay in it. It works incredibly well. The vehicle is a Hyundai, and I just think that the system has integrated really nicely with the existing system, but I have to plug it in. And I'm so used to being able to Bluetooth to my car which of course I'd rather airplay than Bluetooth. So I plugged my phone in instead of leaving it in my purse, and then I forget it almost every time.
- Can we talk just for a second about CarPlay? What's your favorite thing about it?
- Okay. I Love CarPlay. My favorite thing about it is... Well, actually I'll start with my least favorite thing because it's also not that bad. My least favorite thing about CarPlay is having to listen to auto-generated text messages read out to me . So if I get like a confirm text message and it's half coded or like yes, equals reply, no equals stop. Something like that. It'll read all of it, but that's really not that bad. My favorite thing about CarPlay is my ability to navigate, and it feels like it's hands free. I don't have to be very distracted. Most of what I'm doing I can do from my steering wheel. But if I do need to navigate it takes a couple of taps and I can do it while I'm stopped. And it's not hard to do. I love listening to music on it. I love hearing my messages come in on it. I think it's really nice.
- Now, with your messages, does it automatically, start reading them as soon as it comes in or do you need to let go to your messages app and tap on it and then it does it?
- I get a notification preview. It's a banner preview kind of like you get on an iPhone and you can tap on it and it will automatically start reading it out. If you don't tap on it, I have a sidebar that I can customize. My most recent apps come up in that little tray. And so my most recent apps generally include music and the messages app. So I'll just tap on the messages, tap on the recipient or sender and it'll read out the most recent message from that list.
- Okay, cool. 'Cause I was wondering about that 'cause mine also, doesn't automatically read it out as soon as it comes in. So I usually just like avoid the messages app because I completely agree with you that having Siri readout text messages in general, I don't love the experience of that. You don't get any of the inflection. I mean, Siri's getting better and better, but it just sounds weird. I find it to be still just not great. And I also don't love dictating text messages so that's how I would respond. I usually just wait and respond once I've stopped driving. And it's been rare that I've used that CarPlay feature, but for me I agree like being able to navigate and listen to music, really easily with CarPlay has been so great. And I think the reason that I'm so sold on CarPlay is just because all the cars that I've had previously, either had no software system in it or really, really terrible one that I hated using. I had the Chevy Volt before. And I feel like even having it for a couple of years I could never find what I was looking for. And so having the Apple interface that I'm so used to 'cause it's really pretty much the same as your iPhone is so refreshing. I can always find exactly what I want. And I really like the dashboard view.
- Me too.
- In the latest update, they came out with the dashboard view, so you see both like your little music player, you can see your next step in your navigation. And also a view of the map. If you're playing something like Audible, you can see that too. You can see my husband and brother-in-law walking around in the backgrounds here. But yeah, my husband Tyler is also a huge fan of the CarPlay dashboard view. 'Cause we drove cross country to Florida a few months ago and I don't know, it just made the drive so much nicer. It's hard to really describe why it's so great, but it is. I highly recommend it to anyone shopping for a car or looking for an aftermarket system
- I do too. It's just one of those things that it doesn't seem like it when you first get it, like it'll add to your life, but genuinely does. I'm pretty sold on it.
- Yeah, and also I think with the aftermarket ones like it's not that big of a deal to get installed. Like you would need to bring it to a dealership that knew how to do it. Or like, I don't know that all places can do it easily, but from what David said, it wasn't expensive or a big deal.
- From what I understand, it's not a huge deal. The one thing to keep in mind is that for instance, I bought my vehicle from a Hyundai dealership and I still have a maintenance plan with them. They most likely would not install if I didn't have CarPlay or a system that supported CarPlay in my vehicle, they probably would not make an aftermarket alteration to a vehicle that they ever wanted back or that I had any kind of maintenance plan with them. They probably would not put in non-Hyundai or non-stock additions to that vehicle for you. However, it's still pretty easy to get done anywhere else. And there are a lot of certified electricians who can work on your vehicle. So it shouldn't be too hard to get done. But that's one thing to keep in mind.
- Yeah, that's a good point. All right. So enough about CarPlay. Let's move on to news. We have just a short update that I wanted to talk about and that's iOS 14.5. So Apple is now doing beta testing for iOS 14.5. So people are trying it out. That means it's not available to the general public though, and should be later this month. 'Cause usually Apple will come out with a beta version and within a month it's available to the public. So this update has a couple of exciting features that I just wanted to mention. One of them is the ability to unlock your iPhone using your Apple watch. And the other one is the ability to set Spotify as your default music service via Siri. So Erin, could you tell us about the Apple watch unlocking feature? I know that you're excited about that as well.
- I really am. So I'm just such a nut about my Apple Watch. I'm it owns my soul at this point, but I'm not gonna lie. One of the things that you can already do with your Apple Watch is unlock your Mac. So if you're wearing your watch and it's unlocked near your Mac, it can unlock it. You can also unlock your Apple Watch with your iPhone, but as of, as of right now until this development gets, you know, made into an actually readily available version of the software you can't actually unlock your iPhone with your Apple Watch. One of the things that's really nice about this is that you know, if we're going out, most of us are wearing masks right now. If you're wearing a mask and you haven't set up an alternative appearance or your phone doesn't recognize you in a mask very well, wearing your Apple watch and unlocking your iPhone that way is really, really going to be a nice development for you. It will, for me, I know for sure. I do a lot of things where I am wearing a mask, a lot. And so that'll be nice for me. But additionally, if I'm sitting at my desk I don't wanna have to pick it up, put my iPhone in front of my face. If it doesn't recognize my face, type in my passcode. If I'm sitting here working with my Mac and my Apple Watch I'd really rather it be unlocked more easily. So there'll be just sort of a a time-saver and a convenience thing for a lot of us.
- Yeah, I've really been finding... I know a lot of people have been trying to work around setting up face ID so that it will recognize your face even with a mask on, but apparently you have to do like a special thing where you register your face with like only half a mask on, it's just like annoying. And I don't think works very well. I've just been not doing that and using my passcode anytime I'm trying to unlock my phone in public.
- Me too.
- So this will be a very welcome 'cause, you know it's only a few seconds, but we've been spoiled and so entering, and I have a longer passcode for security I guess I'm not completely irresponsible security-wise. So it would be nice to not have to deal with that.
- I have a shorter passcode, but it's those four numbers, man, those are a pain.
- So the other feature that there's been like whispers of with iOS 14.5 is that you can set Spotify as your default music service when using Siri. So now they're like now, this one's a little bit less clear exactly how it's gonna work. The article I read on "The Verge" said for their beta testing, they were able to, the first time they tried to play a song from Spotify, a little setting popped up that let them choose Spotify as their default. And then from then on anytime they just ask Siri to play music it would automatically play from Spotify. Whereas other people said you still need to use the like, say play this from Spotify, every time you do it which doesn't sound as cool to me . It's not as, you know, like it would be nice just to set it as your default and then not have to think about that when you're asking for music. So we'll have to wait and see how that ends up being once we get our hands on it. But these are both, I think, significant updates. A lot of times Apple's more incremental updates, it's just still important, but like behind the hard security stuff that you're not gonna notice any differences with, but these ones I think definitely will make a difference in quality of life.
- Yeah, definitely. If they are as convenient as it seems like they're going to be.
- Yeah, and if you own an Apple watch, which also now holds true for the next segment of our podcast, we're getting into our main theme which is talking about staying healthy and entertained as the pandemic wears on. And we're all battling pandemic fatigue. So we're gonna talk about Apple Fitness Plus which is Apple's new fitness subscription service only for Apple Watch users. So for those of you listening who don't have an Apple Watch, you are free to skip over this section or maybe you wanna listen to see whether you think it might convince you to get an Apple Watch. So we're gonna talk a little bit about that. I've already given my first impressions of Apple Fitness Plus, but Erin, as a certified personal trainer has a lot of good insights about for instance, how to scale workouts with Apple Fitness Plus and just some tips for getting the most out of it. And then we'll get into our entertainment tips including how to have an Amazon Watch Party, which is a lot of fun.
- It is a lot of fun. Well, as Donna said, I was pretty excited about Apple Fitness Plus. I heard the announcement of the impending rollout. Of course, Apple does the thing where they sort of hold up the carrot, but don't tell you when they're actually gonna release it. So I sat there sitting on my hands excited for it for a little while. And then when I finally heard it was getting released, my coworkers had to listen to me babble about it a lot 'cause I was so excited. I, when I first got my hands on it was a little confused about whether I liked it or not. I'll fully admit. And that's because the interface seemed so simple that I couldn't tell what it was adding to my life other than access to workouts. But that said, it only took me five minutes of playing around on it to keep going, "Oh, Oh cool. Oh, I really like this. Oh, this is going to be fun." I spent a lot of time researching the trainers, and what I have seen from them is thoroughly impressive. I mean, I went in with a little bit of skepticism wondering if Apple had really done a good job of providing trainers to suit all fitness needs and all personality needs. And they've done an amazing job. You get a free trial of Apple Fitness Plus if you own an Apple Watch. If you own an Apple Watch Series 3 or later and it is one that you purchased before September 15th, I believe the date was, you get a free one-month trial. If you purchased an Apple Watch on or after September 15th, you get a free three-month trial. Certain vendors, we heard from some contributing commenters last time we talked about this, that Best Buy offers you a little bit of an extension on that free trial. So if you're gonna buy from a vendor and you're interested in extending a free trial, you might try going for Best Buy, if you're gonna buy your Apple Watch there. Otherwise, you'll be able to take advantage of the free three-month trial. And that happens automatically, when you actually log into your fitness app.
- Nice, and so I feel like I just want to address a couple of our most common questions from the workshop Erin, and I did last week for our Insider subscribers. And so a lot of people were confused. First of all, like where is this Fitness Plus service? And also like, what devices do you need to make it work? We already just said like you do need... Oops, you do need an Apple Watch in order to be able to use Apple Fitness Plus and you need an iPhone 'cause you know the Apple Watch is not a stand-alone device. It has to be used with an iPhone anyways. So you need to have an Apple Watch paired to an iPhone in order for this service to even show up as an option on your iPhone or on any of your other devices that are logged into the same Apple ID. So you need an iPhone Series 3 or later and an iPhone 6S or later. It needs to be paired. And then you can also use Apple Fitness Plus on an Apple TV or an iPad, but you don't need those in order for it to work. So once you've paired an Apple watch to an iPhone, if you open the fitness app on your iPhone you will see a tab in the middle that now it says Fitness Plus. If you would go there, it'll automatically prompt you like to go through the steps to get the service or start your free trial.
- Yeah, and as Donna said, that was something that confused a lot of people because people are used to it being called activity. The app used to be called activity, but the most recent... And this is another important note. You do need to make sure that both your watch and your iPhone are up to date on their software updates. That's really important because certain roll-outs and certain pending updates to the software are gonna make your life a lot easier and also will make it easier to recognize how to get into the app itself. But the fitness app looks like your three activity rings on a black background. That's how you'll open it on your iPhone. It's not in the watch app, it's on the fitness app. And then it's a little centered tab to get to Fitness Plus.
- And if for some reason it's not on your iPhone, just go to the app store and search for fitness and re-install it on your device 'cause some people have had that issue as well. So the pricing for Fitness Plus it's 9.99 a month, once you're done with your free trial or you can pay $80 a year. The other thing, and a little tip that I wanted to share was that, you can get it with an Apple One premier subscription. And Apple One is Apple's new, like bundled service plan. It's a 29.95 for this premiere option. It's basic Apple One subscription. Does not include Fitness Plus or News Plus, those are the ones that are not included. So you wanna get the premier version if you wanna get Fitness Plus with it. And it's really amazing because it also includes up to two terabytes of iCloud storage. And this is something you can share with five family members. So I'm in a family sharing group with my whole family and 29.95 a month for that, with Fitness Plus, a iCloud storage and Apple Music all included in that, is actually a really good deal.
- It is. I'm not sure how I could potentially fill up two terabytes of storage. I'm sure there's a way, but that's a lot of storage .
- It's a lot of storage. Yeah. So that's the basics on pricing. Erin, is there anything else you wanted to share about Fitness Plus? Like do you think people should... Like do you think it's worth paying for? Do you think it's worth getting an Apple watch for?
- I love those questions. And I actually have had my friends asking me those questions ever since they realized that I've been working for iPhone Life and doing these types of reviews. Yes, and yes. Honestly, if I'm 100% honest about it, I see this being useful going forward even in a non-pandemic world, but especially in a world where we need access to easy and versatile ways to move and to get ourselves focused on something fitness-related and other than our day-to-day lives, I find this incredibly important. I do not find the $10 a month cost prohibitive at all, based on what you're getting. That said, it could be for some users. Some people could decide that the 9.99 a month is not worth it. However, if everyone's going in on, like you said, the Apple One is at the premier tier plan, if everyone decides to go in on a plan like that and you're sharing something with family members it becomes a lot more affordable. You're looking at $30 a month for all of these assets and subscriptions instead of $10 a month just for the Apple one or the... excuse me, Fitness Plus. I think that it's probably gonna be worth it for a lot of people. Especially, as many people had to put things like seeing their personal trainer on hold, if they did use a personal trainer. If they didn't use a personal trainer a lot of people subscribed to gyms or at least did punch passes at gyms pretty regularly. Most gyms that I know of have a punch pass of around $5 to $7 a day. So that's one or two punch passes or single visits to a gym that, you know, you can use Apple Fitness Plus in stead of, which I think is really cool. As to whether it's worth getting an Apple Watch. That's one with a little bit more depth to it because one of my biggest criticisms of Apple Fitness Plus is that you have to have an Apple Watch. I think that they should probably have made this a system that's a little bit more readily available to all Apple users. Not every Apple user has an Apple Watch. Many iPhone users also use PCs and vice versa. So I think in future, I'd love to see Apple make this a little bit more accessible. For instance, to family members of people who have an Apple Watch, who can still use it because one user has an Apple Watch. And that said, you can bring in family members to do a workout with you, but it's not quite the same. You have to have the Apple Watch in order to truly do and track the workout. I think it's worth getting an Apple Watch. As I've said before, I'm totally in love with my Apple Watch. A little bit too much. Probably, I use it for a lot of things, and it's just made my life a lot easier. You can get inexpensive Apple Watches. It does have to be a Series 3 or later in order to work with Fitness Plus. Those are not very expensive right now. They're still on the market. You can get them from Apple and you can get them from other third-party vendors as well. From what I understand. So if you're at all, considering it, I think it's worth it. If it's not something you ever thought was in your future, maybe look into it and see if it's something that fits with your lifestyle. If it's not, maybe this isn't for you, and that's okay.
- Now another question that we got a lot from people was just how scalable are the workouts with Apple Fitness Plus. And you already touched on this, but I wanted to talk a little bit about like, how can you tell when looking through the Apple Fitness Plus app, which workouts are gonna be easier and also which ones will and will not require equipment
- Apple equipment. I think that, and this actually kind of goes with a really basic navigation. When you open the app, you're automatically gonna be prompted to set up your free trial. That's extremely easy to follow. Once you get to the app, you also have a very easy to follow homepage. So as you're scrolling through the home page, at the very top of the homepage actually has an icons bar across the top of it. It looks just like the exercise types in your workout app, on your Apple Watch. So you're gonna recognize those workout types which does make it a little bit easier. If you're newer to Apple Watch and new to Fitness Plus these might not be as intuitive, but the names of them are things like core, H-I-I-T, which stands for High Intensity Interval Training. Cycling, treadmill, swimming. You can do dance workout. You can do yoga. There are mindful cool down workouts, which I really think are cool. When you're looking at these, you can scroll through them left to right or right to left. Once you figure out which workout you want, you can tap on that and it will show you an entire list of workouts that fit into that sub-category of workouts. You can also scroll through the first page of the fitness app and see featured workouts. You can see suggested workouts based on your workout activity. You can see things like Black History month workouts. Right now, they have a themed workout section for Black History month and they update that theme section based on what's going on in the world. You can also at the bottom of your homepage find workouts you've saved to My Workout. Now to answer your question a little bit more specifically, I find the search feature fairly usable. I wish they had a couple of more categories that I could narrow my search down by. But one of the best ways to search for a workout is to use the search feature. You can narrow it down by trainer, by length of time that you wanna work out, and by music. When you're looking at music, one of the hacks that I kind of figured out is that you can decide how active you wanna be by the music, most of the time. If you're gonna choose a more upbeat type of music, you're probably going to get a more upbeat workout. If you're looking at something like interval training or strength training or dance, if you choose a fast-paced music selection and you choose a shorter time chances are you're gonna go hard in that short time. And then to your question about actually using equipment with it. If it's titled after a piece of equipment, it's kind of a given, that you're going to have to use a piece of equipment. So cycling, you're gonna need the stationary bike. Strength training for the most part, you're going to need your own type of equipment, dumbbells kettlebell, something like that, bands. You can get a preview by tapping on the thumbnail of a workout, it'll tell you what it's about and what it requires. It's also gonna tell you what kind of music, who the trainer is and how long it's gonna last. So if you need details on something, unfortunately, the titles of the workouts are not very intuitive. It's like dance with this trainer, dance with this trainer, strength with this trainer. But you can tap on the actual thumbnail to see both the video preview of what you're going to be doing in that workout and also see how much of equipment you're gonna need, if anything. That's another way to figure out if it's scalable to you as well. You can scale things by adjusting the types of weight you use or how much weight you use. You can adjust your own pace. If you're doing a treadmill workout, for instance, you don't have to do as high an incline as the trainer is suggesting you do. You can do a slightly slower pace than the trainer is using. You don't have to push yourself to their limits because their limits are not gonna be the same as yours. You're gonna wanna actually pace it to your own.
- Yeah, one thing that I found too, that's really nice, I just did a HIIT workout yesterday, and in general, that's a good way to get some cardio and not necessarily need equipment. Like some of them they're like if you have a dumbbell, great, but they have other options. But the nice thing that I found too is that they have usually like three people working out. And a lot of times they have each person doing a different variation of the move to different extents. So like one of them was jumping jacks, and they had one person just like stepping out to each side. So you could see like, that's an option if like jumping isn't an option for you. So they're good about that, which is nice too. And, yeah.
- Yeah, I feel like the trainers are really good at both giving visual options for how you can alter a move especially in things like yoga or strength training. That comes in really handy because not everybody has the same flexibility, not everybody has the same strength or endurance. So when you're looking at people on the examples, the actual assistance to the trainers, it really does help to say, "Oh, I can do that. Okay, cool. I'm going to modify it this way." And most likely that person's gonna be somebody you can follow for the rest of the workout, if it matches your style or if you want to challenge yourself on a move you know you can do, go ahead. But really, I'm all, all about safety when it comes working out. And one of the things I know that we got asked a lot in our workshop was, like Donna said how to scale, but also how do you know how intense you're supposed to be going? How do you know how much exhaustion you should be targeting for when you're doing this workout? The burn bar is a really fun tool. When you're doing a workout with Apple Fitness Plus, you'll see this kind of pinkish bar under your metrics that are being tracked on screen. And the position of sort of the little orb on the bar actually shows you how you compare to other people who have done the same workout. That can be good. It can also be dangerous if you're pretty competitive, but not quite up for a super-intense workout. So my tip is always to compete against yourself and to use that as motivation, of course, but to make sure that you have your fitness metrics updated in the health app first. Go into your iPhone health app, update your height, weight, date of birth, makes sure all of that's up-to-date. Make sure that if you have any medical conditions, those are listed in there as well because sometimes metrics are based on your actually... Excuse me, all the time metrics and exhaustion levels are going to be based on your ideal target range, which it calculates for you. There are ways you can manually calculate it, but I always recommend consulting a health care professional for that. Otherwise, if you are just sort of fairly healthy, but have certain limits to your ability to commit to an exercise, it works best just to go as hard as you feel like you can while still being safe. You really wanna make sure you prioritize safety. If you couldn't speak a sentence, if I asked you to and be understood, you're probably going a little bit too hard.
- Yeah. I think that that's a helpful tip. I hadn't heard that one before about being able to say something I'm like, "Hmm, I probably should scale back in certain situations." One thing I just wanted to add to what Erin said, is that the burn bar is really helpful, but it's only available for HIIT workouts, rowing, treadmill, and there was one other, cycling. So for yoga and strength training, you're not gonna see that bar there. And it doesn't mean there's anything wrong with your app. I know that was something that in the last past episode, David and I, were newer to the service and we're chatting about that, and we're like, "Why when I'm doing yoga, I don't see the burn bar." It's not supposed to be there, so.
- That makes a lot more sense. I hadn't actually noticed that. I'm glad to clarified.
- I think that we... Unless there's anything else you wanted to add to Fitness Plus, we should move on to our entertainment section of the podcast before wrapping up. We have a lot of content we wanted to share with you all today, but was there any parting thoughts you wanted to share for Apple Fitness Plus?
- No, just really enjoy it and make sure that you are doing it safely. The key to actually benefiting from a workout is making sure you're doing it safely. Keeping yourself safe, keeping yourself balanced, not pushing too hard, and always make sure that you consult a medical professional if you need to.
- So moving along to our staying entertained section of this podcast, we wanted to share some of the latest ideas we've had because I think having FaceTime and Zoom dates isn't really cutting it anymore.
- Yeah, not kidding.
- All of us are getting like tired. That can be kind of tiresome. So we're trying to think what are some ways that you can feel connected to people that you're close to without being feeling like work? It should be fun. Or what are some things you can do at home that are more constructive? Like Erin's gonna talk about using Duolingo for language learning. So we have some different ideas for you. I wanted to start out by sharing my latest tip for this, which is to have a watch party with friends. And so I was just across country from my husband over the holidays and we weren't really talking on the phone that much. And so we found a way to connect and to feel like we were doing something fun together where it's just to watch the same show at the same time. And you can just do this by literally just texting that person and choosing when to start. Or if you have Amazon Prime, you can watch an Amazon Prime video and actually set up a watch party with up to a hundred people. And that way, there's like a chat box for all the people involved. And you're exactly synced up and watching the show at the same time. You're sure not to be like a few seconds ahead and spoil something for the other person. So if you go open up Amazon Prime, either you can do it on your Apple TV or you can do it through your web browser or something. There's a little like party icon. When you go to a movie or TV show in Amazon, assuming you're a Prime member. And if you click on that, you can enter in your name and invite people and send people like a special link. I would recommend doing that just like in a group, text message chat or something. You could send the link and be like, "Let's have a watch party and watch, you know, this show at this certain time." And all get on and be able to kind of like chat about what's happening in the show. So I find that it's just like kind of a lighter-hearted way to interact than necessarily having a big, long phone catch up.
- There's a lot
- Yeah, we wanted to talk about gaming a little bit and language learning, and then if you're into cooking, I have an idea for you too. Do you want to talk about gaming and?
- I am also, not much of a phone person, I'll fully admit. And so the drain of feeling the pressure to talk on the phone a lot or have FaceTimes with friends is a little bit much for me sometimes. One of the ways that I've gotten around that, is that I really, really like playing games. And I like being able to play games that are fun and mildly competitive that I can interact with my friends, but not have the pressure to support a conversation while I'm doing it. So the thing that I've liked a lot lately is Battleship. I actually have the Hasbro app version of Battleship, and I really like it. You can create a room and there's a little invite code that you actually can send from the app to your friends in Messenger or in Facebook Messenger, or really I think you can email it too, I haven't had to do that yet, but your friend then joins you on their device. It can be Android or Apple. You can buy this app or there are free versions, but I've tried several of them and I think the Hasbro app is kind of the best. Once they join you you can actually real-time shoot at each other ships. And it records whether it's a hit or a miss. They can see what you're doing. It's really a fun way to have that little adrenaline rush of, "Oh my gosh they're going to sink my Battleship." without having to put in as much effort or frankly look decent on video . So, which is a constant thing .
- plus?
- Yes, definitely. Another suggestion we had from our team was Words with Friends. Some people also really like Animal Crossing because you can build villages or visit your friend's villages. They can visit yours. So just small ways to interact.
- And then for you, you've been using Duolingo a lot as well, right? To work on your, how many languages do you know? I remember it was a lot.
- I have like five language profiles on there. I'm not saying I'm great at all of them, but I... The first language I learned was Italian other than native English. And so when I started practicing on Duolingo it was really fun because I had a little bit of a basis of knowledge. So I had paused for a while. Hadn't really focused on it. But now I use Duolingo for a couple of other languages that I'm starting from scratch with. And I was really interested to see if the app supported that style of learning or if it was better, if you had a little bit of a basis, like if you knew conjugations and things like that. what I'm finding is that it's actually incredibly intuitive still even if you're learning for the first time. I decided to challenge myself and try Russian. And the coolest thing about using it on my iPhone or a mobile device is that you can speak into the microphone to check your pronunciation. They have all sorts of different ways of asking you questions. It's fill in the blanks, there's matching. It's really built like a game. So it's really fun. And you kind of compete with yourself. I have like a 20-day streak going or something like that. And it'll send you a little notification.
- Nice. Yeah. It'll send you a little notification. "Oh, you're about to miss your streak. Make sure you, you practice Duolingo today, practice Russian today." And then of course, Apple makes it really easy to have alternative language keyboards, which is another way that you can practice. And I really, really liked that, that capacity on the iPhone. It's a a fun way to kind of practice.
- Yeah. I feel like this is a really fun tip too. Like there was some article I was reading about like the happiness hacks like things that make you feel happy. And one of them was like just having something to look forward to. And so if you're just kind of at home dreaming of the days of when this pandemic will be over and it'll be safe to travel, having something you're working toward in the meantime, I think is really fun. So if you feel like, okay, I'm working on my Spanish and I might be able to like go to a Spanish speaking country at some point, that's a good way to sort of like do something where you're learning. And also that's kind of letting you daydream a bit, you know?
- Yeah, it really is. And since it's built like a game it makes it easy to do that. You're not sitting there frustrated 'cause you're missing these. You're like, "Oh shucks, I'll have to try again." You know. One of my friends was practicing Italian so that he can travel to Italy after the pandemic. So he's pretty excited about it.
- Amazing. Oh, that sounds so good. Yeah, the tip that I wanted to share was just the New York times cooking app, but it doesn't have to be that app. We have some people on the team who loved Tasty that has video recipes that you can watch. There's a bunch of ones out there. But I'm partial to the New York times cooking app just 'cause the layout's really nice. The recipes are from what I've found pretty gourmet. but not that hard, which is a combination that I appreciate. And also like the right mix of healthy and not healthy for me. Like it has a lot of good like whole foods in there, but it's not shying away from like butter and cheese and things like that, which I love . So the nice thing about this app, I've been just saving recipes that look good to me in my little recipe box in the app. And my goal is just been to do a recipe a week with my husband as something fun, kind of like a little date night type thing to do together. And it's also like safe with the pandemic to be doing. And you know, again, this one can be just something you're doing for fun now or you can feel like you're working up your acumen as a home chef and then someday you'll be able to have a big dinner party and have people over.
- Well, and you had mentioned something that I thought was really cool just from really logistically Handy-side was, if you're using an app like the New York Times app you can actually create a grocery list and you had mentioned, it's nice if you're doing curbside pickup to already have that kind of created, and you can just put that on your curbside pickup list or if you need to rush in and rush out of a store, if you are going in, you already have it created on your phone.
- Yeah. It's really nice 'cause you can save recipes that you just treat it like a Pinterest board almost, like save all the recipes you want, but then you choose when you're going in to actually make a recipe separately to add the ingredients to a grocery list. Some apps I've seen, it will dump like any recipe that you've saved like all into a grocery list, even if you aren't planning on cooking it right away. So it's nice to be able to control that separately. And like you said, you can then use that to order your groceries online, really easily for curbside pickup. Or if you're deciding to make a grocery run, make it, you know quick and efficient grocery run. So it's nice, and New York Times cooking, by the way, it's not free. It has a 21-day free trial and then it's 4.99 a month. So I'm trying it out for a little while. I don't know how long I'll wanna continue doing the paid service, but it's still pretty reasonably priced.
- Yeah, and it does help you, like you said have goals to work toward. We that's sort of been a running theme and also kind of the theme of the next app that we were gonna share or app suggestion that we were going to share with regard to geocaching.
- Oh yeah. I forgot about geocaching. Do you want to talk about that?
- I'd love to, and I think my favorite thing about geocaching is this is so nostalgic for me. My grandfather and I used to take our family my siblings up these mountains in Colorado, with an old handheld GPS unit roughing it, you know he was really into making sure we actually knew how to do this stuff. And now I can just look on my phone. So what's really cool about geocaching apps is that it's sort of like a worldwide treasure hunt. You have little boxes hidden, probably all around you especially if you're in a city you'll be surprised how many hidden locations there are for these. When you're looking at a geocaching app and there are a lot of apps, but when you're looking at a geocaching app, you can see these hidden locations. And what happens is when you use the GPS to find them, once you get to them, it's pretty pandemic safe. As long as you sanitize your hands afterward, you know it's an activity you can do by yourself. You open it, and often what happens is that you sign a little mini guest book or you leave a little gift inside there, like a little... We used to McDonald's toys just for fun. Just to sort of show you'd been there and contribute to the little treasure box that you see when you find the box at the end of the rainbow. But what I really love about geocaching is that there are so many apps to do it. It's worldwide, you can do it absolutely anywhere, whether there are a few around you or many around you and you can create your own geocache with most apps. So if you wanna start one and get a community going in your area, you absolutely can. Even in a time when we can't be face-to-face with people. So it's just another way to incorporate interaction without direct social interaction that kind of breaks those distancing rules.
- I love this. My dad's been telling me about geocaching for a long time and I haven't tried it personally. So it's fun to hear more about it. And it makes me wanna give it a shot at some point.
- It's totally fun. And I wanted to turn over to our readers for our question of the week to ask you, "How are you using your Apple devices to overcome pandemic fatigue?" We would love to hear your inspiration for us that we can share with other listeners in our next episode. So email@podcastatiphonelife.com and let us know what you're doing and why. And we'll be looking forward to getting that. And this wraps up our 153rd episode of the iPhone Life podcast and our first podcast episode featuring Erin Smith. So thanks so much for joining today, Erin. It was so fun to have you on the show.
- It was really nice to be here. Thank you for having me and thank you all for listening.
- And please don't forget to go and leave a review of the iPhone Life podcast on Apple podcasts, if you haven't already. It helps other people like you find iPhone Life and join the iPhone Life Community. Thanks everyone. Topics: The iPhone Life PodcastMaster your iPhone in one minute a day: Sign up here to get our FREE Tip of the Day delivered right to your inbox.
http://dlvr.it/RsbxHs