These days, learning how to type faster and more accurately is really about learning to how to type smarter. We'll show you how to make use of simple iPhone keyboard settings and shortcuts to write the text you want to send with fewer taps on your keyboard. With these handy typing tips, you'll be able to more easily access numbers and special characters and type full words with fewer taps on your iPhone. Let's get started!
Related: Your Guide to iPhone Group Messages in iOS 14
Jump To:
* 1. Insert a Period from Your Character Keyboard
* 2. Set Caps Lock
* 3. Quick Access to Numbers
* 4. How to Undo Typing
* 5. Select Words with Predictive Text
* 6. Set Up Text Replacement Shortcuts
* 7. Use Slide-to-Type
1. Insert a Period from Your Character Keyboard
This ultra-simple shortcut is one of my favorite fast typing tips. At the end of a sentence, double-tap the space bar and a period with a space inserted behind it will be added to your text message. While only a few seconds faster than the regular method of adding a period, it saves you from having to switch to your special character keyboard and feels far more efficient.
This shortcut is typically enabled by default; however, if it isn't working, open Settings, tap General, tap Keyboard, and tap the toggle next to "." Shortcut. The toggle will be green when enabled and gray when disabled.
2. Set Caps Lock
When I want to celebrate with friends (or communicate an important point), setting the caps lock on my iPhone reduces the number of taps on my iPhone keyboard. This shortcut is easier and faster than tapping the shift button for each character. To do so:
* Double-tap the shift button to set caps lock.
* Type the text you want to be capitalized.
* Tap the shift button to disable caps lock and continue typing as usual.
This shortcut is enabled by default; however, if it isn't working, open Settings, tap General, tap Keyboard, and tap the toggle next to Enable Caps Lock. The toggle will be green when enabled, and now the shortcut above will work.
3. Quick Access to Numbers
If you're typing numbers, you often have to tap to switch to the numbers keyboard, tap the number (or series of numbers) and tap to return to the main characters keyboard. With this iPhone keyboard shortcut, we can shorten the process:
* Press and hold the 123 button with your left hand.
* While still pressing and holding the 123 button, type the numbers you wish to enter.
* Release the 123 button, and you automatically return to your letters keyboard.
This process becomes even faster if you want to type a single number or special character. To avoid switching keyboards, press the 123 button and without lifting your finger, slide to select the key you wish to type. Then, lift your finger to automatically return to the ABC keyboard.
4. How to Undo Typing
While this shortcut is about deleting typed text, I had to include this nifty setting because it is one of the easiest iPhone tricks I've come across. If you've typed up a lengthy text and have changed your mind about sending it, you can simply shake your iPhone to delete your last typed sentence (instead of pressing and holding the delete button).
* With the conversation containing your typed message open, give your iPhone one or two quick shakes.
* Tap Undo.
The last sentence you've typed will be deleted from your text message draft. If this shortcut isn't working for you, open the Settings app, select Accessibility, tap Touch, and tap the toggle next to Shake to Undo. The toggle will be green when enabled.
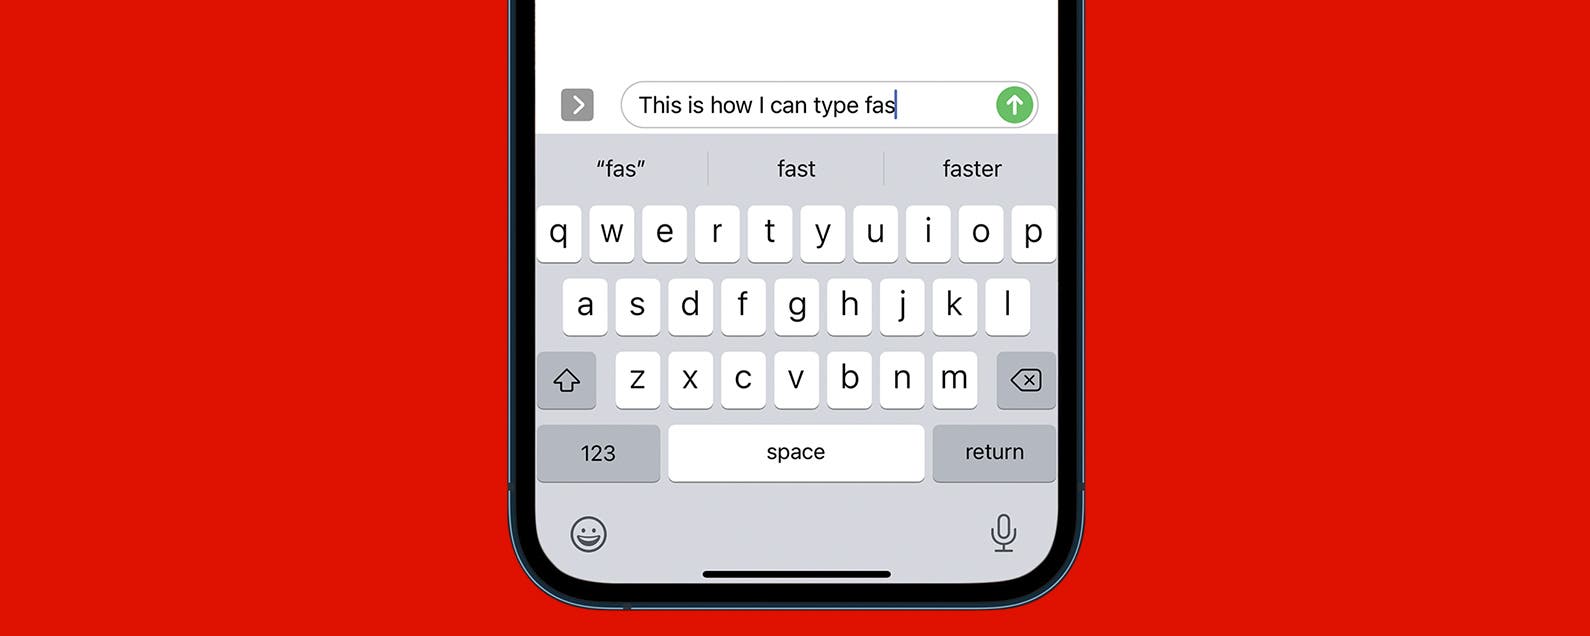
5. Select Words with Predictive Text
With predictive text, you can see word and phrase suggestions at the top of the keyboard. These are words your iPhone predicts you will type next, based on your past text conversations, writing style, and the websites you visit on your iPhone. Using predictive text, you can select an entire word, rather than typing your message character by character. How it works:
* Start typing your message and as you see a word suggested to want, tap to add it to your message.
* If you don't see the word you want, tap the first few characters of the word, and it will likely appear.
This shortcut is enabled by default; however, if word options are not displaying at the top of your keyboard, open Settings, tap General, tap Keyboard, and tap the toggle next to Predictive. The toggle will be green when enabled, and now the shortcut above will work.
6. Set Up Text Replacement Shortcuts
With this fast typing tip, you will be setting up shortcuts for phrases you often use. For example, I have a text replacement shortcut set up on my phone so when I type "fmin" and tap the space bar, my iPhone replaces this with "I'll be there in five minutes." Here's how to set up a text replacement shortcut.
* Open the Settings app.
* Tap General.
* Tap Keyboard.
* Tap Text Replacement.
* Tap the plus icon to add a new shortcut.
* In the Phrase field, type the words you want to create a shortcut for.
* In the Shortcut field, type the characters that will represent your shortcut.
* Tap Save. Now whenever you type your shortcut characters and hit the space bar, the text will be replaced with your phrase.
Add text replacement shortcuts for any commonly used phrases, and before you know it, you'll be sending texts more efficiently than you thought possible!
7. Use Slide-to-Type
I've only recently learned about the slide-to-type shortcut, and am startled by how much faster it is than typing on my iPhone. With slide-to-type, you simply slide your finger across the keyboard over the characters you want to type. Based on your gesture, your iPhone intuits the word you are typing and adds it to your text. If you hate trying to tap exactly on a particular key, this shortcut is for you! I've added an example below to illustrate how this works.
* In one continuous motion, slide your finger across the keyboard to select the characters for a word. The example below illustrates the sliding motion to write "Hey."
* Lift your finger and the word will be added to your text. Slide your finger to add the next word.
This shortcut is enabled by default, however, if it isn't working, open Settings, tap General, tap Keyboard, and tap the toggle next to Slide-to-Type and Delete Slide-to-Type by Word. The toggles will be green when enabled. Topics: How-ToiPhoneKeyboardMaster your iPhone in one minute a day: Sign up here to get our FREE Tip of the Day delivered right to your inbox.
http://dlvr.it/S0XfXz