Wednesday, May 31, 2023

Samsung and Dezeen Hold Global Design Challenge

  Samsung Electronics and global design and architecture magazine Dezeen today announced the launch of their latest global design competition to recognize
http://dlvr.it/Spwb7J

How to Save an Email as a PDF on Your iPhone & iPad (2023)

What To Know * PDFs help you condense and organize emails so they're easy to store and find when you need them. * To create a PDF from an email, tap Reply > Print > touch and hold print preview to maximize > Share > Books. * The PDF you've created will be saved in the Library tab of the Books app. Saving an email as a PDF on your iPhone or iPad isn't a straightforward process, but it can be done. Here's how to save a Gmail or Outlook email as a PDF, or an email from any other account you've synced to Apple's Mail app! How to Save an Email as a PDF on Your iPhone & iPad  If you're looking for an email management method that will keep your important emails safe and easy to access, we'll show you how to save an email as a PDF on your iPhone or iPad. Keep in mind that you can also create email folders to organize emails if you'd like to keep them all in the Mail app rather than downloading them. For more great email management tutorials, check out our free Tip of the Day.  * Open the Mail app. * Open the email you want to save as a PDF, then tap the Reply icon (left pointing arrow). * Tap Print. * Touch and hold the print preview, and a larger version will open. * Tap the larger version. *  Now tap the Share icon. * Tap Books from the app options. If Books isn't available, tap the More icon.  * From the More menu, tap Books.  Once you've finished these steps, your PDF will be saved to the Books app. You'll be able to open that app, tap the Library tab, and see the email you downloaded as a PDF on your iPhone or iPad. Be sure to set up iCloud Drive on all your other devices, so you can access the email you converted to PDF, whichever device you're using.  How-ToiPadiPhone(Apps)Apple AppsMailCommunicationProductivity & BusinessMaster your iPhone in one minute a day: Sign up here to get our FREE Tip of the Day delivered right to your inbox.
http://dlvr.it/Sptnwt

Monday, May 29, 2023

Here’s How To Update the Privacy Settings on All of Your Apps

  Learn more about how the Security & Privacy Dashboard helps you manage app permissions on your Galaxy devices here.     * This content was
http://dlvr.it/SpqHz9

Friday, May 26, 2023

Samsung’s ‘See Beyond Color’ Campaign Helps Shelter Dogs Find Their Forever Homes

Animal shelters around the world are full of abandoned pets waiting for their forever home. This heartbreaking state of affairs does have a bright side,
http://dlvr.it/Spg8QQ

[Interview] From Streets to Samsung Art Store: Logan Hicks Discusses His Creative Process and Inspiration Behind Urban Stencil Art

Since its launch in 2017, Samsung Art Store has been at the forefront of driving significant changes in the way we experience and appreciate art. With vast
http://dlvr.it/SpfhPs

Thursday, May 25, 2023

Apple ID Not Active? Here’s the Fix! (2023)

What To Know * The "This Apple ID is not active" error message means that Apple has disabled your account, and all your data and affiliated services are now unavailable. * This pop-up means that you, or someone else, entered the wrong Apple ID password, account information, or security question too many times, and Apple has locked your account.  * You can restart your device, check the Apple System Status page, reset your Apple ID password,    If you get an "Apple ID Not Active" pop-up when you try to log in to or verify your Apple ID, we're here to help! We'll cover why your Apple ID is inactive and how to fix this error message on your iPhone, iPad, and Mac. Jump To: * What Does "This Apple ID Is Not Active" Mean? * Restart Your Apple Device * Check Apple System Status * Reset Apple ID Password * Contact Apple Support Why Does It Say This Apple ID Is Not Active & What’s the Fix? Apple ID login issues are a pain, especially getting a "Verification Failed Apple ID is not active" error message on your iPhone, iPad, or Mac. Let's go over why your Apple ID is not active, and how to fix the problem, get rid of the error message, and activate your Apple ID! For more great Apple ID tutorials. check out our free Tip of the Day What Does "This Apple ID Is Not Active" Mean? According to Apple, "If you or someone else enters your password, security questions, or other account information incorrectly too many times, your Apple ID automatically locks to protect your security, and you can't sign in to any Apple services." But, don't worry; there are several ways to activate your Apple ID again. Here's how to fix the Apple ID Not Active error message and get back into your account. Restart Your Apple Device Restarting your Apple device is a great way to get rid of bugs and glitches. If the "Apple ID Not Active" error message is due to a glitch, rather than your account actually being disabled or locked, restarting your device is an easy fix. Here's how to restart your iPhone, iPad, and Mac. Check Apple System Status Sometimes, but not often, getting the "Apple ID Not Active" error message can be a problem on Apple's end! Visit the Apple System Status Page and make sure that Apple ID has a green dot next to it, meaning it's available. If it's not, you'll need to wait until Apple resolves the outage.  Reset Apple ID Password If you entered your Apple ID password wrong too many times because you forgot it, you can do an Apple ID password reset two different ways. Here's how to reset your Apple ID password on an iPhone, iPad, Mac, or PC. Contact Apple Support If you're still seeing the "Apple ID Not Active" error message, there are a few more troubleshooting steps to try, including our article about what to do if your iPhone is locked. If your Apple ID is still not activated after those extra steps, it's time to contact Apple Support. Image courtesy of Apple. By now, you should be able to sign in to your Apple ID without the "This Apple ID is not active" error message popping up. Be sure to check back in with iPhone Life for any other Apple device troubleshooting needs. We can help you with your iPhone, iPad, Mac, AirPods, Apple Watch, and more! How-ToiPadiPhoneMacApple IDDevice ManagementMaster your iPhone in one minute a day: Sign up here to get our FREE Tip of the Day delivered right to your inbox.
http://dlvr.it/Spd0Db

Two Researchers of Samsung Were Elected as Working Group Chairs of 3GPP, the World’s Largest Mobile Communications Standard Development Organization

Samsung Electronics has announced that two researchers were elected chairs of two Working Groups in the Third Generation Partnership Project (3GPP), the
http://dlvr.it/SpbTnX

[Design Story] Bigger Screen, Deeper Connections: How Life Expands With Family Hub™+

  As homes have evolved, the kitchen has become a hub for social activity and family gatherings. No longer confined to just cooking and eating, the modern
http://dlvr.it/SpZlqS

Solved: What Does Live Mean in Find My iPhone?

What to Know * Live in iOS allows you to track your friends' movements in real time without having to refresh the app. * In order to track people's live locations in the Find My app, the person has to have allowed you to see their location. * To stop showing your live location in the Find My app, you must stop sharing your location. Find My—previously known as separate apps Find My iPhone and Find My Friends—is a staple Apple native app that allows you to find your friends and personal Apple devices by accessing GPS locations. You may have noticed the small "Live" tag underneath friends who are sharing their location with you. We'll cover everything you need to know about what it means when someone's location is live. Jump To: * What Does Live Mean on Find My iPhone * How to See Live Location on Find My * How to Enable Live Location in Settings What is Live Location on iPhone Have you been wondering what live means on Find My iPhone? The Find My app allows you to share your location with friends and have them share their location with you. We'll go over everything about what Live Location means on iPhone and how to use it. If you like tips about using your Apple devices, be sure to sign up for our free Tip of the Day! Let's get into Find My Live tracking. What Does Live Mean on Find My iPhone In the Find My app on Apple devices, you will find a small caption that says "Live" underneath contacts who are sharing their locations with you. The live feature will allow you to see the other person's location in real time without having to refresh the app. This means you will be able to watch your family or friends as they run errands or find them easily if you are at a busy festival or big mall together. This is an excellent feature, especially if you have children who enjoy playing outside or roaming around with friends. How to See Live Location on Find My Before you can see someone's live location on Apple's Find My app, you need to have shared your location with the contact, have them accept, and then share their location with you. To do this, read through our article on how to share your location with Find My. Once you have shared your location with friends or family, and they have shared theirs with you, proceed to the steps below. * On your iPhone, open the Find My app. * Tap People in the bottom left. * Tap the person's name you want to track. * From here, you will notice the small "Live" caption under the person's name and address of the location. You will be able to watch as the contact moves on the map. How to Enable Live Location in Settings Having trouble seeing your friends' Live Locations? Before you can see a contact's Live Location in the Find My app, you'll need to make sure that all the proper settings are enabled on your iPhone. Most of these settings are on by default, but if you're having trouble, go through these steps to ensure everything necessary is enabled. * First, make sure you have Live Locations sharing enabled by going to Settings. * Tap Privacy & Security. * Tap Location Services. * Toggle Location Services on. It will be green and to the right when enabled. * Next, go back to Settings and tap your Apple ID. * Tap Find My. * Toggle Share My Location on. It will be green and to the right when enabled. * Then, tap Find My iPhone. * Toggle Find My iPhone on. It will be green when enabled. * Now, go back to Settings again and reopen Privacy & Security. * Tap Location Services again. * Scroll down and tap Find My. * Choose While Using the App. * Then, toggle on Precise Location. It will be green and to the right when enabled. * Lastly, now open the Find My app. * Tap Me in the bottom right. * Toggle Share My Location on. It will be green when enabled. Pro Tip: Find My Live vs Now If you see the word "Now" displayed, it means that it is not currently tracking the contact's location. It is showing you the last known location of your contact, and you will not be able to see them as they move. This is usually due to slow connectivity issues on either end of the GPS. Usually, it will update automatically and fairly quickly once it regains the connection. Now you should be able to see your friends' Live Locations, so long as you have a good connection and both of you are sharing locations. How-ToiPhoneAppsFind MyApple AppsSettingsLocation ServicesPrivacy & SecurityMaster your iPhone in one minute a day: Sign up here to get our FREE Tip of the Day delivered right to your inbox.
http://dlvr.it/SpZTcm

Wednesday, May 24, 2023

Prepare for the Future with an Apple Savings Account (2023)

Paying and saving money with your iPhone is easier than ever. Apple introduced Apple Pay in 2014, and the Apple Card in 2019, and this year, they’ve added savings accounts to the Wallet app. Find out how to get started with building your Apple Savings account. Why You’ll Love This Tip * Automatically deposit your Daily Cash into a savings account. * Build your savings faster with a high Annual Percentage Yield rate. * Take advantage of the high APY without any of the balance limits high-yield accounts often have. How to Set Up Apple Card Savings Account To set up your Apple savings account, you will first need an Apple Card. Whenever you make purchases with your Apple Card, you’ll get a percentage of that purchase back in the form of Daily Cash. Normally, your Daily Cash would be transferred to Apple Cash, but now you have the option to deposit your Daily Cash into a savings account. For more Apple Pay tips and tricks, be sure to sign up for our free Tip of the Day newsletter. Now, here’s how to set up your Apple Card savings account: * Open the Wallet app. * If you don’t see a message encouraging you to open a savings account, tap the three-dot icon. * Tap Daily Cash. * Tap Savings. * Tap Continue. * You will need to enter your social security number, and then tap Next. * Tap Agree to agree to the terms and conditions. * Check whether or not you have been notified that you’re subject to backup withholding by the IRS, and then tap Confirm & Open Account. Your Daily Cash will automatically be deposited into an Apple high-yield savings account. You can also deposit money from your linked bank account into your Apple Savings account to take advantage of the high APY. Additionally, you have the option to withdraw your funds from your savings account at any time with no fees. How-ToiPhoneApple CardApple AppsWalletFinancesMaster your iPhone in one minute a day: Sign up here to get our FREE Tip of the Day delivered right to your inbox.
http://dlvr.it/SpYv0h

Make Phone Calls Clearer with Voice Isolation on iPhone (2023)

What to Know * Voice Isolation reduces background sounds on phone calls to help make your voice clearer. * Wide Spectrum enhances background sounds to help multiple speakers on a FaceTime call come through more clearly. * While on a call, open the Control Center > Mic Mode > Voice Isolation or Wide Spectrum. Your phone calls on iPhone just got a lot clearer. Apple previously implemented Voice Isolation and Wide Spectrum for FaceTime. Now, they have made Voice Isolation available for phone calls as well. Wide Spectrum is also available on FaceTime audio calls. Here’s everything you need to know about Voice Isolation on iPhone. Jump To: * What Is Voice Isolation? * How to Enable Voice Isolation on iPhone What Is Voice Isolation? Voice Isolation is a feature that filters out background sounds, making your voice clearer and easier to hear. This is especially useful if you’re out in a crowded area or if you’re at home and your kids are watching TV while you’re trying to talk to your mom on the phone. I find it to be most handy when my apartment’s landscaping team decides to mow the grass while I’m on the phone with a friend. Wide Spectrum, on the other hand, enhances background sounds. This is meant for when there are multiple people talking on a phone call, such as during a conference room meeting. This way, everyone’s voice comes through loud and clear. Both Voice Isolation and Wide Spectrum with FaceTime were introduced back in iOS 15, but you can now use Voice Isolation on regular phone calls and Wide Spectrum on FaceTime audio calls. Here's how to enable it. How to Enable Voice Isolation on iPhone For more iPhone tips and tricks, be sure to sign up for our free Tip of the Day newsletter. Now, to enable Voice Isolation, you first need to be on a phone call. Additionally, these features are only supported on the iPhone XS and newer. * While on a call, swipe down from the upper right edge of your display to open the Control Center (or swipe up from the bottom edge of the display if you are using an iPhone SE). * Tap Mic Mode to change your iPhone’s microphone settings. * Tap Voice Isolation to turn the feature on. If you are on a FaceTime call, you can also select Wide Spectrum. Note: Wide Spectrum is only available on FaceTime (including FaceTime audio calls). Once you have enabled Voice Isolation or Wide Spectrum, the caller on the other end should be able to hear you loud and clear. How-ToiPhoneAppsApple AppsPhoneControl CenterCommunicationMaster your iPhone in one minute a day: Sign up here to get our FREE Tip of the Day delivered right to your inbox.
http://dlvr.it/SpYP8X

Tuesday, May 23, 2023

How to Stop Spotify from Opening on Startup (2023)

What to Know: * If Spotify opens every time you turn on your Mac, it's probably been added to the list of Login Items that will open at login. * Remove Spotify from Login Items by going to System Settings > General > Login Items > Select Spotify and then tap the "-" button to remove it from the list. * You can also go into Spotify's settings and disable startup at login from there by going to Settings > Show Advanced Settings. Are you wondering, why does Spotify open on startup? MacOS has a setting called Login Items that prompts certain apps to open when you turn on your Mac. Here's how to stop Spotify from opening on startup on Mac. Jump To: * Remove Spotify from Startup via System Settings * How to Make Spotify Not Open on Startup via Spotify Settings How to Stop Spotify Opening on Startup When you're trying to turn on your computer and start your work or your day, the last thing you want is for Spotify to pop up and slow you down or distract you. That's why it's super convenient to know how to remove apps from startup on your Mac. If you like useful tips about using your Apple devices, be sure to sign up for our free Tip of the Day! Here's how to disable Spotify on startup. Remove Spotify from Startup via System Settings The first method involves going into your Mac's settings to disable Spotify at startup. * On your Mac, open System Settings. * Click General. * Click Login Items. * Select Spotify from the list of items. * Click the "-" button to remove it from the list of Login Items. How to Make Spotify Not Open on Startup via Spotify Settings Another alternative if Spotify is still opening upon logging in, you can go directly to Spotify's settings and disable Spotify on startup from there. * On your Mac, open Spotify. * Click Spotify from the top navigation bar. * Click Settings. * Scroll down and click Show Advanced Settings. * Scroll down to Start Up and Window Behavior, and in the drop down menu next to Open Spotify Automatically After You Log into the Computer select No. When you've completed this method, be sure to remember to exit and close Spotify and then relaunch to make sure the changes took place. And that's the two most reliable ways to prevent Spotify from starting automatically on Mac.  How-ToMacAppsThird-Party AppsSettingsSpotifyDevice ManagementMaster your iPhone in one minute a day: Sign up here to get our FREE Tip of the Day delivered right to your inbox.
http://dlvr.it/SpVfpB

Samsung Launches 2023 Smart Monitor Lineup Globally

Samsung Electronics today announced the global launch of its full 2023 Smart Monitor lineup.1 The new M8, M7 and M5 Smart Monitors (Model Name: M80C, M70C,
http://dlvr.it/SpVC05

Monday, May 22, 2023

How to Use the Tesla Phone Charger the Correct Way (2023)

What to Know: * Some Tesla models have USB and/or USB-C ports to charge your iPhone, while other models have built-in wireless chargers. * Tesla-compatible third-party wireless charging options are also available. * Built-in or third-party wireless charger not working with your iPhone with protruding cameras? Try charging it with the display down. There are several ways to charge your iPhone in your Tesla. Depending on the model of your car, you'll have either USB ports, USB-C ports, or both! I'll also go over iPhone-compatible Qi-certified chargers and troubleshooting options for phones with protruding cameras. Jump To: * Do I Have a Built-In Tesla Wireless Phone Charger? * Best Tesla Accessories for Charging Wirelessly * Troubleshooting Tesla Wireless Phone Charging Do I Have a Built-In Tesla Wireless Phone Charger? Not every Tesla comes with a built-in wireless phone charger for iPhone or Android. If you have the current Model 3 and Model Ys, you will have a wireless Qi charger built-in. Other models and older models will have USB and/or USB-C ports but no built-in wireless chargers. However, you can purchase third-party wireless chargers for any Tesla model. For more tech tips, sign up for our free Tip of the Day newsletter. Best Tesla Accessories for Charging Wirelessly Tesla does sell official wireless chargers for their cars, such as this one for any 2012- 2020 Model S/X ($195), but they are often low in stock as well as pricey. Luckily many companies create compatible Qi-enabled phone chargers that you can use as your go-to wireless Tesla iPhone charger. When shopping for a wireless charger, make sure you buy the correct one for your model. Some chargers can be compatible with various Tesla models.  TRUULOOP MagSafe-Compatible 15W Charger ($55.98) This unique MagSafe-compatible charger sits behind the steering wheel and works on Tesla Model 3s and Tesla Model Ys. Please keep in mind that this charger has a USB-C cable, so if you have an older model Tesla 3 or Y with a USB port, you'll need a USB-C to USB adaptor.  LISEN Tesla Phone Mount Holder ($49.99) This charger mount can sit anywhere on the dash or behind the display of a Tesla Model 3/Y/S/X and even other cars, such as the Ford Mustang Mach E or a Jeep Wrangler. This is a fantastic option because you can use it to mount your phone anywhere you want, unlike more limiting chargers. VXDAS Tesla Model 3 Wireless Charger ($39.99) This is a popular option for older Tesla Model 3s, such as the 2017, 2018, and 2019 models, and can charge two phones at once! To install it, you must replace the original Tesla console and plug it into the USB ports. The great thing about this is that it comes with splitter cables so that you can still connect other accessories like the flash drive to record your dashcam footage, all while charging two Qi-enabled phones. You can even charge your wireless charging AirPods using this charger! Spigen OneTap Pro Cup Holder Charger ($39.99) Third-party wireless charger options seem to be a little more limited for Tesla Model X and Model S. This cup holder charger is MagSafe compatible and works on any Tesla model and basically any model car, so you can bring it along on travels if you are renting a car.  Troubleshooting Tesla Wireless Phone Charging There are a few reasons why your Tesla phone charger might not be working as expected. The most common problems are protruding cameras or a bulky phone case getting in the way of wireless charging, a device not being Qi-enabled, or your wireless charger getting unplugged or damaged. Follow these steps to get your wireless car phone charger working again: * Confirm that your iPhone has wireless charging. If you have an iPhone 12 or newer, it should be compatible, but you can learn more about Qi-certified charging here. * Make sure your wireless charger is plugged in properly; it can become unplugged without you noticing. * If you have a case on your phone, make sure it is MagSafe-compatible. If it isn't, it might be too thick to charge correctly. Try taking it off to see if your phone starts charging. * Newer iPhone models have protruding rear cameras that can make wireless charging more difficult. You can still charge if you turn your phone over and place it screen down; make sure the charger is clear of any debris so you don't scratch your display. * Not every wireless Tesla charger is big enough to charge one of the larger iPhone models. If you think this is the case, you can reach out to the manufacturer and double-check if your phone is compatible. Pro Tip: Since we rely on our phones so heavily, especially if you use yours to control and lock/unlock your Tesla, it is a good idea to have a backup option. I always bring a charging cord or power bank just in case I experience issues with my wireless charger. Now you know how to charge your phone in a Tesla! As much as I love wireless chargers, I personally prefer plugging my phone in because it is usually faster and more reliable. Next, discover the best Tesla apps that unlock hidden features and make owning a Tesla even more fun. FAQ: * Does charging a phone in a Tesla reduce range/drain the battery? Yes, but very insignificantly. According to WhichEV, you can charge an iPhone 12 from 0-100% almost 5,400 times on a 2023 Tesla Model 3 battery. This means that it would only take around 1% to charge your iPhone over 50 times. * Does Tesla have USB charging ports? Yes! While every Tesla model is a little different, most Tesla models have five ports. Older models have USB (USB-A) ports, while newer models have USB-C ports. Two ports are located in the center console, two are in the rear, and one is in the glovebox compartment. Splitters can be used to charge even more devices simultaneously. * Does my phone have wireless charging? If you have an iPhone 12 or newer model, your phone is MagSafe compatible and can charge wirelessly. How-ToTeslaChargingMagSafeCarsMaster your iPhone in one minute a day: Sign up here to get our FREE Tip of the Day delivered right to your inbox.
http://dlvr.it/SpRZS1

The Smallest Details on the Largest Screen: How Samsung’s Neo QLED 8K Presents Stunning Visuals

A bigger TV screen is generally speaking a good thing. Over time, larger TVs have not only become more accessible but increasingly popular among consumers.
http://dlvr.it/SpPn4Z

Friday, May 19, 2023

How to Turn Off Password on MacBook (2023)

If you have a communal Mac, are tired of having to enter your password every time you log in, or you just aren't particularly concerned with security, you may want to know how to remove the Macbook password at login. While this means your information may be more easily accessible, for many of us, our computers never leave our homes. If you're okay with the risks, we'll walk through how to remove the password from Mac. Why You'll Love This Tip * Access your computer quicker and easier instead of having to enter your password every time. * Allow access to your computer to anyone who may want to use it without having to memorize a password. * Keep in mind that this process makes your data more vulnerable; we do not recommend removing your password long-term. How to Remove Login Password for Mac Before you remove your Mac password, be warned that this makes information stored on your computer more easily accessible. However, removing the password from your Macbook makes it a lot more convenient if you're sharing the computer and your account with family and friends. If you like tips about using your Apple devices, be sure to sign up for our free Tip of the Day! In order to remove the password from your Mac, you will need to first disable FileVault, a feature that secures the data on your disk by encrypting its content automatically: * On your Mac, open System Settings. * Click Privacy & Security. * Scroll down to FileVault and click Turn Off. * Enter your password and then click Unlock. * Then, click Turn Off Encryption to confirm. * Now, close and reopen System Settings to save the changes. * Click Users & Groups. * Next to Automatically login in as, select your main account. And that's how you disable a password on your Mac in Ventura, the most up-to-date version of macOS. If you ever decide you want to put a password on your Mac, even temporarily, it's actually quite easy to follow these steps again to set it back up. We recommend reinstating your password as soon as it's convenient for you.  How-ToMacSettingsPasscodePrivacy & SecurityMaster your iPhone in one minute a day: Sign up here to get our FREE Tip of the Day delivered right to your inbox.
http://dlvr.it/SpGp4N

Thursday, May 18, 2023

Simplicity Feeds Immersion: The TV Design Philosophy of Elimination

Ultra-large TVs are taking the world by storm. The standard of ultra-large TVs, currently broadly understood as “larger than 75 inches,” continues
http://dlvr.it/SpCrR8

Tuesday, May 16, 2023

Samsung Introduces New High-Performance Kiosk Built on Windows OS

  Samsung Electronics today announced the global launch of the KMC-W, an updated Windows version of the Samsung Kiosk, winner of an ISE Best of Show award
http://dlvr.it/Sp7Dk8

Solved: How to Turn Off Apple Maps Suggestions (2023)

What to Know: * You can adjust Maps Suggestion Notifications in Siri & Search settings. * Another way to avoid the notifications is by turning Significant Locations off in Location Services. * Lastly, you can try toggling Location Based Suggestions off in Location Services settings. Are you getting Apple Maps suggestions telling you how long it would take to arrive at certain locations? Or are you getting Apple Maps notifications that keep popping up, telling you about traffic in the area? Apple Maps has a location-based feature that will offer annoying pop ups if you're close to your house or a place you visit often, or sometimes it will even pull locations from text messages or emails to ask if you want directions. If you want to turn off Apple Maps suggestions, there's three potential solutions I'd recommend trying. Jump To: * Stop Suggestions Notifications for Maps via Siri & Search * Turn off Significant Locations for Maps * Delete Location-Based Suggestions for Maps How to Turn Off Maps Suggestions Apple Maps suggestions and notifications come from a variety of sources, all of which can be annoying, or even dangerous, if unwanted. Depending on what kind of Apple Maps suggestions you are getting, I would recommend turning all of these setting off to successfully stop receiving Maps notifications. If you like tips about using your Apple devices, be sure to sign up for our free Tip of the Day. Stop Suggestions Notifications for Maps via Siri & Search The first option to turn off maps suggestions on iPhone is to go to Siri and Search settings and disable suggestions specifically for Maps. This will help you avoid suggested location notifications. * On your iPhone, open Settings. * Tap Siri & Search. * Tap Maps. * Toggle Suggestion Notifications off. It will be gray when disabled. Turn Off Significant Locations for Maps The second option requires you to disable the Significant Locations feature on your iPhone, and if your iPhone is password protected, you will need to enter it to customize this setting. Important Note: While this is the most popular solution to this problem, disabling this will affect many Apple apps and services that use personalized Location Services such as Maps, Driving Focus, CarPlay, Siri, Calendar, and Photos..  * On your iPhone, open Settings. * Tap Privacy & Security. * Tap Location Services. * Next, scroll down and tap System Services. * Tap Significant Locations. It will prompt you here to enter your password or use FaceID or TouchID. * Toggle Significant Locations to off. * Tap Turn Off. The toggle will be gray when disabled. Delete Location-Based Suggestions for Maps This last option will prohibit suggestions from popping up based on where you are located, like telling you there's a gas station nearby. To stop Apple Maps suggestions, it follows most of the same steps as above. * On your iPhone, open Settings. * Tap Privacy & Security. * Tap Location Services. * Next, scroll down and tap System Services. * Toggle Location Based Suggestions off. It will be gray when disabled. And those are all the ways to turn off iPhone Maps notifications! If you're unsure what kind of Maps notifications you've been receiving, my suggestion would be to turn all of the settings off and see if that fixes the problem. How-ToiPhoneAppsSiriApple AppsMapsLocation ServicesNotificationsTroubleshootingDevice ManagementMaster your iPhone in one minute a day: Sign up here to get our FREE Tip of the Day delivered right to your inbox.
http://dlvr.it/Sp4lDw

Friday, May 12, 2023

Take the Hassle Out of Switching Smartphones: Galaxy’s ‘All About Switching’ Video Gains Global Popularity

“Ladies and gentlemen, Smart Switch welcomes you to Galaxy! We are approaching at a speed of 1GB transfer in less than 2 minutes. For all transfers via cable
http://dlvr.it/SnwFGW

Thursday, May 11, 2023

Larger Than Life: Samsung’s Ultra-Large TVs Offer Enhanced Viewing Experiences for Users

To enjoy their favorite content to the fullest, more and more consumers are seeking to purchase larger TVs for their homes. According to market research firm
http://dlvr.it/SnsL93

Wednesday, May 10, 2023

Samsung Shares Epic Moments on a Huge Billboard Screen in London With Galaxy S23 Ultra and 200MP ISOCELL Image Sensor

The quality of photos and videos is an instrumental benefit of smartphones — it is often what differentiates one device over another. And, what’s the key
http://dlvr.it/SnpQFD

Monday, May 8, 2023

Best Apps for iPhone's Live Activities iOS 16.4 & How to Use Them

What to Know * Live Activities works on iPhones running iOS 16.2 and later, letting you track important app data on your iPhone’s Lock Screen. * There are dozens of Live Activities apps available for iPhone; discover the best ones for getting sports scores live, food delivery, and other categories. * Learn how to figure out what apps have Live Activities the easiest way without downloading and testing each one. The much anticipated iOS 16 Live Activities feature was originally delayed, coming out with the iOS 16.2 update. iPhone Live Activities grab the most important pieces of data from your favorite apps and display them directly on your Lock Screen. I'll teach you everything you need to know about the Live Activity feature and cover the best Live Activity-supported apps! Jump To: * How to Use Live Activities iOS 16.2 & Newer * Best Apps that Use Live Activities * How to Tell If An App Supports Live Activities How to Use Live Activities iOS 16.2 & Newer Live Activities are pretty self-explanatory because they are enabled by default and can be turned on or off for each app directly on your Lock Screen. As long as you are running iOS 16.2 or newer software, any compatible app you download will suggest turning on and using Live Activities whenever it is applicable. For example, if you order Uber Eats, Live Activities will let you track your driver’s location and live estimated time of arrival. Once you are using an app that is compatible with Live Activities, this will happen: * As soon as you run a compatible app, you will see the Live Activity on your Lock Screen. It will say "Allow Live Activities from [APP NAME]?" To keep seeing them, tap Allow. If you don’t want to see this particular app’s Live Activities, tap Don’t Allow, you can always change your mind and re-enable it in the future. * If you have an iPhone 14 Pro or Pro Max, any app that has Live Activities will also have Dynamic Island-compatibility. * To turn on Live Activities in iOS 16.2 or later, even after you have disabled them or tapped Don’t Allow, open Settings on your iPhone. * Scroll down to the app and select it. * Toggle Live Activities on. * If you want to enable (or disable) Live Activities for all apps, return to Settings and tap Face ID & Passcode. * You’ll need to enter your passcode before you can make any changes here. * Scroll down, and next to Live Activities, find the toggle. If it is green, Live Activities are enabled. If it is gray, Live Activities are disabled. Tap it to toggle this feature on or off. Now you know how to enable Live Activities on iOS 16.2 or later. If you experience Live Activities not working even after you make sure they are enabled in your Face ID & Passcode settings and for the particular app you wish to use, make sure you are running the latest iOS, as this can help fix known iPhone glitches. Also, make sure your compatible app is not only open but doing whatever the Live Activity is supposed to show. For example, the DoorDash Live Activity (iOS 16.2 & later) will only show up if you have a food delivery on its way. For more iPhone tips, sign up for our free Tip of the Day newsletter. Best Apps that Use Live Activities Despite the initial Live Activities iOS 16 delay, they came out with the iOS 16.2 update. Today, there are dozens of compatible Live Activities apps. The Live Activities feature provides a great way to stay on top of your favorite sports events or quickly see the status of your lunch order directly from your iPhone's Lock Screen. If you have an iPhone 14 Pro or Pro Max, you don't even have to unlock your phone if the Always-On Display is enabled. Best Sports App with Live Activities: Sports Alerts (Free) The best Live Activities sports scores apps depend on your sport of choice. However, the sports app with the best Live Activities support is Sports Alerts. This app can track live scores, stats, news, and alerts for NFL, MLB, NBA, CFL, NHL, NCAA, soccer, tennis, golf, football, basketball, and many more! When you open the app, you can see all the games in an easy-to-navigate fashion, and if you tap on one, then tap the More menu, you can enable Live Activities to get the score on your Lock Screen. Best Food Delivery App with Live Activities: DoorDash (Free) While some people prefer apps such as Uber Eats (Free), which also supports Live Activities, my go-to for food delivery is DoorDash. Not only is it the most popular food delivery app, with Uber Eats coming in second, but in my area, it is the only viable food delivery app.  Best Weather App with Live activities: CARROT Weather ($4.99/month) CARROT Weather is a popular weather app because it provides accurate forecasts, sends unusual weather alerts, and supports Live Activities and even Dynamic Island, as long as you have the iPhone 14 Pro and Pro Max. While Live Activities for weather aren't practical for every climate, I live in a place where rain and wind can be unpredictable and cause power outages. So I love to be able to glance at my phone to see if I need to charge my generator and walk my dogs before the weather turns.   
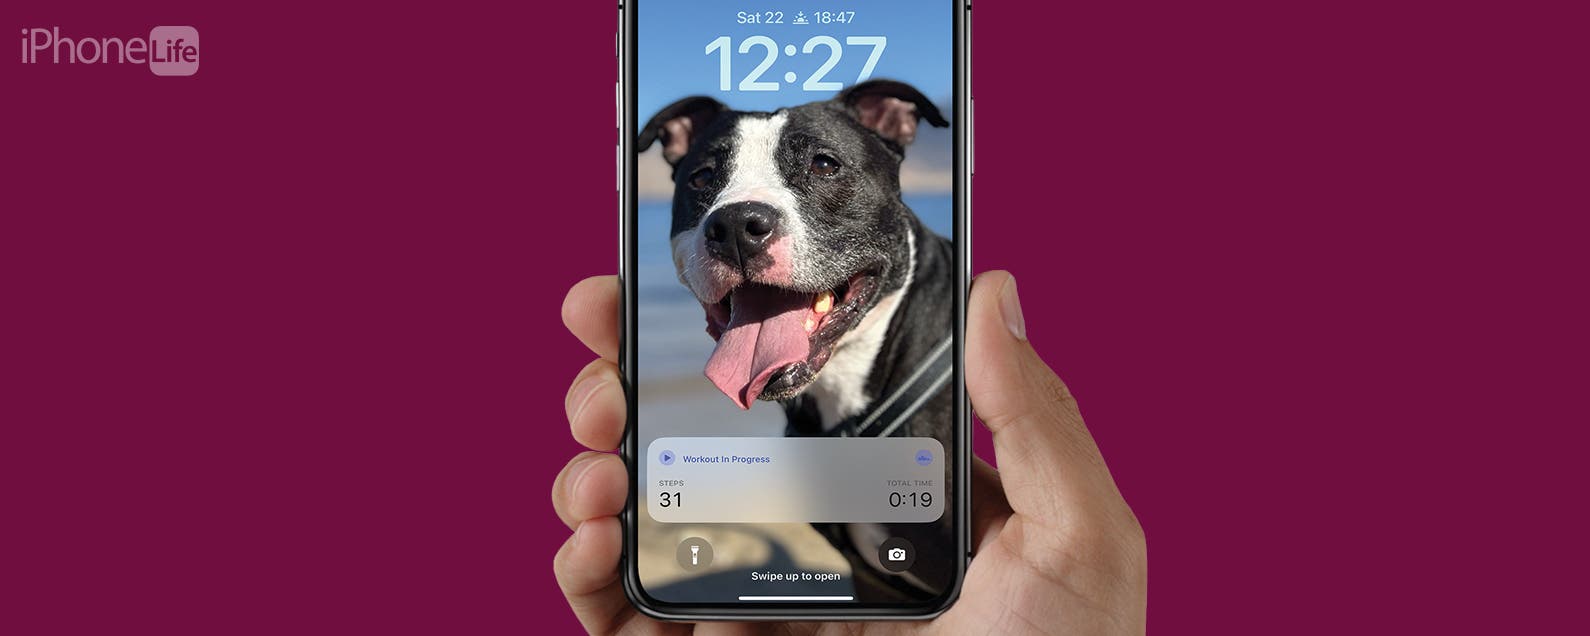
Best Fitness App with Live Activities: Steps (Free) There are various fitness and workout apps that work with Live Activities. One example is  SmartGym: Gym & Home Workouts ($59.99/year), which shows whatever activity you selected for your workout and your countdown/timer. While this is a cool feature, it feels a little gimmicky because most people will want to have their workout app open and view the instructor/instructions on your phone's full-screen. For this reason, my favorite Live Activity app is Steps because it is the easiest way to track your step progress directly on your Lock Screen. This is a great equivalent to seeing your steps on your Apple Watch face or an alternative if you don't have an Apple Watch.   Best Productivity App with Live Activities: Forest ($3.99) Forest is a nifty app that gamifies being off your phone. It has over 32,000 5-star reviews and has helped plant over 1.5 million trees worldwide! The idea is that you set a time to focus and stay off your phone, which you'll see the countdown for on your Lock Screen. If you manage not to use your phone during this focus period, you will win rewards, and real trees will be planted by the Trees for the Future organization to help protect the environment!   How to Tell If An App Supports Live Activities Unfortunately, there isn't a super quick and easy way to see if an app supports Live Activities. But I have a trick for you that's better than Googling something like "ESPN live activities iOS 16" and scrolling through pages and pages of unclear results. My trick is to open the app in the App Store and see if Live Activities are mentioned. Since this is still a fairly new feature, many apps that support it will show a picture of their Live Activity in the featured images or will mention supporting Live Activities at the beginning of the app description.  If you have an app downloaded that says it supports Live Activities, but you can't get them to work, make sure to update your iPhone's iOS but also check for app updates, which will add Live Activity support to your app if you were previously running an older version that wasn’t supported. Now you know how to enable and use Live Activities, plus you have a fun list of apps to add to your iPhone app arsenal. If you have an iPhone 14 Pro or Pro Max, make sure to learn how to use the Dynamic Island next or how to enable frequent live Activity updates.How-ToAppsLive ActivitiesDevice ManagementMaster your iPhone in one minute a day: Sign up here to get our FREE Tip of the Day delivered right to your inbox.
http://dlvr.it/Snjxd1

Thursday, May 4, 2023

Better Sleep, Better Health: New One UI 5 Watch Shows First Look at Upcoming Galaxy Watch

Samsung Electronics today unveiled One UI 5 Watch,1 to be available for Galaxy Watch devices later this year. The new software is designed to bring an even
http://dlvr.it/SnXGw7

Wednesday, May 3, 2023

How Long Does AirTag Battery Last & Checking Battery Life

What to Know * Apple AirTag battery life is estimated at around a year but can vary depending on usage. * AirTags cannot be charged; they use CR2032 lithium coin batteries that can be bought in most stores, including CVS, Target, Walmart, and Lowe's, and they can be ordered online. * You can use Find My to check if your Apple AirTag battery is low. If you're in the market for an AirTag or already have one, you may be wondering, "How long do AirTags last?" As long as you keep your AirTag safe and dry, it should last you years, but you'll have to replace the battery every year or so. I'll teach you everything you need to know about AirTag battery life and replacement. Jump To: * How Long Do AirTag Batteries Last? * How to Check AirTag Battery Life * How to Replace AirTag Battery How Long Do AirTag Batteries Last? According to Apple, AirTag batteries should last for about a year or even longer. However, this depends on usage. I miraculously stopped losing my items after attaching AirTags to them, and even the AirTags that I only pinged once or twice ended up giving me a low battery warning less than a year later.  There are several factors that can impact AirTag battery life, such as checking on them in Find My often, which drains the battery even if you aren't pinging them. Another reason why I believe my AirTags ran out faster than expected is that I live in a tropical climate that is both hot and humid, which may negatively impact batteries.  Also, while AirTags are moderately water-resistant and can spend up to 30 minutes underwater with a maximum depth of 1 meter (3.2 feet) without experiencing permanent damage, exposing them to water could be a factor in battery life as well. This is important to keep in mind, especially if you have an AirTag attached to your dog's collar and they get it wet. Luckily, you can check if your AirTag battery is running low so that you don't run out unexpectedly and lose your item! How to Check AirTag Battery Life When your AirTag runs out of battery, you will get a notification on your iPhone. While you cannot find out the exact percentage of battery left on your AirTag, you can manually check if the battery is low. * To check your AirTag's battery life, you need to first open Find My on your iPhone (or another Apple device). * Tap Items if you are not already there. * If your AirTag battery is low, you will see the low battery icon. * If you see the low battery icon and your AirTag says No location found, it is possible that it ran out of battery. Any AirTag set up with your Find My account will alert your iPhone that the battery is low. From my experience, an AirTag with this warning can still last for weeks, if not months. However, I do recommend replacing the battery immediately to avoid losing your AirTag and the item it is attached to. To learn more about your AirTags, sign up for our free Tip of the Day newsletter. How to Replace AirTag Battery If you get the Find My low battery warning for your AirTag, it is time to get a replacement battery. Here's how to change your AirTag battery: * Before you open your AirTag, make sure that the outside of your AirTag is dry and clean, then open the AirTag by placing your fingers on either side of the Apple logo and turning the cap counter-clockwise. * Remove the cap and battery. * Make sure to dispose of the old battery correctly, it can be dangerous to throw a battery in the trash, and it is terrible for the environment. Place the new battery inside and turn the cap clockwise until it is sealed tight. Warning: When you replace the AirTag battery, your AirTag will make a beep sound once closed, but this doesn't mean that it is fully sealed. Make sure to close it tightly so that no liquid can get inside and damage your AirTag or the battery. Since you now know how long AirTag batteries last, you could set up Calendar reminder(s) to manually check your AirTag battery based on the date of purchase or the latest battery replacement. This isn't necessary since your iPhone will warn you in time, but it can provide peace of mind and ease low-battery anxiety.  Now you know all about AirTag batteries from AirTag battery type for easy at-home replacement, how long they last, and how to check battery life. I hope this cleared up all your Apple AirTag battery life questions. If not, check out the FAQ below or leave a comment below. FAQ: * Do AirTags need to be charged? No! AirTags cannot be charged via cable or wirelessly; they contain CR2032 lithium coin batteries that need to be replaced annually on average. * How much does AirTag battery replacement cost? Depending on where you live, a six-pack of CR2032 lithium coin batteries will cost around $10. You may be able to buy a single battery at your local supermarket, convenience, or drug store, and they are available for online purchase as well. How-ToAirTagFind MyPrivacy & SecurityMaster your iPhone in one minute a day: Sign up here to get our FREE Tip of the Day delivered right to your inbox.
http://dlvr.it/SnTKn3

How to Stop Sharing Location on iPhone (2023)

Sharing your location is a handy way to let friends, family, or significant others know where you are at any given moment. The iPhone's Find My app makes this super easy. But what if you decide you don’t want your contacts to know where you are? Read on to find out how to stop sharing your location. Why You’ll Love This Tip * Prevent others from seeing where you are if you don’t want them to. * Save battery by not using Location Services to constantly send your location. How to Turn Off Location on iPhone If you previously shared your location with a contact but no longer want to, you can easily switch it off from the Find My app. For more iPhone hidden tips and tricks, be sure to sign up for our free Tip of the Day newsletter. Now, here’s how to stop sharing your location: * Open the Find My app. * Tap People. * There are two ways to proceed. The quickest is to swipe left on the contact with whom you no longer want to share your location. * Tap the red trash can icon. * Alternatively, you can tap the contact. * Scroll down and tap Stop Sharing My Location. * Tap Stop Sharing Location to confirm. This will stop sharing your location with the contact. Another way to do this is to go into the Messages app and tap on the contact’s name at the top of the screen. Then, you can scroll down and tap Stop Sharing My Location. In the end, this contact will no longer be able to see your location. If you’re wondering how to stop sharing your location without them knowing, the above methods will work. You’ll see a notification in your Message history that says you stopped sharing your location, but this notification is visible only to you. Any method of turning off location sharing will not notify the other person. How-ToiPadiPhoneAppsFind MyApple AppsMessagesLocation ServicesPrivacy & SecurityMaster your iPhone in one minute a day: Sign up here to get our FREE Tip of the Day delivered right to your inbox.
http://dlvr.it/SnQl9l