Apple pay is a quick and convenient way to send and receive money through your iPhone. A common question with this feature, though, is: "Can you transfer Apple Pay to the bank?" Yes! Not only is it possible, but it's easy and efficient. Without this capability, Apple Pay would be unable to reach its potential as a full-service payment platform, and limit users greatly in how they could use the money they receive. Let's look at how to transfer Apple Cash to the bank and get the most out of this service.
How to Transfer Apple Cash to Your Bank
Open the Wallet app or tap the Wallet icon in Control center. If you are on an iPad you can find Wallet & Apple Pay in Settings.
Tap your Apple Cash card.
If you are on an iPhone, tap the More button.
Tap Transfer to Bank.
If you haven't yet linked your bank account, enter your Routing and Account numbers, then confirm by entering them again.
Enter the amount you would like to transfer, then tap Next.
Select either Instant Transfer, which comes with a $0.25 fee, or 1–3 Business Days, which has no fee.
Tap Transfer.
A notification will pop up at the top of your screen to let you know the transfer request was successful.
You now know how to transfer Apple Pay to your bank. If you selected Instant Transfer, you will see the money in your account within thirty minutes. 1–3 Business Days will take longer but will show up in one to three business days, as its name suggests. Once you have entered your bank account info once, you won't have to do it again.
For more great Apple product tutorials, check out our Tip of the Day.
It was inevitable. Eve Systems, a company that has reimagined itself from an Apple Mac accessory company to a HomeKit automation powerhouse, has created a sprawling line of diverse products. These range from automated power strips that monitor your electrical use and temperature sensors that report indoor air quality. They further extend to a smart outdoor water controller that tracks water usage and even an indoor water detector that can be used to set off a cascade of automation events such as notifying you of a leak and, in turn, communicating with an Eve smart plug to deactivate the electrical pumping source of the water. And yet with all that HomeKit goodness, Eve didn't jump on the home video monitoring camera bandwagon, until now. Did Eve's drop dead simple HomeKit integration and stable quality make it into its first home security product? Read on to find out.
The Eve Cam ($149.95) is an Apple accessory through and through. Unlike other home security camera solutions that use proprietary, and often shoddy afterthough,t security back ends with a dull or poorly designed front-end UI, Eve Cam integrates directly into both the elegantly designed and highly polished Eve app and Apple's Home app. Joining the camera to your network is as easy as any connecting any other HomeKit-enabled device. Simply point your iPhone at the QR code sticker affixed to the bottom of the camera, and within less than a minute, the camera will appear in the apps, ready for monitoring. Assuming you also have configured a iPad or Apple TV as your HomeKit hub, you'll be able to review up to 200 GB on a secure, encrypted iCloud storage plan for up to 10 days past of infrared-triggered motion captured video events. You can also choose which recordings you want to store permanently.
The camera can be set up on its magnetic pedestal (great for affixing to metal surfaces like appliances, cabinets and frames) or secured to a wall via the included mounting kit. Unfortunately unlike other cameras (notably Netgear's Arlo line), Eve Cam is not battery powered, so an ugly black microUSB cable will need to run across the wall or floor to a power outlet. The pedestal is also manually fixed into whatever angle or position you want the camera to statically point at instead of motorized for 360-degree room scanning. Nevertheless, the fish-eye 150-degree field of view makes it easy to see most of the room the camera is positioned to monitor.
The camera also has a built-in speaker and microphone to allow two-way communication between the viewer and the viewee. This could come in handy when tracking children, pets or guests that might need a bit of remote instruction. The camera also has built-in night vision and full HD video capability. And because the camera is integrated as part of your HomeKit environment, it can be used as a scene initiator whenever motion is detected. For example, if you're arriving home at night, the camera could see you in the dark, turn on the lights and start heating up dinner for you.
Pros
Ridiculously easy setup and operation
Ultra-secure video storage
Apple Home Scene integration
Cons
Unsightly microUSB cable power delivery
Fixed camera position
Final Verdict
The ideal customer for Eve Cam is one who has already invested almost exclusively into the Eve home automation product line. The other optimal customer is one who is keenly seeking a highly secure and trustworthy cloud-based storage solution that is part of the Apple privacy ethos and ecosystem. Lastly, it's for the person who doesn't want to deal with the hassles of network integration and yet another account creation and proprietary app. Eve Cam *just works*.
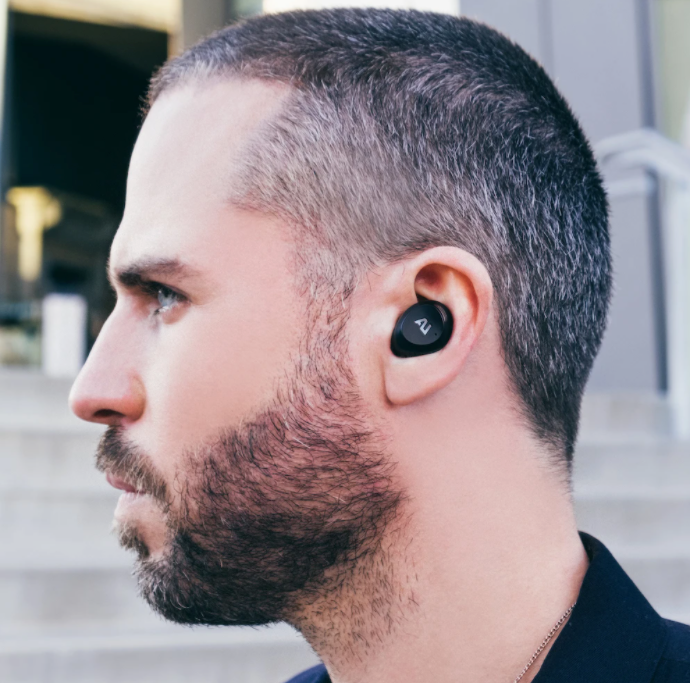
Any set of wireless earbuds is going to be compared to Apple's AirPods and AirPods Pro. Fortunately, the AU-Stream Hybrid ANC Earbuds ($189.95) that Ausounds sent me to try have a lot of distinctions to make them a worthwhile competitor. First, they are compact enough to fit entirely in the ear with no microphone stalk extending towards the mouth of the user. That marginally impacts the quality of the speaker's voice, but it isn't too much of an issue since the primary focus is on listening not talking.
Speaking of sound, these remarkably tiny earbuds have a wide range, featuring a frequency response from 20 Hz to 20 KHz and use titanium speaker drivers for long-term performance. They get even better when you enable active noise canceling without degrading the sound quality, although that decreases the battery life from 25 hours to 20 hours. They are quite light, at just 6.5 grams per earbud with a waterproof rating of IPX5, so you can sweat in them but don't swim with them.
Next, they come in metallic crimson red, gold, and gray, as well as the typical black. If you want to stand out from the average Apple user wearing boring white AirPods, these will help you do that! They support Siri (or Google Assistant) through a long-press for one second on either of the earbuds. Other gestures are easy enough to master, so you can control playback and answer calls with a touch.
The earbud sports up to 9 hours of battery life and can be recharged using the included case for a total of 25 hours of battery life (20 when using ANC). Also supports a rapid charge with 15 minutes to deliver 3 hours of use. The charging case itself charges via USB-C as well as Qi wireless charging, with a complete charge in about three hours. The three different size eartips help ensure a solid fit as well.
Pros
Compact enough to fit in the ear
Nice color choices including metallic red, gold, and gray in addition to black
Hybrid active noise cancellation
25 hours of total battery life (20 with ANC)
Rapid charge with 15 minutes to deliver 3 hours of use
Wireless charging for case
Siri support
Cons
Microphone is far from the speaker's mouth
Final Verdict
If you are looking for true wireless earbuds, the AU-Stream Hybrid ANC Earbuds from Ausounds should be high on your list.
While family sharing can be a useful way to consolidate your family's tech, there can be many reasons why you might want to hide app or e-book purchases. Some apps have credit card information you might not want to give your kids access to, and other apps may have content suitable for some family members but not others. Whatever your reason is for wishing to hide certain app or book purchases from Family Sharing, it is possible to do. First, here's how to hide app purchases, followed by how to hide book purchases.
How to Hide App Purchases on the iPhone
Open the App Store.
Tap the Profile icon in the upper right corner.
Tap Purchased.
Tap My Purchases.
Swipe left on the app you wish to hide.
Tap Hide.
How to Hide Book Purchases on the iPhone
Open the Books app.
Tap Library.
Tap the three dots below the book you wish to hide.
Tap Remove.
Tap Hide Book.
This is an easy and reversible way to hide apps and books from Family Sharing. For more tips and Apple device tutorials, check out our free Tip of the Day.
You probably know that OtterBox makes some of the most rugged cases available for smartphones and tablets. You might even know that the company also make coolers and other outdoor accessories that are just as rugged. But you may not know that OtterBox also makes wireless charging power banks. The company sent me a review unit of the OtterSpot Wireless Charging System ($99.95) and it could be a game changer.
My kids are always asking for a battery pack and they never seem to remember to recharge them. The OtterSpot makes this as easy as stacking blocks. The OtterSpot is a circular base unit and one or more matching portable batteries that stack on top of each other. You have to align them properly, but the built-in magnets help them lock into place. They immediately start charging themselves, and because they have a Qi coil on top, they can simultaneously charge your iPhone or other Qi-based device.
Each battery pack has four LEDs that indicate power level and there is also a USB-C port so you could charge another device as long as you have the right cable. It's not OtterBox's fault, but since Qi is constantly using some power to sense if a device has been placed on it, they require pressing a button to "wake up" the Qi charger and start charging. OtterBox says you can stack multiple batteries but if you read the fine print, it specifies up to three battery packs plus one Qi device at a time. That's probably practical anyway, as the additional packs cost $44 each and the included A/C charger needs to be able to charge three batteries and one device. Each pack offers 10-watt fast chaging and 5,000 mAh of capacity. The base unit itself charges via the included USB-C cable and wall adapter.
Pros
36 watt charging pad
Clever, elegant design
Magnetically stackable and chargeable
Integrated LED lights and USB-C option
Add more battery packs as needed
rubber pads to protect naked phones
Cons
Need to align batteries, but magnets help
Need to remember to press button to start charging via Qi
Final Verdict
If you have multiple family members who want to grab a power bank and go, the OtterSpot from OtterBox can eliminate cables and hassles.