In the 154th episode, David and Donna share tips for customizing your Safari homepage for quick access to all your important links. Other topics include editing Portrait mode photos, marking up images, and tips for planning your next trip with your iPhone.
Click here to listen and subscribe. If you like what you hear, be sure to leave a review. And remember to tune in every other week to hear our editors share with you the latest Apple news, best apps, iPhone tricks, and coolest accessories.
Claim 10% off your subscription to iPhone Life Insider when you visit iPhoneLife.com/PodcastDiscount.
This episode was brought to you by CASEBUDi Crossbody Phone Lanyard ($15, gobudi.com). You can use your phone as you normally would without having to remove the lanyard. If you’re the kind of person who likes to be out and about but doesn’t want to shove your phone into a bag, an accessory like this will free up your hands. CASEBUDi’s adjustable lanyard is an affordable and stylish fix for this issue.
Questions of the week:
Which Portrait lighting effects do you use and why? Email podcast@iphonelife.com and let us know.
Articles referred to in this episode:
* How to Bookmark a Page in the Safari App on Your iPhone & iPad
* How to Connect 2 Pairs of AirPods to One iPhone
* How to Use Selfie Portrait Lighting & Portrait Mode on iPhone X
* How to Markup (Draw & Write on) Screenshots on Your iPhone
Useful links:
* The iOS 14 Guide: Master Apple's New Widgets, Tools & Features
* Join the iPhone Life Facebook Group
* Insider walk-through: get a sneak peek of members-only benefits
* Get the Insider discount for Podcast Listeners
* Sign up for the free Tip of the Day Newsletter
* Email the Podcast
* Subscribe to iPhone Life magazine
Episode 154 transcript:
- Hi and welcome to the iPhone Life podcast. I'm Donna Cleveland, Editor-in-Chief at iPhone Life.
- And I'm David Averbach, CEO and Publisher.
- Sorry, we missed a week last week. I just wanted to let you all know I was in Mexico and now I'm back. So we're a little bit off of our usual biweekly schedule but we're excited to get back on our schedule and share a great episode with you today. David, you wanna start us out with our sponsor?
- Yeah, I do. Today's sponsor is Go Buddy. And Go Buddy has this really cool new product. So if you've been a long time listener, you know, Go Buddy's been a sponsor for a really long time and they have a wide range of really practical, useful affordable products. They usually sell them through Amazon and they have a new product out. And so I'm excited to tell you about it and it is a Lanyard. And so how it works is it works with a pop socket. And so you wear this across your body and you can connect your phone to it. And so it's a nice way to securely and easily carry your phone. If you don't have pockets, if you're hiking if you're doing something where you want to have your phone be safe and secure but also you don't want either the bulk of your pocket or you want it to be a little bit more readily available to you than in your pocket. So it's really affordable. If you go check it out on Amazon, we'll link to in the show notes at iphonelife.com/podcast.
- That would have been very convenient on my trip. I feel like hiking, especially, it seems like it's a great way to have it on your body so you can pick it up and take photos really easily without losing your phone.
- Yeah exactly, exactly.
- All right, next up, we have our Daily Tip. If you may already be a subscribed to this but we have a free daily newsletter called "iPhone Life Tip of The Day", and we send you a one-minute tip that teaches you something cool you can do with your iPhone every day. Like the name of it suggests. So I wanted to share our latest favorite tip and that was how to bookmark a page in the Safari App on your iPhone or iPad. And I chose this one because I use the Safari App on my computer a lot. And I use bookmarks there all the time, but I actually didn't know how to do this on my iPhone. And so I hadn't really been bookmarking pages until I read this tip. Do you use bookmarks often David?
- I do and I actually sort of have a separate side tip for this because I use bookmark slot. I find that I often use bookmarks like I bookmark things on my computer and then I'll want to access them on my phone. So having those swapped, I find to be really useful. Like as an example, we have a few Zoom links that we regularly access when we have regular meetings. And so those, I have bookmarked everywhere so I can access it from my phone and my computer. But I will give some bonus tips on that after we give the tip of how to do the basic bookmarks. Are you a bookmarker?
- Yeah. So, I think I will be more after looking over this tip because being able to bookmark on both your mobile devices and on your computer I think will make it a lot more useful. This is a related feature on Safari but I use Favorites all the time. And that allows like whenever you open up a new tab in Safari you'll see all of your most frequently or like whatever links that you've favorited. And so that's how I get to things like all of our the Google docs and spreadsheets and Zoom links that I want there. But, now that I see you can create different like bookmark folders and things like that I think I'll be using that more. But just for people who don't use bookmarks, the intention of the feature is just to have an easy way to access links that you're using regularly like David said. So the way you use this tip is if you open up the Safari App on your iPhone or iPad and you navigate to a web page that you wanna bookmark then you just go and you press and hold, there's a little book icon at the bottom of your display on the menu there. So you have to like press and hold it. And then a little menu will pop up that says, "Add Bookmark." So you'll do that. You also can tap the Share icon and you'll have an option to add a bookmark from there as well. So it's up to you, but this is a bit of a faster way. So once you tap, Add Bookmark, you'll choose where you save it to. If you have different folder options then you can save it to a specific folder. Otherwise it will by default save to your Favorites. And Favorites again is something that like, anytime you open up a new tab in Safari you'll see little icons for all of your favorited sites there.
- And I'm gonna put you on the spot a little bit because I don't know if you are clear on this. I'm a little bit unclear on the difference between a Favorite and a Bookmark. Are you, do you understand the difference?
- So, I think that bookmarks automatically go to your favorites unless you've set up other bookmark folders. So that's sort of the difference, like if you, and I know and it is a little bit confusing the way Apple has had an app for a long time I couldn't figure out how to add things to my Favorites when I wanted them there. But at least on your Mac, it's a little bit different but at least from your iPhone if you don't have any other folders set up in bookmarks it'll just automatically save it to your favorites. So there is no difference.
- Okay.
- But if you've created different bookmark folders like say you wanna have your bookmarks for work and you wanna have your bookmarks for, you know, a side project or something like that you might create different folders for them and save them there. And so then when you tap, Add Bookmark in that situation then you'll choose which folder to put it to. So you can choose favorites or something else.
- So just to clarify Favorites is a type of bookmark?
- Favorites is like the default Bookmark folder.
- It's a thank you, perfect, okay. And I actually do do folders for my bookmarks. So I am one of those people where I have this exact set up, I have my work bookmarks, I have my personal bookmarks. And then I have my favorites, which are all work bookmarks but they're the ones I use like every single day. So I have--
- Great.
- That set up and I have it set up across my Safari and both my desktop and my phone. So let me give a quick how to do that.
- Yeah, the syncing of it I was gonna say like, that's happening for me but I don't remember ever setting that up.
- Well--
- So please explain.
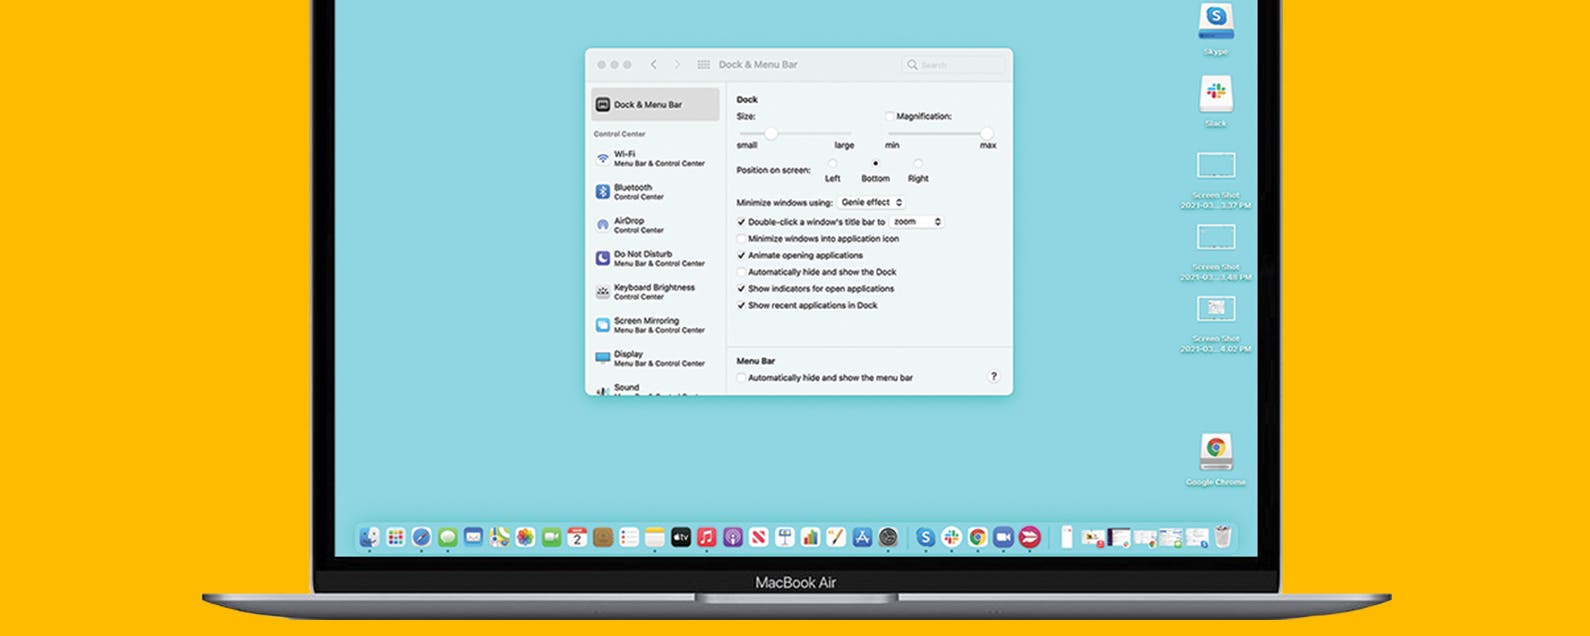
- Okay, I think by default it's turned on. So I think it's probably for most people but I had accidentally turned it off. What you need to do is you need to make sure that you go into iCloud in that you have Safari turned on for iCloud. I had turned it off at some point thinking it was unnecessary but what it does is it syncs up all of your bookmarks. So that you can have your desktop bookmarks on your computer and vice versa or on mobile and your mobile bookmarks on your computer. So that they're all synced up. And so it's a really convenient thing. Also on desktop now, Safari, the newest feature this is what you were just talking about, on the kind of the default screen. It has all of your favorites and it has recently accessed, so you can see pages you were looking at on your phone, it has those on your computer so it's easy to get to them. So they just added this with the latest Operating System. And I think it's a really nice feature but I do want to give one final bonus tip which is you can customize this screen on Safari on your computer. So on the bottom right corner, you have a little like, it kind of looks like slider gear things. So you open up Safari, you open up a new tab. So it'll be your start page, is what it's called. And then on the bottom right corner, it gives you the options of what will show up and what will not show up. So for example, I have added a of me and my wife. And so every time I open up a new tab, I see a pretty photo of me and my wife. Also, I don't use the reading list. So I got rid of that as an option that shows up. And also some people, depending on your browsing habits you may have stuff you browse at work and stuff you browse at home. And you don't want the stuff you browse at home to show up at work and vice versa. So this gives you some controls over what shows up where. I find I'm sharing my screen a lot at work. So I pay special attention to like what is showing up where. But I think, you know, we've sort of gone into the weeds of Safari power usage here, but I think this area of cross syncing between desktop and mobile and using Safari to kind of bridge those gaps is a really powerful area to pay some attention to.
- I know as you're talking about this, David I just changed my Safari Start page background image
- Oh yeah.
- To something much more appealing so thank you for that tip.
- What is it?
- It's still one of the Apple's defaults. So if you hit the little Plus icon there like next to the backgrounds you'll have a bunch of different options from Apple. So I didn't go ahead and choose one of my own photos yet but it's still nice to switch it up. Apple has some pretty kind of like illustrations and stuff like that.
- It's honestly I've enjoyed it more than I thought I would. 'Cause I ended up looking at that screen like a 100 times a day. 'Cause I'm always--
- Right.
- On Safari for work. I'm always opening a new tab and before I enter the URL, it loads the Start page. And like the default is just gray. And so just having a fun photo it like a little thing, but I like it. It makes my day a little bit better.
- Yeah, I like the Safari Start page too. Okay, for people listening, I hope that everyone does create their own favorites and stuff too. 'Cause it's so, I use it every day to get to the links I need to get to. It's really convenient.
- Yeah and same with taking the time to customize your bookmarks. Pages you visit every day having them easily accessible is really worth it.
- It's very, yeah, totally.
- Another little tip I have is even within a website to thinking through which page you're bookmarking. So for example, I'll give you example for Insiders. Like the default website you go to is Insider.iPhonelife.com and then on the top right corner, you click Log in but you could bookmark the Login page which is the next step. And it just saves you one little thing each day. So little things like that of like which page within a website you're bookmarking saves you time.
- Yeah, it goes a long way. All right, next up I want to talk to you about iPhone Life Insider. David just mentioned it. But this is our premium subscription for people who really wanna master their Apple devices. And so we have video guides for you on all of the new features and devices as they come out. That's like step-by-step video tutorials accompanied by a downloadable PDF. So you can be on your device and watch along and also have a written reference which makes it really easy to learn. We have quarterly online live courses. This is where you have a live instructor leading you through a new feature or product, and you can ask your questions live and we have weekly assignments. It's just a great format that helps keep you on track and accountable. We also have daily video tips. So it's a video version of our daily tip, just a one-minute video teaching you something cool you can do with your iPhone every day. We also have Ask an Expert, which is a feature where if you're having a tech issue, you can contact us and get a guaranteed answer and we help you find solutions. And you get an ad-free version of this podcast with bonus content from me and David. So there's a lot of amazing content with Insider plus a digital subscription to "iPhone Life Magazine" including our full archive of over 30 past issues. So if you go to iPhone life.com/podcastdiscount we have a special deal just for you. I believe, is it $10 off, $5 off David I'm really forgetting?
- It's 10% off.
- 10% off, there you go. So, it's a special discount just for our podcast listeners. Go to iPhone life.com/podcastdiscount to sign up right now. And we just came out with a new video guide on the iPhone Pro camera. So that includes tips on how to use the Pro Raw format if you have the 12 Pro or Pro Max. It also has a Portrait mode and Night mode tips for anyone else with a Pro camera plus photo editing tips for anyone with an iPhone at all. So iPhonelife.com/podcast discount if you want to get in on all of those great things. And I wanted to share an Insider question with you all actually I've two. They're kind of short one. So I thought I would do two today. But our Insiders, as I mentioned they use Ask an Expert to ask their questions to us and we give them solutions. So here's some ones that I thought our listeners might find useful. Here we go, the first one, is there a simple way to add text to a photo? And this is an easy one to answer. Thanks for reaching out. If you would like to add text to a photo you can use markup. So when you open the Photos app, go to the photo that you wanna add text to, tap Edit and then there's three dots in the top right corner, you'll tap that then tap Markup. And from there, there's a few tools that you can add arrows, for instance to your photo, you can add the little text icon and you can type in text and change the color of it. And you use your fingers to move it around and change the size of it on the Display. And that's it. And so from there, once you tap Save you'll have a marked up version of that image that you can then share with whoever you want. David, do you use markup often?
- I use it a lot. I use it more, less for texts and more for drawing. Where I end up using it the most is we kind of talked about this recently with screenshots. Where if I'll take a screenshot of something but I wanna point out something particular on that page. I will then like draw little arrows in red and circle the area. It happens a lot, I don't know why it happens to me so much that I'm trying to like circle things on screenshots but I am and I use it a lot. How about you?
- Is it usually like screenshots of something that you're like making fun of?
- I don't know
- I was gonna say, that's it for me usually at least screenshots that get sent to me it's either have a conversation or something on social media and pointing out what was funny about it.
- Yeah, that's true I guess I do do that. I also do it for work a lot though. Like, I'll be like "This thing isn't working on the website. "Here's a screenshot of what I'm saying."
- Right, yeah and that's much more professional use for it. But you know, I feel like one thing that I've used markup for that's been useful is adding signatures to things.
- Yes and I was just gonna say that's a really useful thing as well is that you to add signatures from mobile. Sometimes I'll literally deliberately open up an email on mobile just 'cause it's really quick and easy to add a signature to it.
- Yeah, and so a little tip with that is that you only need to enter in your signature once and then it's saved. To through markup so you can go back in and just add it to things. So if you wanted your signature to look particularly good you could go to your iPad on the same, if you have an iPad, if it's a device that's logged in with your same Apple ID and you could create your signature using an Apple Pencil, if you have one. And so presumably it'll be a nicer looking signature and then that'll be saved to your iPhone too. And you can use that through Markup, which is nice.
- One other while we're I think on a Mac tip kick of this podcast but we are officially covering Mac now as well. You can add--
- I want all the Mac tips.
- You can add signatures in preview and it's really cool because how it works is you take a piece of paper, you put your actual signature and you hold it up to the camera and it loads it in and it saves it for you in preview. And it's really quick and easy to then go and add signatures to documents within preview. Previews, they're built-in Apple app on desktop that allows you to view photos and PDFs. So it's usually something you would do on a PDF.
- Cool, so we have another Insider question I wanted to share. And this one was about the iPhone camera guide that we recently came out with. So this Insider wrote in, I'm learning with the iPhone Pro camera guide. I took a picture with a black background using Portrait mode and I don't know what light settings I use and I can't do it again and I can't figure it out. Any idea of how to get a black background in Portrait? This was a photo in color. So the answer to this question is that this Insider inadvertently used one of the lighting modes in Portrait mode and just didn't realize it. So you can easily replicate this effect since it sounds like this Insider likes the way that it looked and it's stage lighting. Is the setting that they used. So if you go into the Camera app and you can apply this before or after you take a Portrait photo, which is really cool. So if you open the Camera app and you go to Portrait mode, you'll see in the top right corner, there's your little F icon. And that's where you go, if you tap that, you can go and like adjust the level of depth of field effect you have which means you can choose your subject of course and then you'll choose how much is blurred behind the subject. And like, that's really nice for instance to adjust manually if the person has like wispy hair or something like that you can make sure that it's not completely blurring out the hair in a way that doesn't look good. So once you're there though above where you adjust the depth of field you can also adjust the lighting modes. By default it'll be a natural lighting. So pretty much just like looking the way it actually looks when you're shooting. And then from there you can swipe right and left and go into a few different cool effects. Like there's stage lighting, stage light mono, and some of these ones will pretty much either just completely turn the background white or black. I personally like more natural looking photos. So I haven't done this a lot myself but it's good to know that this feature is there. It's fun to play with.
- Yeah, I was just gonna comment. I was gonna ask you if you use it. It's funny to me too, that your comment was for wispy hair. 'Cause I have curly hair, which for Portrait mode in general is a nightmare. And in particular, the portrait mode settings that turn the background a different color like white or black, just really I struggle with because it like just never perfectly gets my hair. And so it just like weirdly cropped parts of my head are just blending with a background in black. So I almost never use it if you on rare occasion that it works perfectly. It's a really cool effect. It just so frequently doesn't work for me that I find I don't use it enough. But just to re-emphasize, 'cause you did say it but you went over it pretty quickly, for those of you with curly hair or I guess a wispy hair. And if you are using Portrait mode but you're having trouble because your hair keeps getting cropped. If you go after you take the photo and hit Edit you can adjust the aperture and that how that works is it just makes the Portrait mode a little bit less intense and so therefore it'll, like a lot of times for me, not crop out my hair.
- Yeah, but with the ability to adjust it you've been able to get around that. Like it looks good now
- Yes, but more on natural mode. I almost never could.
- Right.
- It just has to be so perfectly distinguishing between your background and your foreground. If you actually change the color of the background that I almost never do it because it just rarely works. Also, I just don't tend to love the effect to be honest.
- Right. Yeah, but I thought that was a fun like at first when I heard the question I'd forgotten about these effects I'm like, "How did this person "Get a black background?" But, so I thought that was a good one to share.
- Yeah.
- But yeah one thing I wanted to clarify, as I said, that you can adjust your portrait light settings either in Capture mode or after the effect. You can only add it after the effect if it was shot in Portrait mode though.
- Yes.
- So I just wanted to clarify that. So if you were in like regular photo mode you can't turn it into a portrait photo afterwards but if it was shot in Portrait mode you can adjust those settings after the fact, which is nice. So I think like that's nice 'cause a lot of times you wanna quickly capture a photo. You might not want to be like tinkering with the editing with the aperture at the time that you can do that later.
- Yeah.
- All right, so that wraps up our Ask an Expert section of this podcast. And I am excited to share an app with all of you today. So for our Apps and Gear section, I have an app today. What about you?
- Yeah, I have an app and a gear but I'm seeing in our notes here we have a comment from our listener.
- Oh yeah, I forgot about that. So this was when I wanted to basically call out myself here because Randy wrote in and was concerned about an editor's message I wrote in the Daily Tip. And in it I was talking about our new AirPods guide and how great it was and how I love my AirPods and how my husband and I go on bike rides. And I sync our AirPods to the same iPhone so we can listen to music together. So he responded to me here. He says, "First of all, I've been an iPhone lifer "For about a year and want you and your staff to know "That I use and enjoy all aspects of iPhone life." That's great to hear.
- Thank you.
- "I typically ignore tips and articles dealing "With AirPods or earbuds. "They simply will not stay in my ears." He likes his Bose noise canceling headphones instead. That was an interesting one to hear just 'cause that's kind of a first that I've heard of that 'cause the people that I know that have AirPods comfort and like their kind of strange ability to stay in your ears is pretty great. But again, like with headphones everyone has to try themselves. Everyone has really different, first of all shapes of their ears and head and also like things that are comfortable for them.
- Yeah.
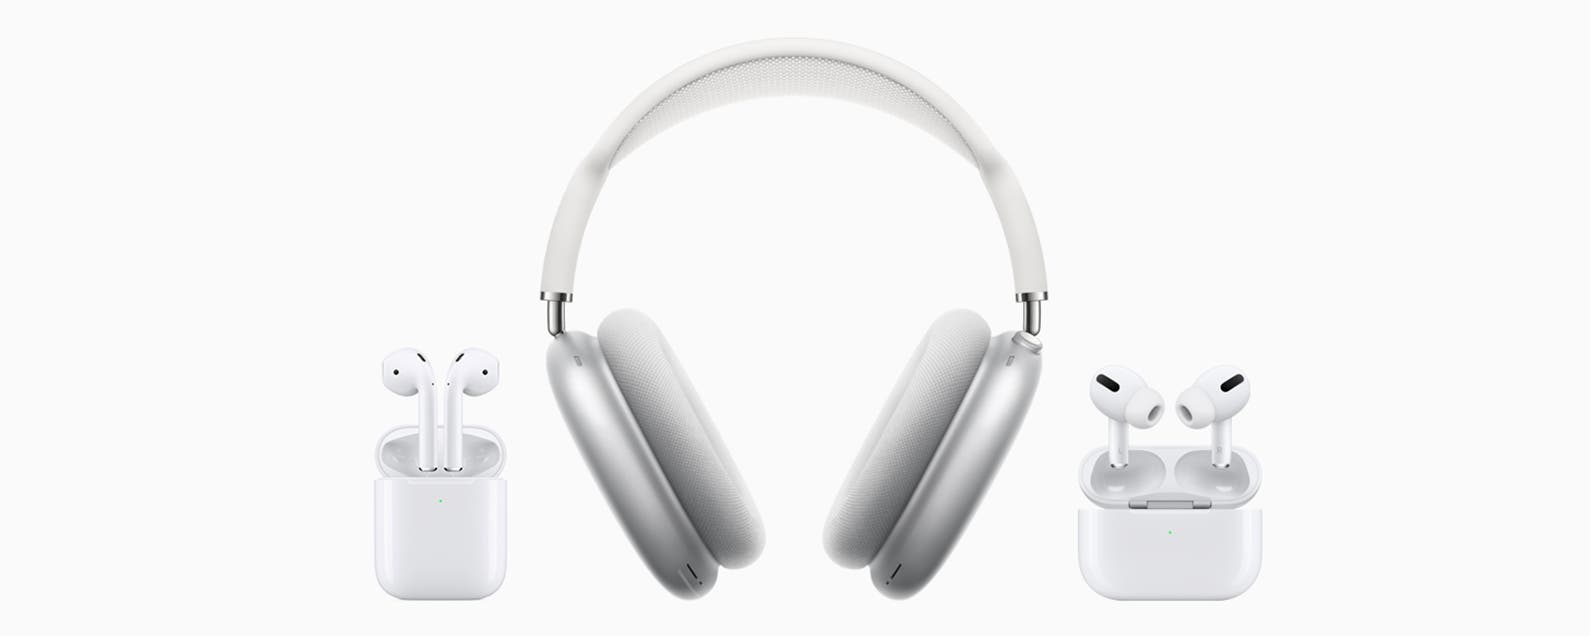
- So I always people definitely try on headphones yourself or earbuds before buying. But so anyway, he says, "However a tip caught my eye "This morning about AirPods. "In the introduction you said that you and your husband "Sync your phones and when you're riding your bike together, "I am an avid although recreational cyclist "And wanted to make sure you're aware that wearing any kind "Of earbuds while cycling is a big no-no." "The reason is that it prevents one from hearing "Road noise and traffic. "I don't mean any disrespect "It's intended as purely informational. "Thanks for all you do," Randy. So I just wanted to point that out just because I hope I'm not encouraging people to go biking with earbuds and definitely if you're on the street could be dangerous and you know the AirPods do have a Transparency mode option which lets you hear street noise through so that can help or you could be wearing like one AirPod and that helps a little bit too but I think it is a good point just to mention that probably better to not wear any at all or to make sure that you have that Transparency mode on at the least.
- But I mean, absolutely traffic safety is important. It is a cool feature though. And there are lots of use cases that are not dangerous. That's something that I will often do like while traveling my partner and I will watch a movie or something like that. And you can have two headphones on the same device. And so there are really cool features. And Transparency mode is a good one 'cause I do like to, now I'm gonna admit it too. I like to run with headphones and I'm very safe. I promise I do my best but Transparency mode's a good one where, 'cause I actually this is one of the main reasons I like AirPods as opposed to AirPods Pro. Is I actually really like having ambient noise be able to get in. Both 'cause I like to work out with them but also even like I'll wear them when I'm working throughout the day, things like that. And it's just really nice to be able to hear somebody even if I have headphones in if I want to be canceling noise, I'll use my big headphones.
- Yeah, that's a good way to do it. I think that, yeah, that feature I will stand by is being cooled. Like just, I thought first you were talking about Transparency mode, which is great too. But being able to sync two AirPods at the same iPhone is a lot of fun.
- Yeah.
- And like you could be cycling on an indoor bike and then you can do it completely, but guilt-free.
- As long as you're taking proper COVID precautions. No.
- Yeah, Yes. All right, unto our apps and gear section. So I wanted to share an app just because I feel like roosters are plaguing my life and I've finally found an app that's saving me. So I moved to Florida four months ago and then we have a next door neighbor with roosters that start crowing at like two in the morning.
- Oh my gosh.
- And then when I was on vacation in Mexico the place that we were staying was basically like there was like a barnyard outside. It was like a million roosters and goats and dogs that started at like 10:30 at night. So anyway, it became very clear that I needed a good White Noise machine app. In Florida, we actually have like a little device for it. It's not through the iPhone, that works well. But I found an app that I liked just as much and I had to try a few. So I just wanted to recommend this one because it's the one that I found to be the best. And it's my noise. And the cool thing about it, is that it's a free app. Some of the other ones I've found are paid and it lets you customize your White Noise levels. Like both to just what you like and also different like depending on your iPhone model the speakers sound a little different. And so it like has a bunch of different toggles for different levels of noise. I use the classic White Noise, but there are other options like rain sounds or stuff like that. And, it lets you set a timer. So I like to have it like fade out in the last hour of sleep. And so I set it for like seven, eight hours total but the last hour it's like slowly fading out--
- Oh interesting.
- Up until when my alarm goes off. And so they're just like, it has some nice features and also strangely other apps that I use even though they said they could go all night with like randomly shut off after a half hour and things like that. And this one was reliably playing all night long. I feel like White Noise machine apps or just in general are like not for everyone but I used to not like them very much 'cause I found them kind of distracting. But now I'm hooked. Dave have you ever tried White Noise?
- I have not, I'm a very light sleeper and I find that White Noise distraction. Like I don't even like having a fan on in my room which I know is like, I'm extreme in that way but I'm not a White Noise.
- So this app, I was gonna say I was sensing a lack of excitement from you.
- I was like, my stepson uses White Noise machine in his room. And so when we travel, then this would be great. So I appreciate that. I still love White Noise people, I just am not one of them.
- For me, I really don't like one of the common White Noise options is like wave sounds and those to me and maybe it's 'cause we didn't grow up around the ocean. I don't find that to like help me sleep at all. And like makes me feel like I'm like seasick or something but lane noise or White Noise health.
- That's fair, yeah, those Iowan thunderstorms.
- Yeah.
- I like when I'm sleeping by the ocean, I really enjoy it. But I find, I often have dreams about the ocean, so yeah, it can be distracting. Okay, I've got--
- Hey what's your apps and gear?
- And I just wanna preface this because we've steered clear of travel apps and gear because of COVID. But as between the like frustratingly high percentage of people who have now had COVID and have immunity and then people have vaccinations rates are going up we're gonna start covering it a little bit for you all. And so I have a couple suggestions for travel again. And even if you're not ready to travel yet it's still fun to be thinking about those days when you can do that. Again, one of them, my first one is for can be used at home as well. I've talked about it before, but it's one of those gadgets that I just don't think a lot of people have and I love it and it makes my life a lot better. And that's my charge battery pack. The company's myCharge M-Y and then charge. It's all one word. And I know there's a ton of battery packs on the market but this one to me kind of checks all the boxes and why I love it is number one, it has both the adapter and the cable built in. So you can plug into the wall and has the capability in all-in-one unit. Most of these power banks do not have that. They either don't have a cable built in or they don't have the adapter built in. So then you're having to carry a bunch of things to use it. Number two, it rapid charges. So it's like half an hour to charge your phone. And in particular for a battery pack, that's really nice. 'Cause you're almost always on the go. I find I actually use it at home a lot. I mean, I definitely use it while traveling, but I use it at home a lot because if my phones, I just need a little bit of battery before I leave the house, but I'm like walking in the house and I need to use my phone at the same time. This is a really excellent solution for that. So I really like it. It also has a USB C built in. So if you have an Android iPhone family, you can use that. My partner and I are always fighting over it. So that's a good sign for seeing a useful device and particularly
- it's a very good sign.
- Tried the other one, which is pretty unique just for traveling, especially for overseas. But I think it's another one where like a lot of people don't think to get this, but it's really useful. It's called OANDA currency conversion. So it's O-A-N-D-A currency conversion. And there's a million currency conversion apps out there but I've used this one for like 10 years and it's like never failed me. What's nice about it? It has a really easy to use interface and it doesn't require internet. So once you get your currency conversions loaded up in there, it doesn't need internet to use. So when you're traveling in a foreign country and you're trying to on the fly, negotiate something and it's in a currency, you're not used to being able to quickly pull it up on your phone and look at the conversion rate to your currency, U.S dollars or whatever it is I find it to be really useful. I've used it for years. So for those of you who are in coming up, gonna do an international trip that's a really awesome app for you. And it's free, I believe.
- I was gonna say, yeah, I wish I knew about this app that sounds great. 'Cause I'm so like not good at like fast calculations on the flight. "I'm like, how much is that?"
- Yeah.
- Something like this would be useful.
- I always try to build little like rules of thumb for myself. Like being like 100 pesos is one is $5 and little things like that that I can fall back on. But then it's like, if you're doing too many of those you lose track and it's nice to have an app to fall back on as well.
- For sure and offline mode is like if you're doing international travel I feel like any app you're using having an offline mode is really important
- Yeah, yeah.
- Since you don't always reliably have service, yeah, cool. We have not come up with a question of the week ahead of time, but I feel like we should. We could do one about portrait mode. I'm curious if people use the different portrait lighting options. And if so, which ones they like the best.
- Yeah, I can send you some examples and we can put it up on our website.
- Yeah and if you have some shots you're proud of send them our way. So email us@podcastatiphonelife.com, letting us know if you use portrait lighting options. And if so, which ones and why, and this wraps up our 154th episode of the iPhone Life Podcast. We've been at this for a while, stick around. If you're an Insider we have some special content just for you. Otherwise we'll be back in two weeks. Thanks everyone.
- Thanks everyone.
- All right, Insiders. We have our special complaints and learning section for you. And I wanted to talk about some of our latest content for all of you to make sure that you are aware of all the benefits that come when you log into Insider. So our senior video producer Rahn Taylor just updated our iPhone Pro Camera Guide. She'd originally done one for the 11 Pro and now has updated it with videos for Prora which is we've been getting a lot of questions from all of you about Prora and how to use it, whether you should use it. And so I highly recommend checking that out. If you're wanting to like up your professional photography game or just are curious about it, you can watch that video and get all the information you need. Also, she goes into a lot of the new night mode settings. You can take a time-lapse video now in night mode. If you have one of the latest Pro cameras, there is more that you can do with portrait mode than before. So I highly recommend checking that out. Rahn always does such an awesome job with the video guides. Also, I think we already mentioned last episode but recently Nicholas, one of our video guide producers did an Airpods Guide that we've also been getting a lot of good feedback about. So make sure to check that out. We also have the spring issue of iPhone Life Magazine when you log into Insider that came out pretty recently. So if you log in navigate to magazine you'll see the full archive of issues and the latest issue which is the iOS 14 guide. We also have a lot of good hands-on reviews in there. We talk about the M one max I wrote about the home pod mini. So that's always a good thing to check out too. So that's my little just update for what's new on Insider.
- Also one other plug, if you are one of those people that mostly accesses Insider from your email, when we email you go log in because we've actually been working really hard to redesign it, it looks so nice. Now we've really tried to make it really both visually appealing, modern and easy to use. So we've been working hard on that this year. We've got a lot of additional updates coming soon in that front in terms of just the user interface but we're working hard on it. So I wanna brag a little bit.
- Yes, oh, and I did want to mention too that we've updated our Ask an Expert section as well. Like we have a short questionnaire that just helps us identify like what phone you have and things like that. We did have a bit of a bug for a couple of weeks with that. And so if you send a question and it didn't go through, please resubmit now 'cause we got that resolved. And I just want to apologize to anyone who did have issues with their questions going through.
- And to be clear, I don't know if you know if it went through or not. If you submitted a question that we did not answer it we're really sorry.
- Yeah.
- We are really committed to answering questions in a timely manner. Now we've grown our team a lot and we have a lot of people on this. So if in the past that's ever happened to you we are now totally up to speed and we will be able to answer your questions. So make sure you go, re-ask your questions.
- Yeah, thank you all for your patience. So for our complaints and learning section I wanted to talk about adding people to the photos app. That's something that I hadn't really gotten that into for some reason until recently. And this is a feature that I use a lot of times if it's like a friend's birthday or something like that I like to go and look through all the photos that I have of that person and maybe share some on social media. My parents have used this to make photo books of people they didn't use Apple to make the photo books but they still used it as a way to sort the photos of my niece and nephew, making little books about them. So it's nice basically just to find a way to see all the photos you have of a specific person. And so if you go into the photos app anytime that you have a photo with a person in it at least that's like big enough for Apple's algorithms to identify. If you swipe up on that photo just opening up one to make sure I'm getting this right. If you will see a little section that says people and it will have the faces of the people there and you can go in and if it's an unidentified person, you can add the name. And if it's a person that is identified, it'll if you tap their little card it'll take you to all the photos you have there. And I just wanted to talk about the fact that anytime you go and look at a person, if you haven't done this already you'll have the option usually to confirm additional photos. If it's someone you have a lot of photos of and I just wanted to recommend going in and doing that 'cause it really improves this feature a lot 'cause usually Apple's first pass at this they're missing a lot of the photos there. So you wanna tap, confirm additional photos and it'll bring up a grid of extra photos that you can go through and say like, yes this is the person and or no, this isn't the person. And so I've been doing that. Yeah, that way then like quickly was able to see all the photos I have of my friend whose birthday is today and decide which ones I wanna share on social media. And it just makes it super convenient. Is this a feature you use?
- I use it all the time and I was actually gonna mention but that'd be the confirm additional photos is really useful 'cause Apple doesn't get them all. And a lot of times, if I'm looking for a photo it won't be there unless I've gone through and done this a few times and you're sorta just training their AI is what you're doing. And then one other tip on this front that you can do is you can layer your searches. So once you have a name in there, you could say like photos of Donna in Fairfield or something like that. And then you can really like find very specific photos if that's what you're looking for as well.
- Yeah, that's a good one.
- Okay, so I have a cool tip that I discovered. And so it happened because I was noticing my battery was draining on my iPhone which unfortunately seems to be a reoccurring trend. And I was seeing that Instagram was often my biggest culprit. And when I looked, it's had a lot of background activity which was driving me crazy because that's I have background app refresh turned off which is a good thing to do. That's I guess one good tip go into Settings and make sure background app refresh is turned off because that is something that frequently drains batteries. And what background app refresh is is it basically keeps your apps up to date in the background. And so Facebook and Instagram are actually big culprits of this, where when you open it it will already all of the updated content loaded for you. But it's a big battery hog and a big data hog as well to be doing that. So I have that turned off by default, but nonetheless it was background activity that was causing it. And then I discovered that there's this little known feature, at least I didn't know about it in Instagram that you can toggle on called, I can't remember what's called. It's like you low data mode. And basically it says use less data. And so that's a really cool feature 'cause not only does that, if you're traveling or if you're somebody who doesn't have a lot of data it'll use less data. It also simultaneously by using less data, uses less battery it just updates your app less frequently in the background. So if you go, I'll see if I can reverse engineer, how to get there. You go, you open up your Instagram app and on the bottom right corner, you tap your little profile. And then on the top right corner you hit the little three lines. When we called the hamburger menu that should bring up all of your Settings here. And then on the top it says Settings. And then it goes, you do let me find it here from there you go to, I think Account. Yep, you go to Account and then there should be it should be right in here. So I should have had this--
- I'm following along.
- Okay, so your data use under account and use less data. You toggle that on and it uses less battery and less data. And it, I'm not somebody that needs everything updated in the background for me. So that's been a really cool feature.
- Oh, I feel like this could be totally like a life-changing little hack, that's awesome.
- And it's hidden, like, no, they don't talk about it. It's buried really deep in Settings. You would never know it's there. And I was really proud of myself for finding it.
- That's awesome, okay. I feel like I definitely wanna pass this along too to our daily tip team to do a tip on.
- Yeah. I mean, I don't know if Instagram is something that Insiders or our daily tip readers are super into but it's pretty, I feel like a lot of people have Instagram at this point and it's a good tip.
- It's pretty ubiquitous, I think.
- Yeah, good word.
- Oh thanks.
- All right, I think that wraps up our complaints and learning segment of a podcast. And just wanted to say, you know thank you for being Insiders. We love having our Insider Community and hope that these tips are helpful for you. And yeah, I like David said, make sure to go check out our new interface when you log into Insider. It also makes it really easy. If you go to the podcast tab to subscribe to our special members only feed of the Insider podcast. If you haven't already, you can always log in and listen to or watch the podcast just through the Insider site as well. But we've created like little buttons where you can go subscribe with the members only feed tools so that you can listen to it in the podcast app. Or we have instructions for a few third party podcast apps as well.
- And we also love feedback. Either ways we could make the interface more user-friendly for you or also content you'd like to see us add. So make sure you can always send us feedback@podcastiphonelife.com.
- Absolutely, yeah, thanks David. Good to see you too.
- Nice to see you glad we're back to podcasting.
- Me too. I will be back in two weeks. Bye everyone. Topics: The iPhone Life PodcastMaster your iPhone in one minute a day: Sign up here to get our FREE Tip of the Day delivered right to your inbox.
http://dlvr.it/RvDfSc